

Alright, let’s have a real chat. Are you tired of Christmas decor that looks like a glitter bomb exploded in a department store? You know the look—so shiny you need sunglasses, so perfect it feels like you can’t actually live in your own home. If you’re nodding along, you’re my kind of person.
I’ve always believed the best kind of Christmas is a cozy one. It’s the feeling of being wrapped in a warm blanket with a mug of something hot, surrounded by decorations that feel personal, warm, and inviting. That, my friend, is the magic of rustic Christmas decor. It’s less about flawless perfection and more about creating a genuine, heartwarming atmosphere.
So, if you’re ready to ditch the sterile and embrace the stunningly simple, I’ve got you. I’ve spent years obsessing over this aesthetic, trying things out, and (occasionally) failing spectacularly. I’m here to share 15 ideas that will transform your space into the cozy Christmas sanctuary you’ve been dreaming of.
1. Rustic Wooden Ornament Tree

Let’s start with a classic that’s perfect for small spaces or as a secondary accent piece. Forget the massive, shedding fir for a moment and picture a minimalist tree made from actual wood. It’s a statement piece that whispers “Christmas” instead of shouting it.
Why It Works So Well
This idea strips the Christmas tree concept down to its bare, beautiful bones. The natural wood grain provides an immediate sense of warmth and earthiness. It’s incredibly versatile; you can leave it bare for a super minimalist, Scandinavian vibe or dress it up with a few choice ornaments. It’s the perfect solution for that empty corner in your office or the console table in your hallway.
I find it’s also a fantastic way to display special, individual ornaments that might get lost on a larger, more crowded tree. Each one gets its own moment to shine. Plus, no watering and no needle cleanup. Need I say more?
How to Make It Happen
You’ve got a couple of routes you can take here, depending on your level of DIY ambition.
- The Easiest Route: You can find these pre-made online, especially on sites like Etsy. Crafters make beautiful versions from reclaimed wood, driftwood, or simple dowels. Just search for “wooden Christmas tree” or “dowel rod tree.”
- The DIY Adventure: Feeling crafty? Grab some wooden dowels of varying lengths. You’ll want them to decrease in size to create that classic triangle shape. Drill a hole through the center of each one and stack them on a central metal or wooden rod that’s secured to a sturdy base.
- Decorating It: This is the fun part. Think small and simple. I love using tiny wooden stars, miniature pinecones, or even just some simple twine wrapped around the “branches.” The key is not to overdo it. Let the wood be the star of the show.
My Personal Spin
I have one of these on my desk, and it’s my absolute favorite piece of office decor. I made mine from fallen branches I collected on a hike, which makes it feel extra special. I used a simple drill to create the holes and a small log slice as the base. It’s perfectly imperfect, and every time I look at it, I remember that crisp autumn day.
2. Burlap Ribbon Christmas Mantel
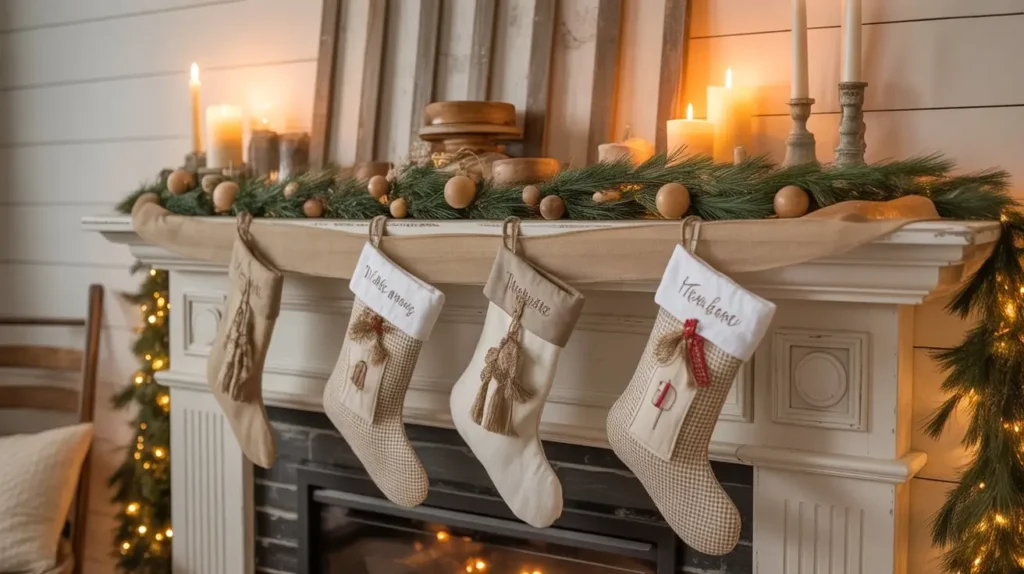
The fireplace mantel is the heart of the living room, especially during the holidays. It’s where everyone gathers, and it deserves to be the focal point. Wrapping it in burlap is one of the quickest ways to inject a massive dose of rustic charm.
Why It Works So Well
It’s all about texture. The coarse, woven texture of burlap is the perfect rustic counterpoint to the soft needles of a garland and the smooth glow of candles. It’s unrefined in the best way possible, giving your decor a grounded, farmhouse feel. It adds visual weight and warmth without adding a ton of color, keeping the look sophisticated and natural.
Ever wonder why designers obsess over texture? This is why. It creates depth and interest that color alone just can’t achieve. Burlap is a masterclass in adding texture on a budget.
How to Make It Happen
This is one of those high-impact, low-effort projects. Seriously, you can do this in under 20 minutes.
- Start with your base. A lush garland of faux or real greenery (cedar, pine, or fir) works best. Lay it across your mantel.
- Take your burlap ribbon. Pro-tip: get the kind with wire edges. It’s a total game-changer and makes shaping it a thousand times easier. You can thank me later.
- Start at one end and tuck the beginning of the ribbon deep into the garland.
- Weave the ribbon loosely through the greenery. Create big, billowy loops. Don’t pull it tight! The goal is to have it look like it’s casually and naturally draped.
- Tuck the other end in, and you’re done. If you have some stubborn loops, you can use a bit of green floral wire to secure them to the garland branches.
My Personal Spin
I like to amp this look up by tucking in other natural elements. I’ll add some pinecones (some plain, some with frosted tips) and a few sprigs of dried eucalyptus or even some dried orange slices. The combination of the rough burlap, the green pine, and the pop of orange is just chef’s kiss.
3. Pinecone and Cedar Centerpiece
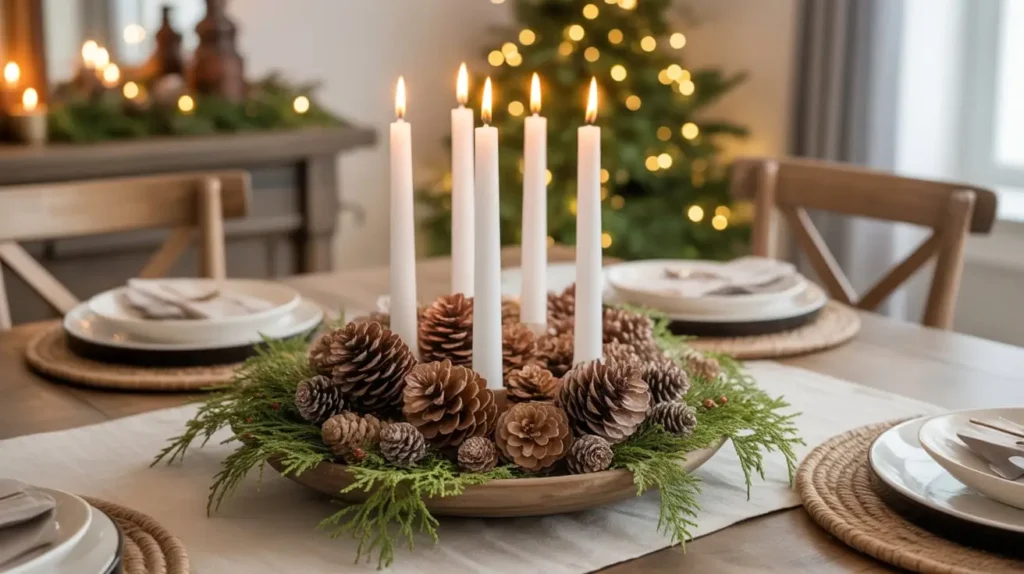
Forget those elaborate, expensive floral arrangements for your dining table or coffee table. Nature gives us the most beautiful materials to work with, and they’re often free! A simple centerpiece made from pinecones and cedar sprigs is elegant, fragrant, and perfectly rustic.
Why It Works So Well
This centerpiece connects your indoor space directly with the outdoors. The scent of fresh cedar is quintessentially Christmas, and pinecones are the undisputed icon of rustic, woodland decor. It’s a look that feels gathered, not bought. It suggests a cozy afternoon spent foraging in the woods, even if you really just foraged in your backyard (or the craft store, no judgment here).
It’s also incredibly forgiving. There’s no right or wrong way to arrange it. The more “random” and natural it looks, the better.
How to Make It Happen
This is more about artistry than rules. Just let your creativity flow.
- Find Your Base: A long, narrow wooden tray, a rustic dough bowl, or even just a simple burlap table runner works perfectly as a foundation.
- Lay the Greenery: Place your cedar sprigs down first, creating a lush green bed. Let the ends drape off the sides of your tray or bowl for a more organic look.
- Add the Pinecones: Now, scatter your pinecones on top. Use a variety of sizes for more visual interest. You can have them all facing one way or just let them land where they may.
- Incorporate Light: To take it to the next level, weave in a string of delicate, battery-operated fairy lights with a warm white glow. The tiny lights reflecting off the textures of the pinecones and cedar is pure magic.
- Optional Add-ins: You can also add some cinnamon sticks, star anise, or a few white or cream-colored candles in simple glass holders.
My Personal Spin
I always add a few faux cranberries or red winterberries to my centerpiece. Just a few sprigs tucked in here and there. It adds that little pop of traditional Christmas red without overwhelming the neutral, rustic palette. It’s the perfect finishing touch that ties everything together.
4. Farmhouse Lantern Holiday Display
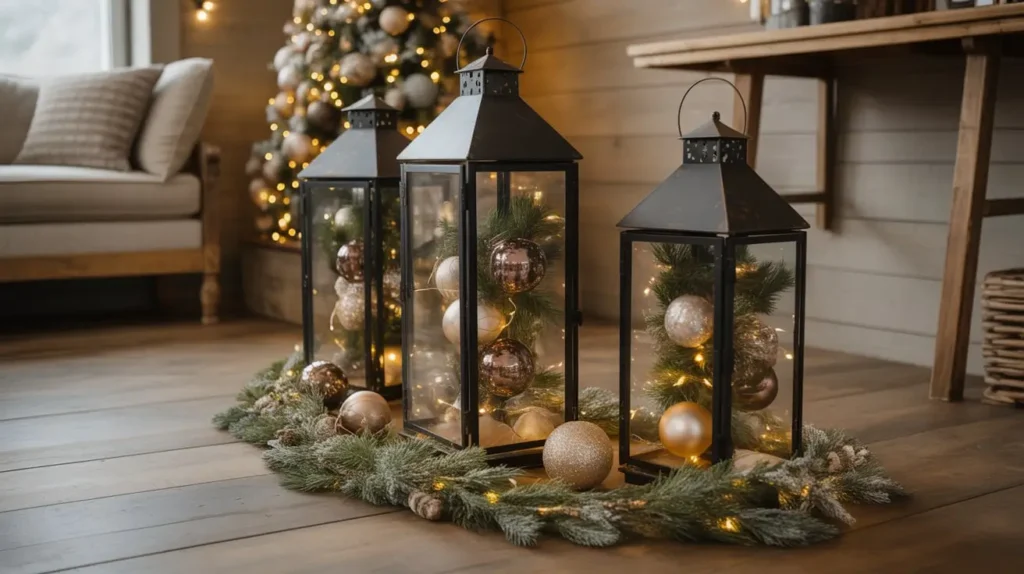
Lanterns are a cornerstone of farmhouse and rustic style, and they truly shine during the holidays. They provide a perfect little vessel to create a contained Christmas scene, and their gentle glow is the very definition of cozy.
Why It Works So Well
A lantern provides structure. It’s like a mini stage for your decor. You can create a beautiful, self-contained vignette that can be placed anywhere—on the hearth, by the front door, on a side table. It keeps things from looking cluttered while still packing a big decorative punch. Plus, the combination of metal or wood with glass is a classic rustic pairing.
They’re also incredibly safe for adding that candlelit ambiance. Using a flameless, battery-operated candle inside gives you all the glow with none of the worry. As someone who once almost set a garland on fire with a real candle, I am a huge proponent of the flameless variety. 🙂
How to Make It Happen
Think of this as building a tiny diorama.
- Choose Your Lantern: Pick a lantern that fits your style. Black metal gives a classic farmhouse look, while a distressed wood lantern feels more cabin-chic. Make sure it’s big enough to hold a few items.
- Start with the Light: Place a good-quality flameless LED candle in the center. Get one with a realistic flicker and a warm tone—it makes all the difference.
- Add a Base: Sprinkle some faux snow, Epsom salts, or even some small pebbles at the bottom of the lantern to create a foundation.
- Fill it Up: This is where you get creative. Surround the candle with small pinecones, a few shiny baubles in a rustic color (like champagne, bronze, or deep red), or some sprigs of faux greenery.
- Top it Off: For a final touch, tie a bow on top of the lantern using a simple plaid or burlap ribbon.
My Personal Spin
I love creating a “cluster” of lanterns. I use three lanterns of varying heights and place them together on my hearth. I fill each one slightly differently—one with ornaments, one with pinecones, and one with just a simple candle and a sprig of holly. It creates a dynamic, layered look that’s way more interesting than just a single lantern.
ALSO READ: 15 Stunning Earth Tone Christmas Tree Ideas for Cozy Homes
5. Vintage Sled Porch Decor
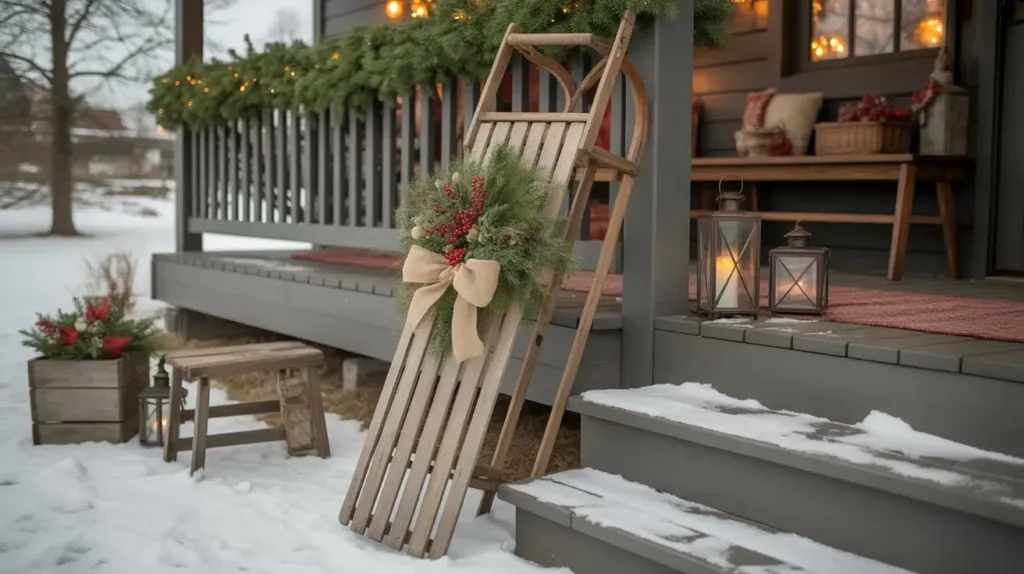
Your porch is the first thing guests see, so why not give them a warm, rustic welcome before they even step inside? A vintage sled, propped up against the wall, is the perfect anchor for a charming outdoor display.
Why It Works So Well
It’s pure nostalgia. A vintage wooden sled evokes childhood memories of snow days and simpler times. It has an instant, authentic charm that you just can’t get from new, mass-produced decorations. Its weathered wood and rusty runners tell a story, adding a layer of history and character to your decor.
It’s also a fantastic vertical element. Porch decor can often feel a bit low to the ground (pots, pumpkins, etc.). A sled draws the eye upward and makes a much bigger statement.
How to Make It Happen
The key here is finding the right sled.
- The Hunt: Scour flea markets, antique shops, and even Facebook Marketplace. Look for a sled with good bones—a little rust and weathered paint is what you want! Don’t worry about it being “functional.” You’re not entering the Olympics.
- Positioning: Simply lean the sled against a wall next to your front door. You don’t even need to hang it.
- Adorn It: This is where the magic happens.
- Hang an evergreen wreath from the top of the sled.
- Tie a big, beautiful plaid bow around the steering handle.
- Weave a garland of pine and fairy lights around the frame.
- You can even hang a pair of old ice skates from it for extra vintage flair.
- Build Around It: Place other rustic elements around the base of the sled, like a small crock filled with birch logs, a bucket of pinecones, or a couple of those farmhouse lanterns we just talked about.
My Personal Spin
I found an old sled at a garage sale for ten bucks. It was a little beat up, but that’s the point! I didn’t want it to look too busy, so I just tied a simple swag of fresh cedar and juniper to the top with some twine and added a few rusty jingle bells. It’s simple, elegant, and looks like it’s been there forever.
6. Rustic Woodland-Themed Christmas Tree

This is where you can go all-in on the rustic theme. A woodland-themed tree moves away from the traditional shiny ornaments and embraces the beauty of the forest. Think animals, natural textures, and earthy colors.
Why It Works So Well
A woodland theme is inherently cozy and magical. It taps into the fairytale-like quality of a forest in winter. It’s a theme that feels cohesive and intentional without being rigid. The color palette is naturally calming—full of browns, greens, creams, and just a hint of deep red. It feels less commercial and more like you’ve brought a piece of the serene outdoors inside.
And who doesn’t love adorable woodland creatures? Foxes, bears, owls, deer… it’s a theme that delights both kids and adults.
How to Make It Happen
Layering is your best friend when creating a woodland tree.
- The Tree Skirt: Start from the ground up. Use a faux fur, burlap, or simple plaid flannel tree skirt to set the rustic tone.
- The Garland: Instead of tinsel, use a natural-looking garland. Think popcorn and cranberry strings, a simple burlap ribbon, or a garland made of wood beads.
- The Ornaments: This is the heart of the theme.
- Creatures: Collect ornaments shaped like woodland animals. You can find beautiful ones made of felt, carved wood, or even brushed metal.
- Natural Elements: Incorporate lots of pinecones (you can buy small ones with strings already attached), bundles of cinnamon sticks tied with twine, and wood slice ornaments (more on those later!).
- Fillers: Use simple, neutral-colored balls in matte finishes (like cream, bronze, or brown) to fill in the gaps. Avoid anything too glittery.
- The Topper: Ditch the traditional angel or star. A bundle of twigs tied into a star shape, a large plaid bow, or even a cute stuffed owl can make the perfect rustic tree topper.
My Personal Spin
My secret weapon for a woodland tree? Pheasant feathers. I buy a pack of long, beautiful feathers from the craft store and simply tuck them into the branches all over the tree. They add incredible texture, height, and an unexpected touch of natural elegance. It’s my favorite little detail.
7. Mason Jar Candle Glow Setup
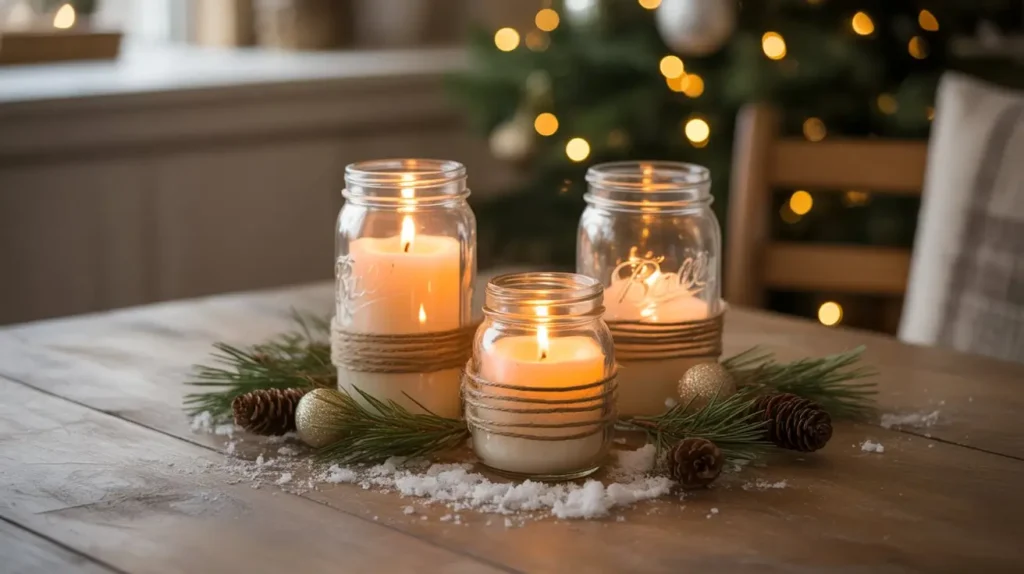
Ah, the humble mason jar. Is there anything it can’t do? For a rustic Christmas, these simple jars can be transformed into the most enchanting light features. They’re cheap, they’re versatile, and they scream farmhouse charm.
Why It Works So Well
Mason jars are a symbol of simplicity and resourcefulness, which are core tenets of the rustic aesthetic. When you place a light inside, the glass diffuses the glow beautifully, creating a soft, warm ambiance that’s incredibly inviting. They’re the perfect vehicle for a simple, understated display that still feels special and festive.
You probably already have a bunch of them in a cupboard somewhere, right? This is their moment to shine. Literally.
How to Make It Happen
You can create a beautiful display with just a few simple ingredients.
- Gather Your Jars: Collect an odd number of mason jars (3, 5, or 7 looks best). Vary the sizes if you can.
- Create a Snowy Base: Pour about an inch of Epsom salt or coarse sugar into the bottom of each jar. This looks just like freshly fallen snow and also helps to stabilize your candle.
- Add a Candle: Place a tea light or a small votive candle in the center of the “snow.” Again, I highly recommend using battery-operated LED versions for safety and convenience.
- Dress Them Up (Optional): Tie a simple piece of twine, a snippet of plaid ribbon, or a sprig of fresh rosemary around the rim of each jar.
- Arrange Them: Cluster the jars together on a windowsill, a mantel, or down the center of your dining table on a wooden board.
My Personal Spin
For a slightly different look, I like to use cranberries. I fill the jar about a third of the way with fresh cranberries, then add water until it just covers them. Then, I float a tea light on top (a real one works here, as it’s floating on water). The deep red of the cranberries seen through the glass is absolutely stunning, especially when clustered with some simple greenery. FYI, this only lasts a few days, so it’s best for a party or special dinner.
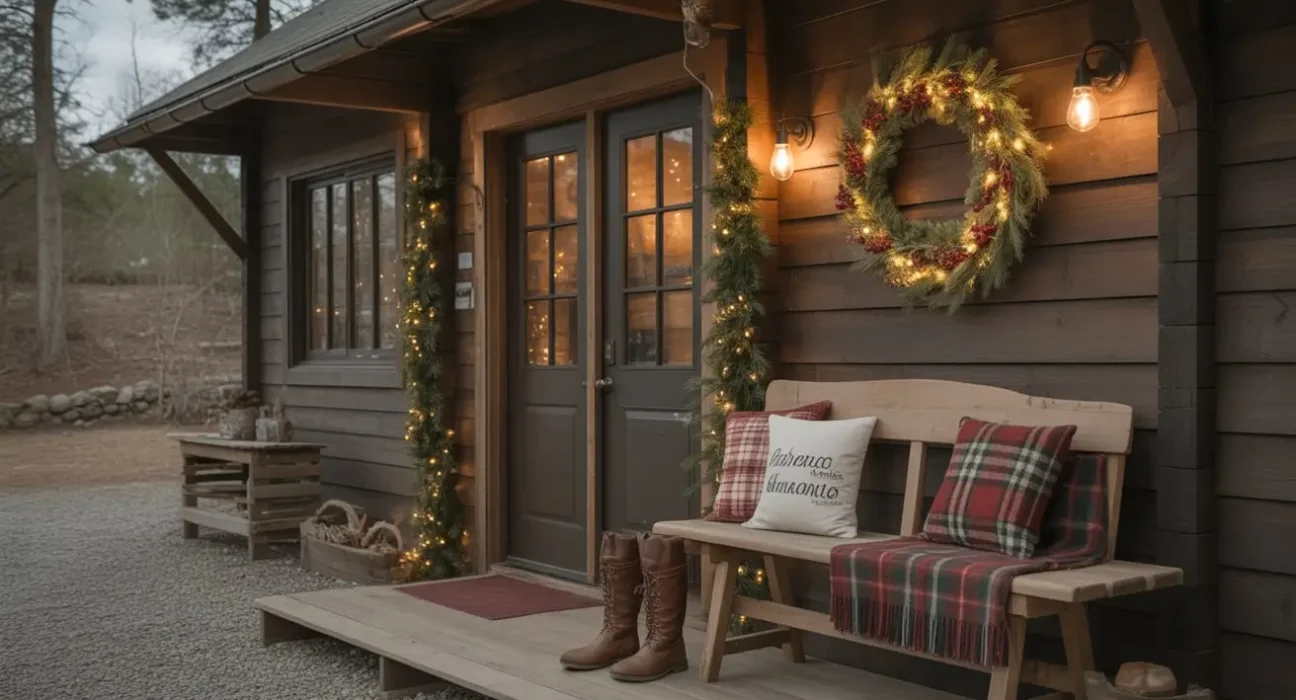
8. Cozy Cabin-Inspired Entryway
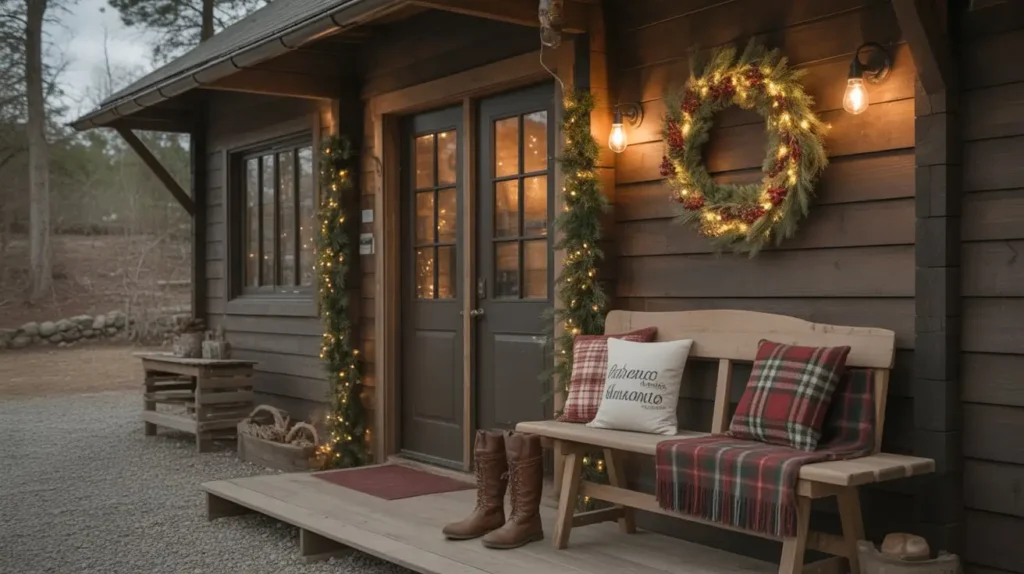
Your entryway sets the tone for your entire home. A cabin-inspired entryway immediately tells guests, “Come in, get cozy, and stay a while.” It’s all about creating a warm and welcoming first impression.
Why It Works So Well
This look is about functionality meeting beauty. An entryway needs practical things like a place for boots and coats, and this aesthetic leans into that. A sturdy wooden bench, a row of cast iron hooks, and a durable rug all serve a purpose while contributing to the cozy cabin vibe. It feels lived-in and authentic, not staged.
It’s an invitation to shed the cold of the outdoors and step into a haven of warmth. What could be more welcoming during the holidays?
How to Make It Happen
Focus on layering practical, rustic pieces.
- The Bench: A simple, sturdy wooden bench is the centerpiece. It provides a place to sit and take off snowy boots. Drape a plaid wool or faux sheepskin throw over it for instant coziness.
- The Rug: Choose a durable but stylish rug. A classic buffalo check or a simple, textured jute rug works perfectly.
- Coat Storage: Install a row of simple, sturdy hooks. Cast iron or dark bronze hooks look fantastic against a plain wall.
- The Details:
- Place a rustic boot tray underneath the bench.
- Lean a small stack of birch logs in a corner.
- Hang a simple “Welcome” sign made from reclaimed wood.
- Place a small, live evergreen tree in a galvanized bucket or a large crock.
My Personal Spin
I believe every entryway needs a signature scent. I keep a small essential oil diffuser on my console table and use a blend of pine, cedarwood, and a hint of orange. The moment you walk in the door, you’re hit with the smell of a Christmas forest. It’s an invisible layer of decor that makes a huge impact.
ALSO READ: 15 Stunning Modern Christmas Decor Ideas for Chic Homes
9. Birch Log Fireplace Styling
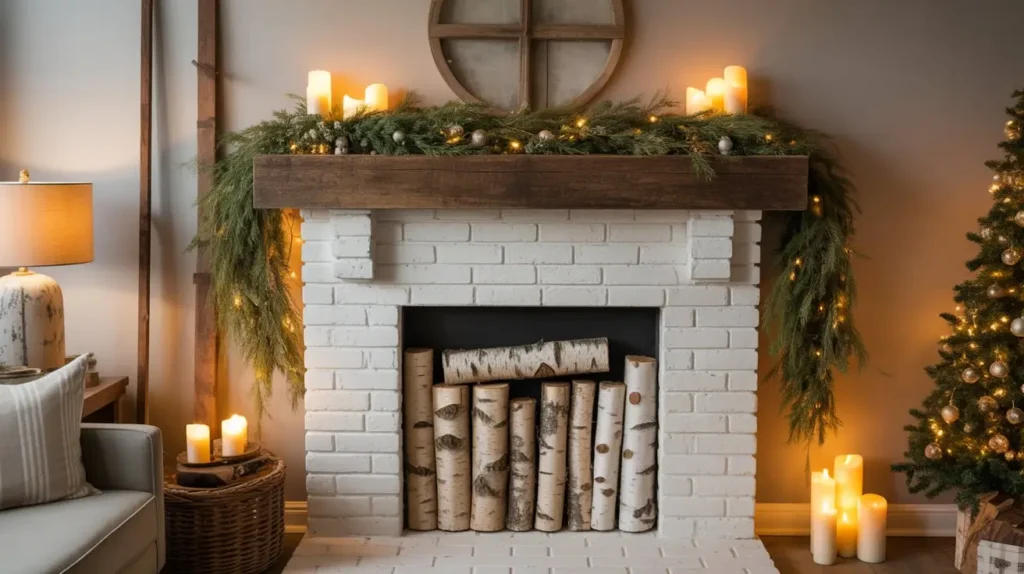
Even if you don’t have a working fireplace, you can still get that cozy, fireside feeling. Birch logs are your best friend here. Their distinctive white, papery bark provides a bright, natural contrast to the dark void of a firebox.
Why It Works So Well
Birch logs have a graphic, modern quality while still being completely natural. The bright white and black of the bark pops against a dark background, creating a clean yet rustic look. It’s a way to fill the “black hole” of an unused fireplace in a way that is intentional, stylish, and beautiful.
It’s a look that feels both Scandinavian and Northwoods-cabin at the same time. It’s simple, elegant, and requires zero maintenance.
How to Make It Happen
This is probably the easiest idea on the entire list.
- Measure Your Firebox: Get the height, width, and depth of your fireplace opening.
- Source Your Logs: You can buy bundles of birch logs online, at home improvement stores, or at some garden centers. Make sure you buy enough to fill the space.
- Cut Them to Size (if needed): All the logs need to be the same length, cut to the depth of your firebox. If you buy them pre-cut, this step is already done for you.
- Stack ‘Em Up: This is the only “tricky” part. Place the logs inside the firebox with the cut ends facing out. Stack them neatly, just like a cord of wood. The beautiful, round ends will create a stunning, honeycomb-like pattern.
My Personal Spin
To make it even cozier, I tuck a string of warm white fairy lights in and around the back of the logs. You can’t see the wire, but at night, a soft glow emanates from between the logs, creating the illusion of embers. It’s absolutely magical and gives the look life and warmth.
10. Rustic Plaid Throw and Pillow Setup

Nothing says “cozy Christmas” quite like plaid. It’s a pattern that is steeped in tradition and warmth. Strategically placing some plaid throws and pillows around your living room is the fastest way to make it feel festive and inviting.
Why It Works So Well
Plaid, especially a classic tartan or buffalo check, is the visual equivalent of a warm hug. It adds pattern, color, and a sense of heritage to a room. It breaks up solid-colored furniture and adds a layer of visual comfort. Draping a throw over a sofa is a direct invitation to snuggle up.
IMO, you can never have too much plaid during the winter. It’s a neutral pattern, in a way. It just works.
How to Make It Happen
This is all about casual, effortless placement. Don’t overthink it.
- Choose Your Plaid: Stick to a classic Christmas color scheme. Red and black buffalo check is a farmhouse favorite. A deep green and navy Black Watch tartan is more sophisticated and moody. A simple red and white plaid is cheerful and bright.
- The Throw: A chunky, wool or flannel plaid throw is a must-have. Don’t fold it perfectly. Casually drape it over the arm of a sofa, the back of an armchair, or across the foot of a bed.
- The Pillows: Mix and match. You don’t need every pillow to be plaid.
- Start with a solid base of neutral pillows (cream, beige, gray).
- Add one or two plaid pillows.
- Throw in a pillow with a different texture, like a chunky knit or a faux fur pillow, to complete the look.
My Personal Spin
I love to coordinate my gift wrap with my pillows and throws. I’ll use a simple brown kraft paper for my gifts and tie them with a ribbon that matches the plaid on my sofa. It’s a small, subtle detail, but it makes the whole room feel incredibly cohesive and thoughtfully designed. It’s my little designer secret.
11. Handcrafted Wood Slice Ornaments
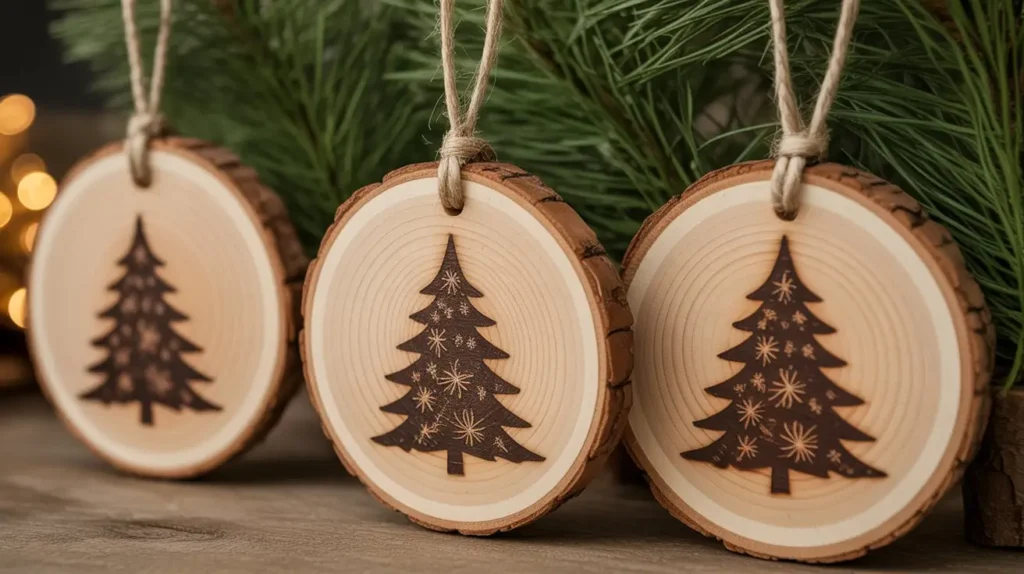
Store-bought ornaments are fine, but there’s something so special about ornaments that are handmade. Wood slice ornaments are incredibly easy to make, fully customizable, and add a personal, rustic touch to your tree.
Why It Works So Well
These ornaments celebrate the beauty of imperfection. Each slice has its own unique grain and shape. They bring a tangible piece of nature onto your tree, reinforcing that earthy, woodland vibe. They also provide a perfect little canvas for you to express your creativity.
They make fantastic gifts, too! Who wouldn’t want a set of beautiful, handmade ornaments?
How to Make It Happen
This is a fantastic weekend project for the whole family.
- Get Your Slices: You can buy pre-cut, pre-drilled wood slices from any craft store or online. Or, if you’re feeling adventurous, you can slice them yourself from a fallen branch. Make sure they’re completely dry.
- Drill a Hole: If they aren’t pre-drilled, use a small drill bit to make a hole near the top for the string.
- Decorate! Here are a few ideas:
- Paint: Use acrylic craft paint to paint simple designs—a snowflake, a tiny Christmas tree, a single initial.
- Stamps: Use rubber stamps and an ink pad to stamp on festive words like “Joy,” “Peace,” or “Noel.”
- Wood Burner: If you have a wood-burning tool, you can etch in more intricate designs or names for a truly professional look.
- Decoupage: Use Mod Podge to apply pretty paper napkins or even tiny family photos to the slices.
- Seal and Hang: Once your design is dry, you can apply a thin coat of matte sealant to protect it. Then, just thread some twine or a thin ribbon through the hole, and they’re ready for the tree.
My Personal Spin
Every year, my family makes a new set of these. We write the year on the back of each one. Looking at our tree is like a little trip down memory lane. I have slices with my kids’ toddler scribbles on them next to more recent, artistic creations. They aren’t the fanciest ornaments on the tree, but they are by far the most meaningful.
12. Rustic Kitchen Hot Cocoa Corner
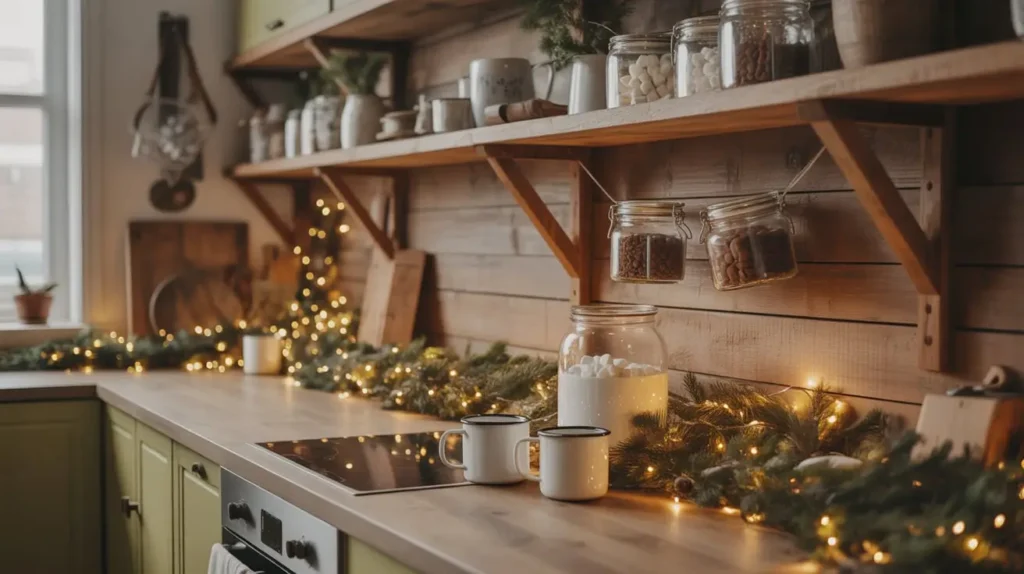
The kitchen is often the hub of holiday activity. Why not dedicate a small corner to the official drink of winter: hot cocoa? A well-styled hot cocoa bar is not only practical but also an adorable piece of decor.
Why It Works So Well
A hot cocoa bar is an interactive piece of decor. It invites family and guests to help themselves, creating a casual, welcoming atmosphere. It’s a functional display that adds a ton of charm and a sense of abundance to your kitchen. It’s a little station dedicated entirely to comfort and indulgence—what’s more Christmas-y than that?
It also corrals all the necessary supplies into one cute, organized spot instead of having them scattered across your counters and cupboards.
How to Make It Happen
You just need a small bit of counter space or a little bar cart.
- The Foundation: Use a tiered tray or a simple wooden platter to define the space.
- The Cocoa: Put your hot cocoa mix in a large glass jar with a scoop. A chalkboard label adds a nice rustic touch.
- The Mugs: Stack a few of your favorite festive or rustic-style mugs.
- The Toppings: This is where it gets fun! Put all your toppings in small mason jars or bowls.
- Mini marshmallows
- Chocolate chips
- Caramel sauce
- Crushed peppermint candies
- Cinnamon sticks for stirring
- The Signage: A small, framed chalkboard sign that says “Hot Cocoa Bar” or “Baby, It’s Cold Outside” completes the look.
My Personal Spin
I always include a “grown-up” addition to my hot cocoa bar. I’ll have a small bottle of peppermint schnapps or Bailey’s Irish Cream tucked in the back with a little tag on it. It’s a fun little surprise for the adults. Plus, it makes my hot cocoa extra merry and bright.
13. Natural Greenery Staircase Garland
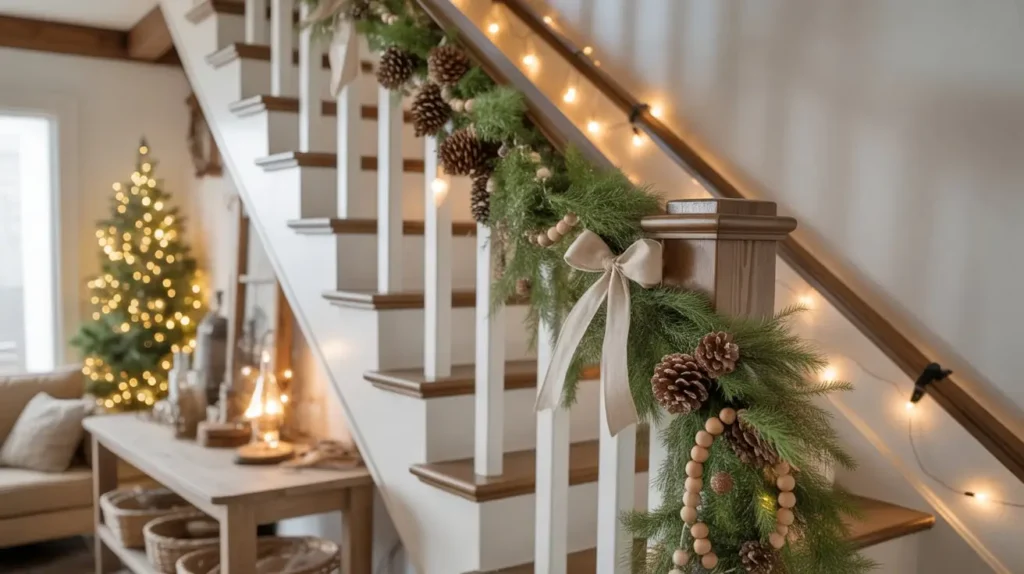
A staircase is a huge architectural feature in a home, and draping it in a garland is a Christmas tradition for a reason. But you can elevate this look by opting for natural, abundant greenery for a truly breathtaking rustic display.
Why It Works So Well
It creates a powerful visual line that draws the eye up, making your space feel grander. The lush, organic shape of a real garland contrasts beautifully with the hard, straight lines of the banister. The scent of fresh pine, cedar, or eucalyptus filling your home every time you walk by is an unbeatable sensory experience.
A well-draped garland feels dramatic and elegant, but using natural greenery keeps it from feeling too formal or stuffy. It’s the perfect balance.
How to Make It Happen
This looks intimidating, but it’s all about a secure base and good draping.
- Measure: Measure the length of your banister, adding extra length for the “swoops” or drapes. A good rule of thumb is 1.5 times the length of your handrail.
- Choose Your Greenery: A mix is always best. Cedar drapes beautifully, pine adds fullness, and eucalyptus adds a unique shape and scent. You can buy pre-made mixed garlands or make your own by wiring different types of branches together.
- Secure it: This is the most important step. Use heavy-duty zip ties or green floral wire to securely attach the garland to the banister at the top, the bottom, and at the peak of each swoop.
- Create the Drapes: Let the garland hang down in graceful arcs between the attachment points. Don’t be afraid of an asymmetrical look; it often looks more natural.
- Embellish: Weave in a string of lights. Tie big, simple bows made of burlap or linen ribbon at the attachment points to hide the zip ties. You can also tuck in pinecones or berry sprigs.
My Personal Spin
I skip the ribbons on the banister itself and instead tie them to the newel post at the bottom of the stairs. I create one huge, dramatic bow with long tails that cascade down. It creates a beautiful focal point and a grand “finale” for the garland.
14. Rustic Dining Table with Neutral Linens
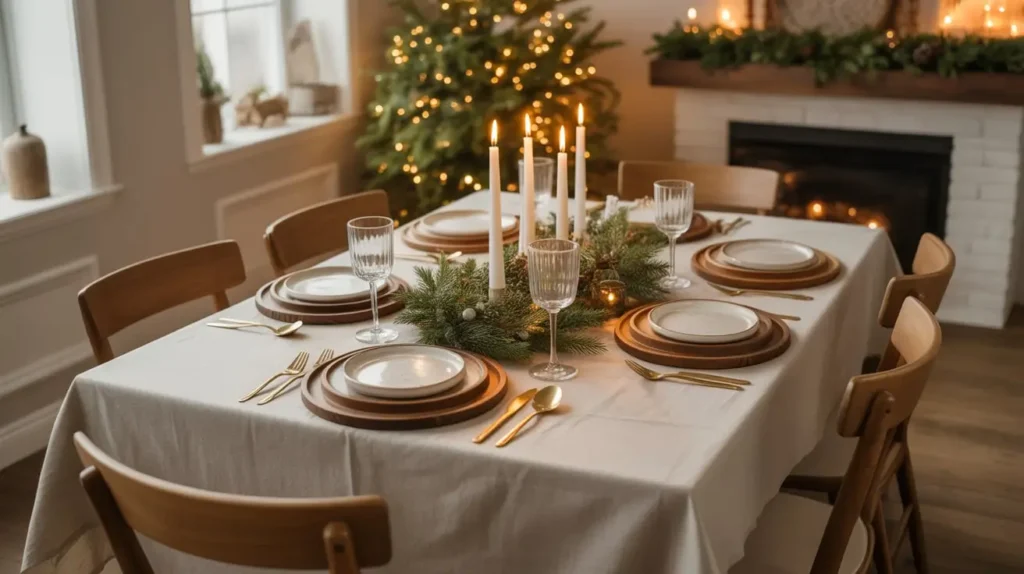
Your Christmas dinner table doesn’t have to be a sea of red and green. A rustic tablescape focuses on neutral colors, natural textures, and simple, elegant details. It’s a look that is both sophisticated and incredibly warm.
Why It Works So Well
A neutral palette allows the food and the company to be the stars of the show. It creates a calm, serene atmosphere for a meal. Textures like linen, wood, and ceramic take center stage, creating a rich, tactile experience. This look is timeless and can be easily adapted for any holiday or season.
It feels less like a “themed” party table and more like an elevated, heartfelt family dinner.
How to Make It Happen
Layering is key to a beautiful, neutral tablescape.
- The Base: Start with a simple table runner made of linen, burlap, or even cheesecloth, letting it pool on the floor at the ends for a bit of drama.
- The Place Settings:
- Use simple wooden or woven placemats.
- Stack your plates—a simple white or cream-colored ceramic set is perfect.
- Use linen napkins, either simply folded or tied in a knot.
- Tuck a sprig of fresh rosemary or a small cinnamon stick into the napkin.
- The Centerpiece: Keep it low and simple. The Pinecone and Cedar Centerpiece we talked about earlier would be perfect here. Or, simply run a line of eucalyptus and a few candles down the center of the table.
- The Glassware: Simple, classic glassware works best. No need for anything overly ornate.
My Personal Spin
I love to create personalized place cards. I use small slices of birch wood and write each guest’s name on it with a simple black marker. I just rest it on top of the folded napkin. It’s a tiny detail that makes everyone feel special and welcomed, and it doubles as a little party favor they can take home.
15. Weathered Window Frame Christmas Display
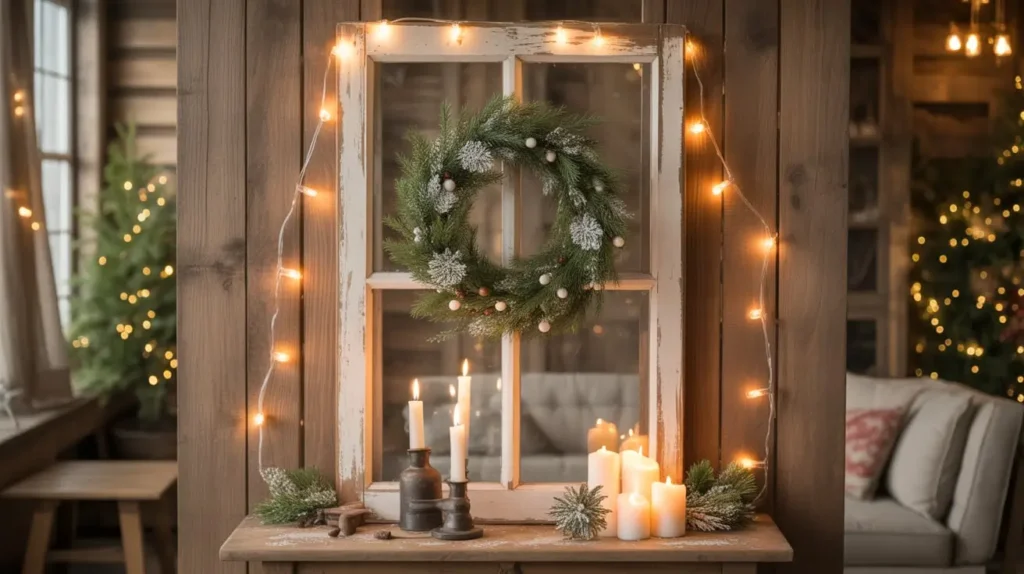
An old, weathered window frame is a fantastic piece of rustic decor that you can use in so many ways, especially during Christmas. It acts as a frame for a wreath or a backdrop for a festive vignette.
Why It Works So Well
The chippy paint and aged wood of an old window frame bring an immediate sense of history and rustic charm. It’s a piece of architectural salvage that adds character to a blank wall. The grid of the window panes provides a perfect structure for hanging smaller items.
It’s an unexpected element that feels creative and personal. Why hang a wreath on a plain wall when you can give it a beautiful, rustic frame?
How to Make It Happen
First, you need a window. Hunt at flea markets, architectural salvage yards, or antique stores.
- Clean it Up: Give it a good wipe-down, but don’t scrub off all that chippy, aged goodness! That’s the whole point.
- Hang it: Securely hang the window frame on a prominent wall—over a console table, above the sofa, or in the dining room.
- Decorate it:
- The Classic: Hang a simple evergreen wreath right in the center of the window frame. This is a timeless, can’t-go-wrong look.
- The Vignette: Lean the window frame against the wall on a mantel or buffet table. Arrange candles, small bottlebrush trees, and other festive trinkets in front of it.
- The Advent Calendar: String twine across the panes and use mini clothespins to hang small, numbered bags or tags for a unique advent calendar.
My Personal Spin
I have a large, six-pane window frame that I hang horizontally over my buffet. I hang a single, small ornament in the center of each of the six panes, using a simple piece of twine. I choose six of my most special ornaments. It turns them into individual works of art and looks so much more interesting than just hanging a single wreath.
So there you have it. 15 ways to bring that stunning, cozy, rustic Christmas vibe into your home. The most important thing to remember is that this style is all about feeling. It’s not about perfection; it’s about warmth, comfort, and creating a space where memories are made.
Don’t feel like you have to do it all. Pick one or two ideas that really speak to you and start there. Maybe this is the year you finally tackle that staircase garland, or maybe you’ll just start small with some mason jar candles. Whatever you choose, make it your own.
So, what’s the first rustic project you’re going to tackle? I’d love to hear about it.
Happy decorating, my friend