

Alright, let’s have a real talk. Is there any room in the house that inspires more collective dread than the laundry room? For most of us, it’s a chaotic purgatory of mismatched socks, overflowing hampers, and mysterious lint piles. I swear my own laundry room used to be a black hole where clean clothes went to wrinkle and single socks went to die. It was a functional space, sure, but it actively drained my will to live every time I walked in.
But what if I told you it doesn’t have to be that way? What if your laundry room could actually be… pleasant? Maybe even stylish? I know, it sounds like a wild fantasy, but after transforming my own sad little laundry closet into a space I don’t hate, I’m a true believer. You don’t need a massive budget or a contractor on speed dial. You just need a bit of creativity and a willingness to get your hands dirty.
So, grab a coffee (or something stronger, I don’t judge), and let’s walk through 15 brilliant DIY laundry room ideas and storage hacks that will completely change your relationship with laundry day. We’re turning that chaotic corner into a functional, stylish, and dare I say, enjoyable part of your home.
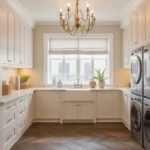
1. Compact Vertical Storage Shelves
Let’s start with the golden rule of any small space: when you can’t build out, you build up. If your detergent bottles, stain removers, and fabric softeners are currently having a party on top of your dryer (or on the floor), vertical shelving is your new best friend. It’s the simplest, most effective way to reclaim your space and your sanity.
Why It Works So Well
This idea is a classic for a reason. It gets all your essentials off your precious horizontal surfaces, making the room feel instantly larger and less cluttered. By using wall space that would otherwise be empty, you create a designated home for everything. No more frantic searching for the pre-wash spray that’s somehow hiding behind the washer, right?
Plus, open shelving forces you to be a little more organized. When everything is on display, you’re more likely to keep it tidy. You might even be inspired to decant your detergents into prettier containers, but let’s not get ahead of ourselves. Baby steps.
How to DIY It (The Gist)
This is one of the easiest DIYs on the list, I promise. You don’t need to be a master woodworker to pull this off.
- Materials: You’ll need a few shelf brackets (you can find these in every style, from industrial to farmhouse), some wood planks cut to your desired length, a level, a drill, and some screws/wall anchors.
- The Process: First, decide on the placement and height of your shelves. Use a level to mark where your brackets will go—crooked shelves are a special kind of decorating sin. Secure the brackets to the wall using the appropriate anchors for your wall type (this is super important for stability). Finally, place your wood planks on top and secure them to the brackets. Voilà!
My Two Cents
Before you go drilling, think about what you’ll be storing. I made the mistake of making my first shelves too shallow. My giant Costco-sized detergent bottle looked like it was perpetually ready to take a nosedive. Measure your tallest and widest items and give yourself a little extra clearance. Trust me on this one.
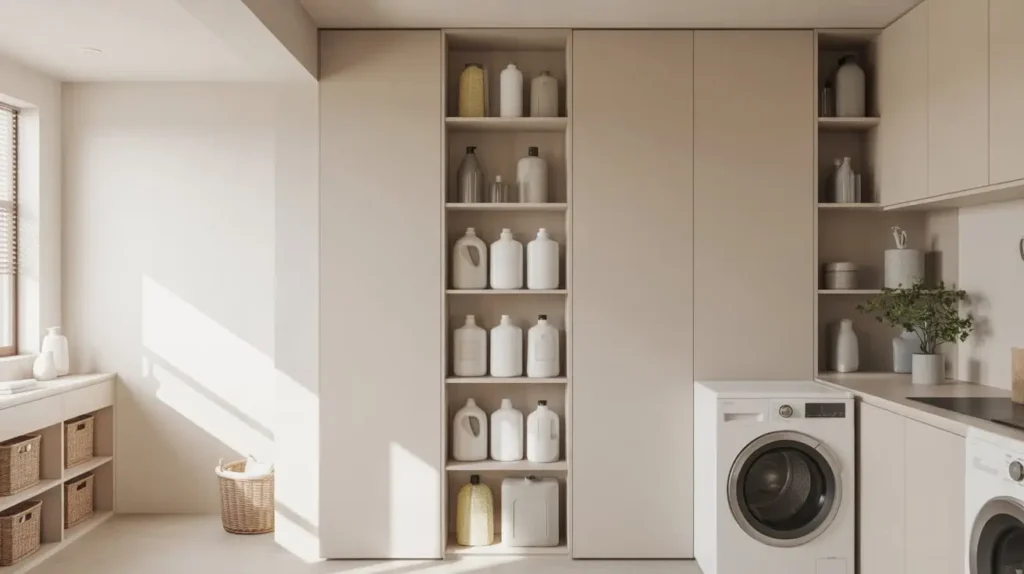
2. Floating Cabinets with Hidden Baskets
If open shelving feels a bit too… open… for your taste, floating cabinets are the sleek, sophisticated alternative. They give you all the vertical storage benefits but with the added bonus of hiding the visual clutter behind closed doors. It’s the perfect solution for those of us who aren’t naturally neat.
Why It Works So Well
Floating cabinets create a clean, modern look because they don’t touch the floor. This visual trick makes the room feel lighter and more spacious. The real magic, though, is the “hidden baskets” part of this hack. Inside the cabinets, you can use simple bins or baskets to corral all your supplies. One for cleaning rags, one for dryer sheets, one for all those rogue stain sticks. It’s organized chaos, but it’s your organized chaos.
This system is particularly brilliant for storing things you don’t want on display. Think spare bleach bottles, boxes of washing machine cleaner, and that one specialty detergent you bought for a single sweater. Out of sight, out of mind.
How to DIY It (The Gist)
You can often find affordable, pre-assembled cabinets at places like IKEA or a home improvement store. The key is in the mounting.
- Find Your Studs: Floating cabinets are heavy, especially once you load them up. You must mount them directly into the wall studs. Use a stud finder to locate them and mark them clearly. Don’t even think about using only drywall anchors here. It will end in tears.
- Create a Ledger Board: A simple trick is to screw a temporary 1×4 board into the studs, perfectly level, right where the bottom of your cabinet will sit. This gives you a ledge to rest the cabinet on while you secure it to the wall, making it a much easier one-person job.
- Secure and Organize: Hoist the cabinet onto the ledger board, then drive long cabinet screws through the back of the cabinet and into the studs. Once it’s secure, remove the ledger board and fill the small screw holes. Then, go wild with your interior organization baskets!
My Two Cents
IMO, the best part of this is the illusion of a custom-built space without the custom-built price tag. To elevate the look, consider swapping out the standard cabinet hardware for something more stylish. A set of chic brass or matte black pulls can make a $50 cabinet look like a million bucks.
3. Foldable Laundry Folding Station
Where do you fold your laundry? On the bed? The living room floor? On top of the washer, where socks constantly fall into the abyss behind it? A dedicated, wall-mounted folding station is a complete game-changer, especially in a tight space. It’s there when you need it and gone when you don’t.
Why It Works So Well
This is pure, unadulterated genius. It provides a large, stable surface for folding clothes without permanently sacrificing a single square inch of floor space. When you’re done, you simply fold it up against the wall. It’s the laundry room equivalent of a Murphy bed.
Having a proper folding station makes the chore so much less dreadful. You can stand comfortably, create neat piles, and immediately sort clothes for different family members. It turns a frustrating task into a streamlined process.
How to DIY It (The Gist)
This project sounds complicated, but the concept is pretty simple. You’re essentially building a small tabletop and attaching it to the wall with heavy-duty hinges.
- The Surface: You can use a solid piece of wood, a sturdy piece of plywood, or even a pre-made laminate shelf. Sand the edges smooth to prevent snagging your clothes.
- The Support: Attach the surface to the wall using two or three strong hinges. The critical part is the support system for when it’s open. You can use folding shelf brackets, which lock into place, or a simple hinged leg that swings down to support the table’s weight.
- Finishing Touches: Paint or stain the wood to match your decor. You could even apply a waterproof sealant to protect it from any damp clothes.
My Two Cents
I used to be a firm member of the “fold on the bed” club. The problem? If I didn’t feel like putting the clothes away immediately, my bed was held hostage. A folding station eliminates that excuse. My pro tip: install it at a comfortable height for you. Standard counter height is about 36 inches, but if you’re taller or shorter, adjust it so you’re not hunching over. Your back will thank you.
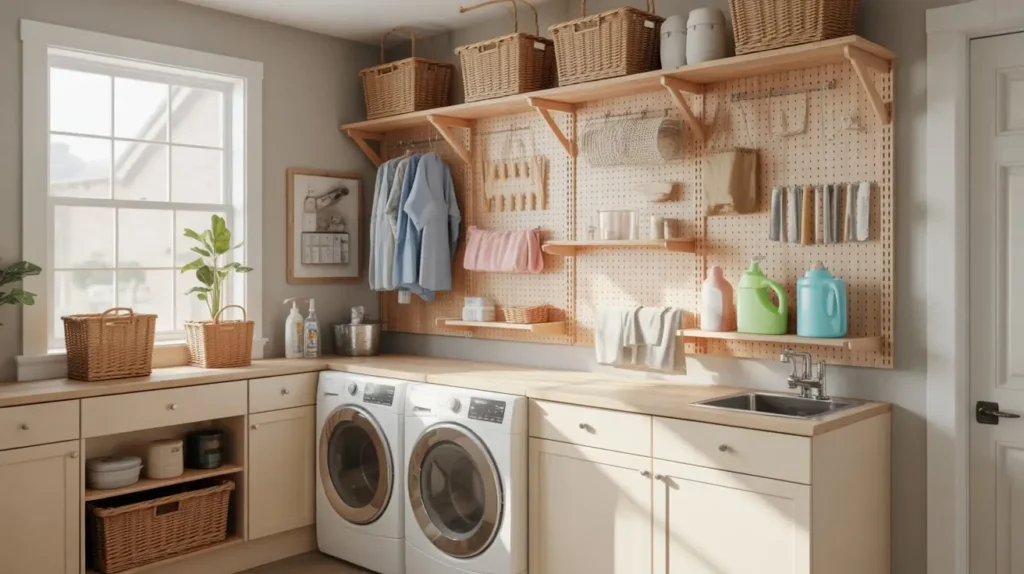
4. DIY Pegboard Wall Organizer
Think pegboards are just for garage workshops? Think again. A pegboard is one of the most versatile and customizable organizational tools you can bring into your laundry room. It’s a blank canvas for storing all those awkward, hard-to-place items.
Why It Works So Well
The beauty of a pegboard is its flexibility. With a variety of hooks, shelves, and baskets, you can create a custom storage solution that perfectly fits your needs. Have a collection of cleaning brushes? There’s a hook for that. Need a spot for your iron? There’s a special caddy for that. Want a small shelf for your sewing kit for quick repairs? You got it.
It also keeps everything visible and within arm’s reach. No more digging through a junk drawer for the lint roller. A pegboard transforms a cluttered wall into a functional and, let’s be honest, pretty cool-looking command center.
How to DIY It (The Gist)
Installing a pegboard is surprisingly straightforward. The key is creating a small gap between the board and the wall so the hooks have space to fit.
- Build a Frame: First, cut a few 1×2 wood strips to create a frame for the back of your pegboard. This is what will mount to the wall and create that necessary gap.
- Attach and Mount: Screw the frame onto the back of your pegboard, then find the studs in your wall. Mount the entire unit by screwing through the wood frame and into the studs.
- Accessorize: This is the fun part! Go to town with an assortment of pegboard accessories. Small baskets for clothespins, long hooks for your dustpan, and shelves for smaller bottles.
My Two Cents
Don’t be afraid to give your pegboard a little personality. I painted mine a bold navy blue to contrast with my white walls, and it became an instant focal point. You can paint it any color, create a pattern, or even frame it out with decorative molding to make it look more polished and intentional.
Read Also 15 Brilliant Pantry Laundry Room Combo Ideas for Small Homes
5. Rustic Wooden Laundry Hamper Stand
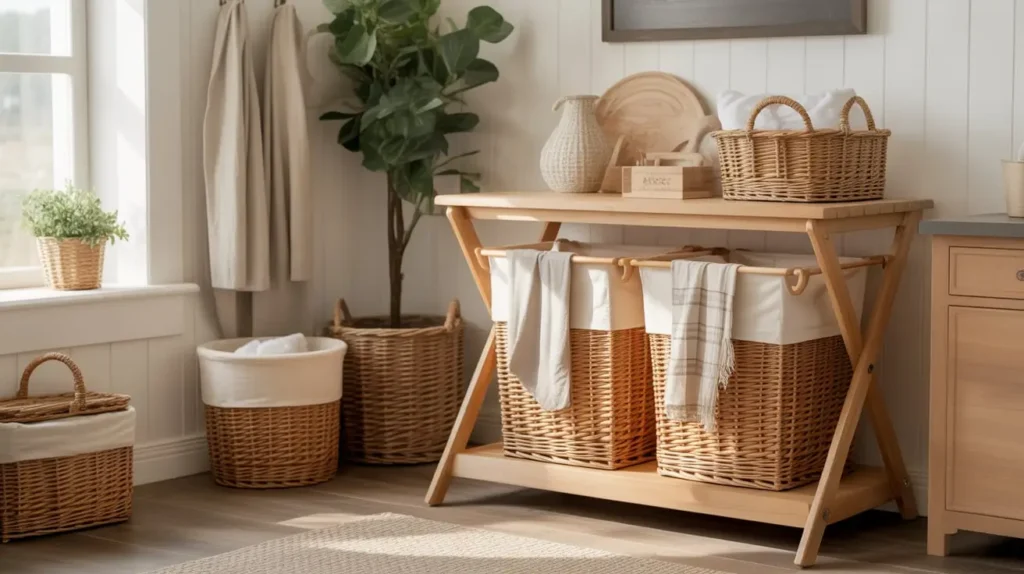
Let’s talk about hampers. They’re usually ugly plastic bins that live on the floor, constantly overflowing and getting in the way. A DIY hamper stand elevates the entire concept. It gets your hampers off the floor and often incorporates a sorting system, making laundry day that much easier.
Why It Works So Well
A hamper stand is both a functional and an aesthetic upgrade. By building a simple wooden frame, you can create designated slots for multiple laundry baskets—one for whites, one for darks, and one for delicates. This pre-sorting saves you a ton of time and effort when it’s finally time to run a load.
Aesthetically, a nice wooden stand just looks better than a pile of plastic. It adds a touch of rustic or modern charm, depending on the wood and finish you choose. Plus, the top surface of the stand can double as another shelf or a folding area!
How to DIY It (The Gist)
This project involves some basic woodworking, but it’s a great beginner project. Think of it like building a simple, open-backed bookshelf.
- Measure Your Baskets: Before you do anything, measure the laundry baskets you plan to use. Your entire design will be based on their dimensions.
- Build the Frame: Use 2x4s or 1x4s to build a rectangular frame. You’ll create vertical dividers to separate the hamper sections. The goal is to create “cubbies” that your baskets can slide into perfectly.
- Add a Top: Finish it off by adding a solid top piece. You can use a nice piece of butcher block for a high-end look or a simple piece of sanded plywood for a more rustic vibe.
My Two Cents
Consider adding caster wheels to the bottom of your hamper stand. This makes it incredibly easy to roll the entire unit out of the way for cleaning or to move it closer to the washing machine when it’s time to load it up. It’s a small addition that makes a huge difference in functionality.
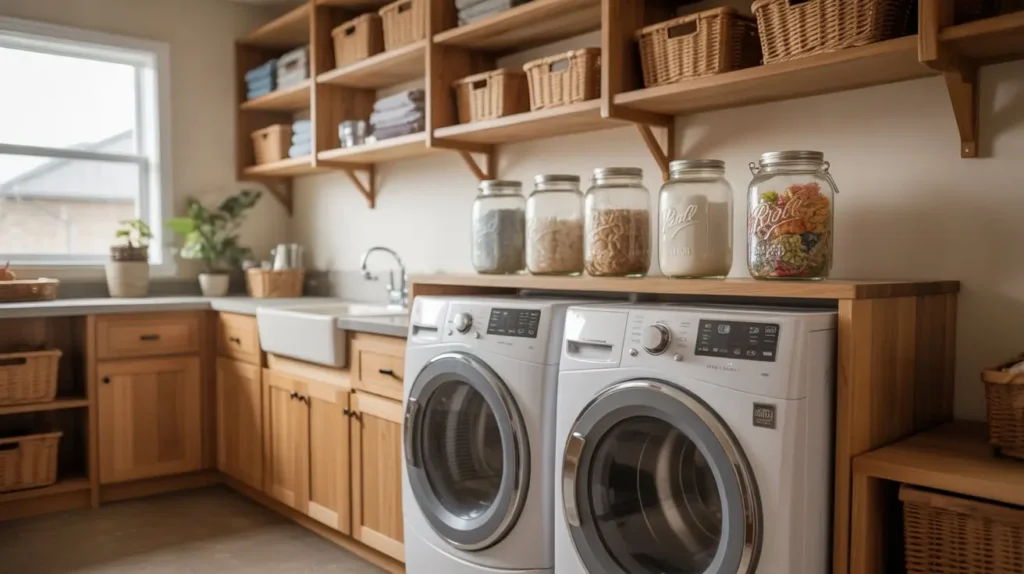
6. Color-Coded Detergent Station
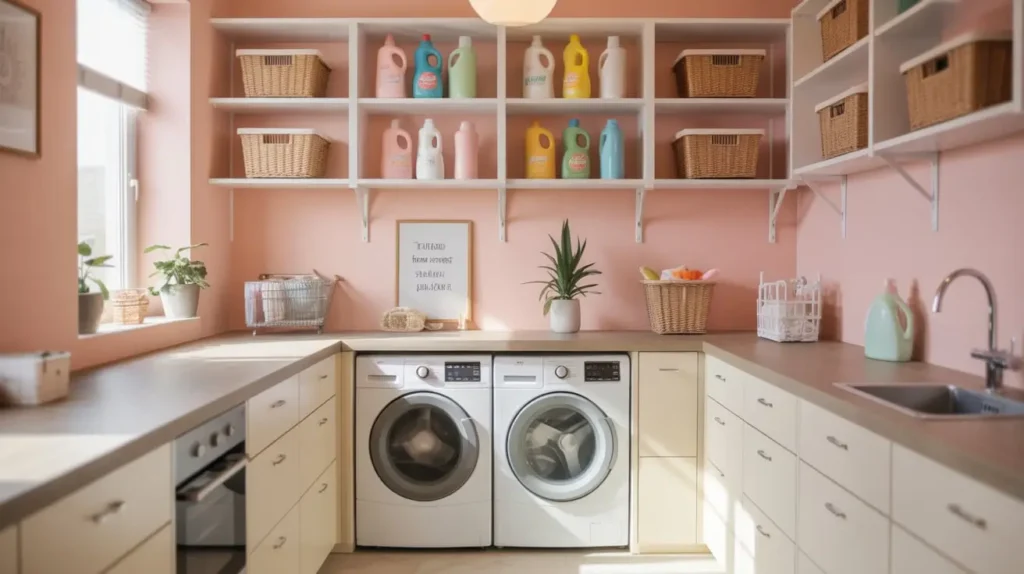
This is less of a build and more of a “get your life together” organization hack, but it’s so effective it deserves its own spot. A dedicated detergent station takes your various liquids and powders out of their ugly commercial packaging and puts them into beautiful, uniform, and easy-to-use dispensers.
Why It Works So Well
Let’s be real: branded laundry packaging is an eyesore. It’s loud, colorful, and cluttered. Decanting your products into clear glass or plastic dispensers with simple, minimalist labels instantly makes your space look like it was styled for a magazine shoot. It’s a small change with a massive visual impact.
Functionally, it’s a win too. Using dispensers with pumps or spigots can help you control a-mounts better, preventing you from overusing (and wasting) detergent. You can create a system: one for regular detergent, one for gentle wash, one for fabric softener, etc.
How to DIY It (The Gist)
This is the easiest “DIY” you’ll ever do. It’s more assembly than construction.
- Get Your Dispensers: Look for large glass or plastic beverage dispensers with spigots for your liquid detergents and softeners. For powders, large glass jars with scoops work perfectly.
- Create Labels: You can buy pre-made, waterproof vinyl labels on sites like Etsy, or you can make your own with a label maker. Keep them simple and clean: “Detergent,” “Softener,” “Bleach Alternative.”
- Set Up Your Station: Arrange your new, beautiful containers on a shelf or tray. A small tray is a great idea to catch any potential drips and keep the area tidy.
My Two Cents
This is one of my favorite upgrades. It just makes me feel so fancy and put-together every time I do laundry. A word of caution: if you have little kids, make sure these are stored safely out of reach. They can look deceptively like drink dispensers, so high shelving is a must.
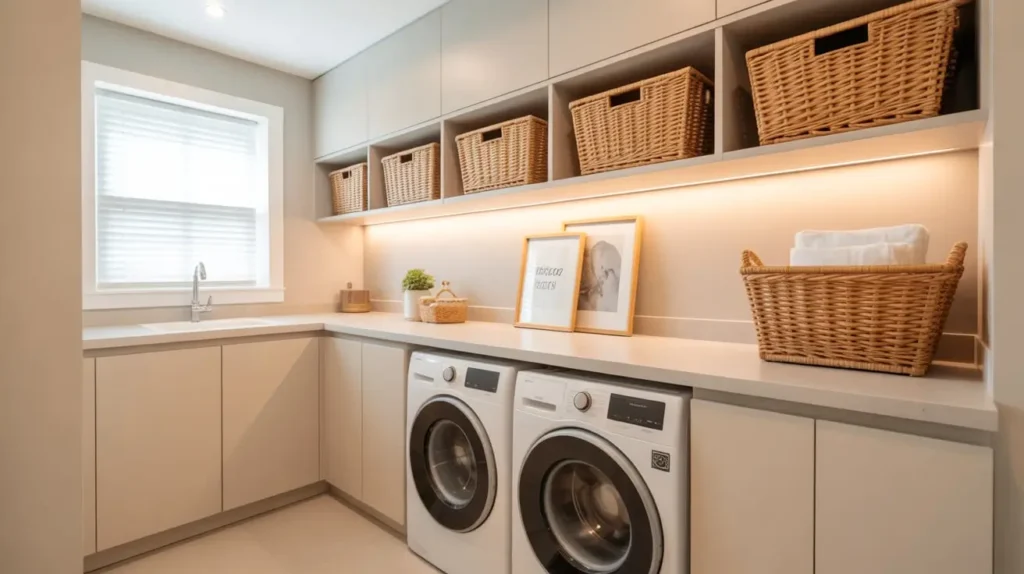
7. Upcycled Crates for Open Storage
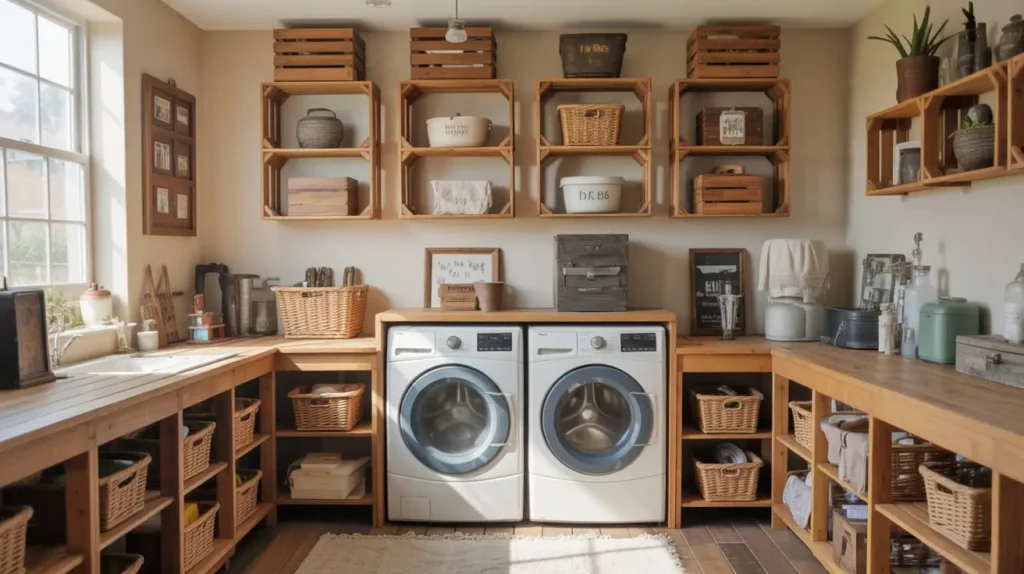
Looking for a storage solution with a ton of rustic charm and a tiny price tag? Look no further than old wooden crates. Whether you find them at a flea market, a craft store, or even your local grocery store, crates can be transformed into incredibly stylish and functional wall storage.
Why It Works So Well
Crates add instant warmth and texture to a space that can often feel cold and sterile. They have a built-in farmhouse or industrial vibe that’s effortlessly chic. By mounting them on the wall, you create little cubbies that are perfect for storing folded towels, extra toilet paper, or baskets of cleaning supplies.
You can arrange them in any configuration you like—a straight line, a staggered pattern, or a grid. This flexibility allows you to create a custom storage wall that is perfectly tailored to your space and your aesthetic.
How to DIY It (The Gist)
This is another beautifully simple project. If you can use a drill, you can do this.
- Prep Your Crates: First, give your crates a good cleaning and a light sanding to get rid of any splinters. You can leave them raw for a rustic look, or you can stain or paint them to match your decor.
- Plan Your Layout: Lay the crates on the floor to decide on your desired arrangement before you start drilling into the wall. Use a level to make sure everything will be straight.
- Mount Them Securely: Drill screws through the inside back panel of the crate directly into wall studs. For heavier items, you’ll want at least two screws per crate. If you can’t hit a stud, use heavy-duty drywall anchors.
My Two Cents
I love mixing and matching crate orientations. Try mounting one horizontally and another vertically right next to it. This creates visual interest and gives you different-sized cubbies for different types of storage. It looks much more dynamic than a uniform row.
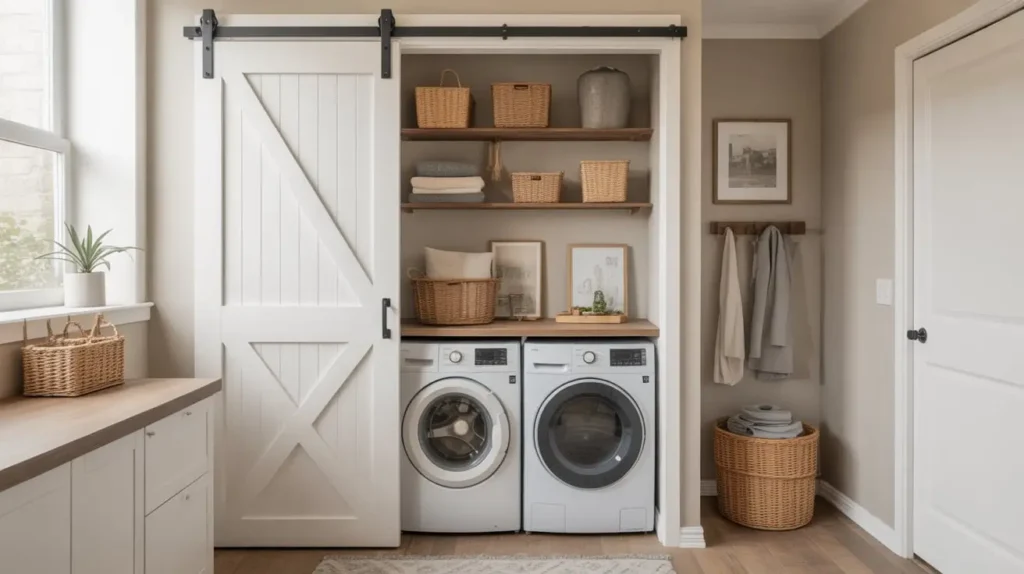
8. Sliding Door Laundry Closet
If your washer and dryer are in a closet or an alcove, you know the pain of annoying bifold doors. They’re always coming off their tracks, they don’t open all the way, and they just feel flimsy. Replacing them with a sliding barn door is a massive upgrade in both style and function.
Why It Works So Well
A sliding door glides along a track mounted above the opening, meaning it doesn’t swing out into your hallway or room. This saves a ton of floor space and eliminates the awkward dance you have to do around open doors. It provides full, unobstructed access to your laundry machines when open.
From a design perspective, a barn door is a statement piece. It can add a pop of color or a dose of rustic texture that completely transforms the look of the area. It turns a boring utility closet into a deliberate design feature.
How to DIY It (The Gist)
This is a more intermediate DIY project, but it’s totally achievable in a weekend. You can buy a barn door hardware kit online or at a home improvement store.
- Get the Door: You can build a door from scratch using wood planks or buy a pre-made “door slab.” Make sure the door is a few inches wider and taller than your closet opening.
- Install the Header Board: The track hardware is heavy, so you need to mount it to a solid header board (like a 1×4 or 1×6) that is securely screwed into the wall studs above your door opening.
- Mount the Track and Hang the Door: Attach the metal track to your header board, ensuring it’s perfectly level. Install the roller hardware onto the top of your door, then carefully lift the door and hang the rollers on the track. Install the floor guides to keep the door from swinging out.
My Two Cents
Measure, measure, and measure again. The placement of the track is critical for the door to hang and slide correctly. Also, make sure you have enough wall space next to the closet for the door to slide completely open. A barn door that only opens halfway is a sad, sad thing.
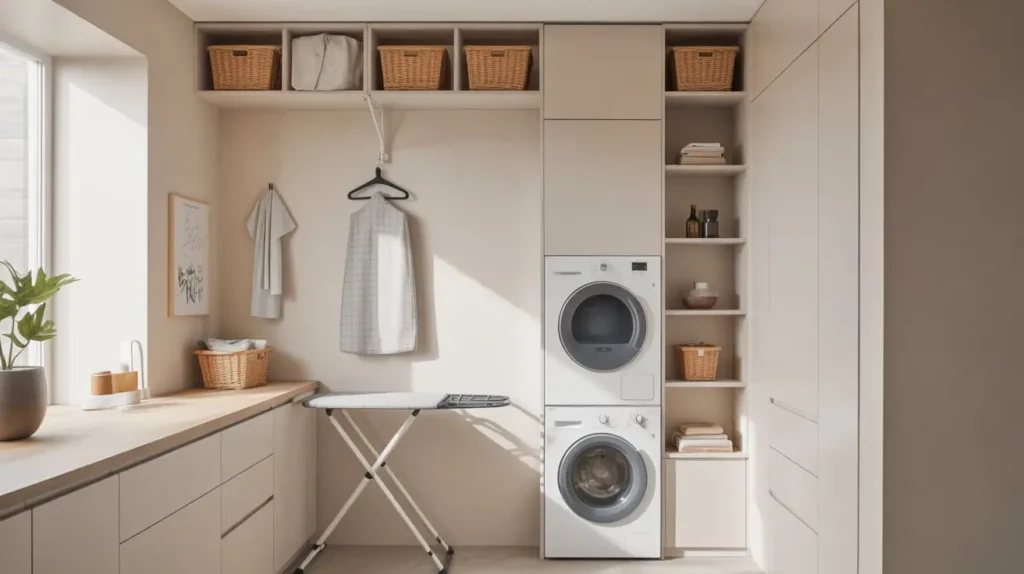
9. Wall-Mounted Ironing Board Setup
An ironing board is one of the most awkward things to store. It’s long, clumsy, and always seems to fall out of the closet at the worst possible moment. A wall-mounted setup solves this problem beautifully by giving your ironing board a permanent, out-of-the-way home.
Why It Works So Well
This is all about convenience. Instead of lugging a heavy board out of a closet, you simply unlatch it from the wall and fold it down. It’s ready to use in seconds. This small change makes the chore of ironing feel so much less daunting.
There are a few ways to do this. You can get a dedicated fold-down ironing board that comes in its own cabinet, or you can simply create a clever hanging solution for your existing board. Either way, it gets the board off the floor and frees up valuable closet real estate.
How to DIY It (The Gist)
The simplest version of this project just requires a couple of sturdy hooks.
- Simple Hook Method: Buy two large, decorative robe hooks. Install them on the wall, spaced to match the feet of your ironing board. You can then just hang the board on the hooks. It’s simple, cheap, and effective.
- Build a Cabinet: For a more advanced project, you can build a shallow wall cabinet that the folded ironing board fits inside. The door of the cabinet hides it completely for a super clean look.
- Add an Iron Caddy: Right next to your board’s new home, install a wall-mounted caddy designed to hold a hot iron and store the cord. This keeps everything you need in one convenient spot.
My Two Cents
I went with the simple hook method, and it was a game-changer. My tip is to hang it behind the laundry room door. It’s completely hidden when the door is open, using up wall space that is otherwise totally useless. It’s the ultimate “now you see it, now you don’t” storage hack. 🙂
Read Also 15 Stunning Blue Laundry Room Ideas and Chic Color Combos
10. Chalkboard Wall for Laundry Notes
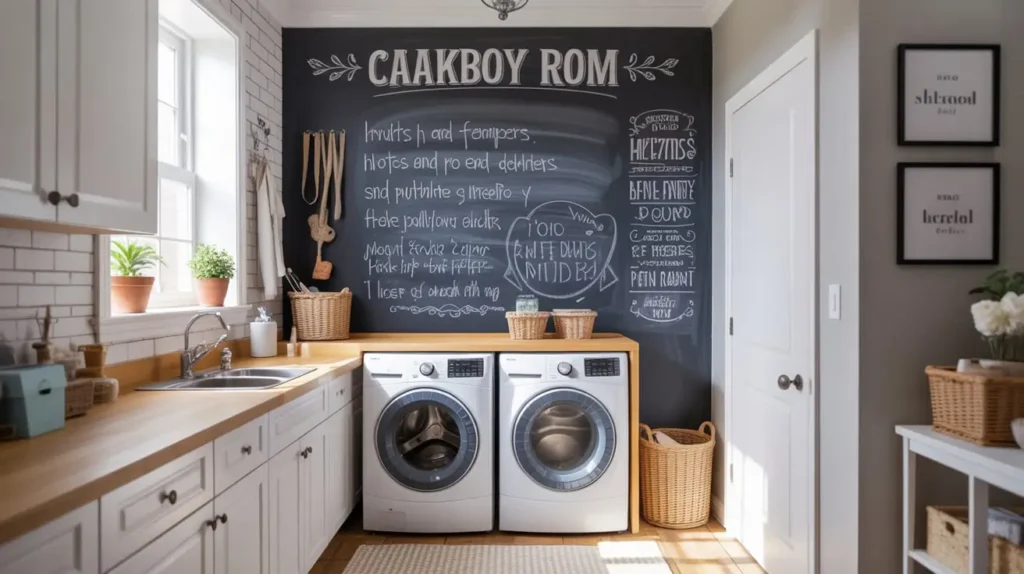
Let’s add a little fun and function to the mix. A chalkboard wall (or even just a large framed chalkboard) is a fantastic addition to a laundry room. It’s a place for laundry cheat sheets, funny quotes, or passive-aggressive notes to your family about emptying their pockets.
Why It Works So Well
On a practical level, it’s a great spot to jot down important information. You can write out the meaning of all those cryptic laundry symbols, keep a running list of items that need stain treatment, or note which sweaters can’t go in the dryer.
On a fun level, it adds a touch of playful, interactive decor. You can change it up with the seasons, leave encouraging messages for yourself (“You can fold all this laundry! Probably!”), or let your kids doodle on it while you sort clothes. It makes the room feel less like a chore zone and more like a part of the home.
How to DIY It (The Gist)
This is a simple paint job with a huge payoff.
- Get Chalkboard Paint: You can find this at any hardware or craft store. It comes in traditional black, but you can also find it in a variety of other colors now.
- Prep the Wall: Like any paint job, prep is key. Clean the wall thoroughly and tape off the edges of the area you want to paint. Use a good primer, especially if you’re painting over a dark color.
- Apply and Cure: Apply two or three thin coats of chalkboard paint with a roller, letting it dry completely between coats. The most important step is to let the paint cure for the recommended time (usually 3 days) before you write on it. Then, “season” the surface by rubbing the side of a piece of chalk over the entire wall and wiping it clean.
My two Cents
If an entire wall feels like too much of a commitment, just paint the front of a cabinet door or find a large, old picture frame at a thrift store and paint the backboard. It gives you the same function without the full-wall drama.
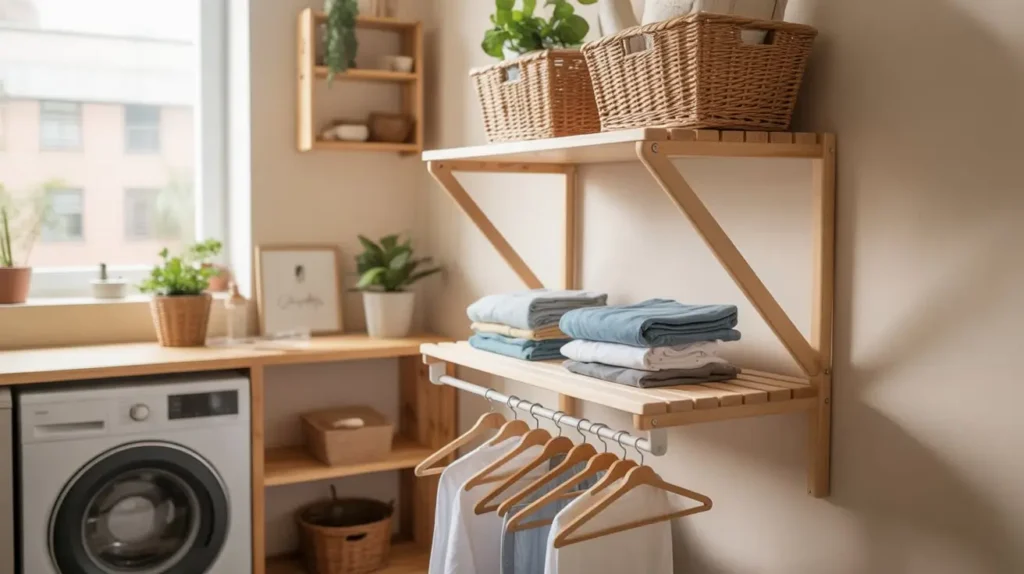
11. Hanging Rods with Decorative Hooks
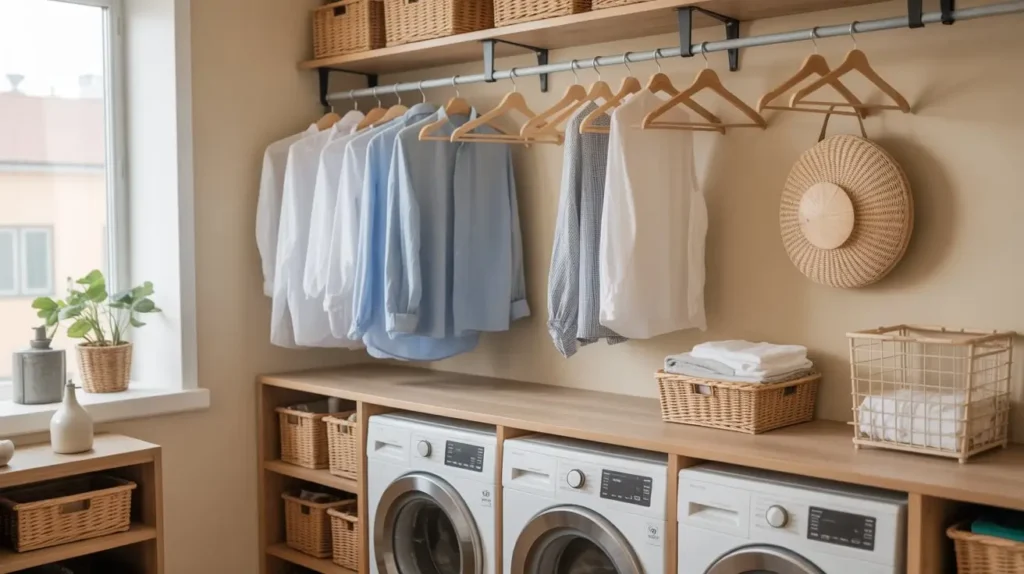
Sometimes the simplest solutions are the most brilliant. A hanging rod in the laundry room is an absolute must-have. It’s the perfect place to hang clothes straight from the dryer to prevent wrinkles, or to air-dry your delicates.
Why It Works So Well
This is a wrinkle-hater’s dream. Pulling your button-down shirts out of the dryer and immediately putting them on a hanger can save you so much time on ironing. A hanging rod provides a dedicated space to do this, away from crowded closet rods.
It’s also essential for items that can’t go in the dryer. Instead of draping wet sweaters over every available surface in your house, you can hang them neatly to dry in the laundry room. Pair the rod with some S-hooks, and you have a spot for hanging laundry bags, scrub brushes, or even a small basket for lost socks.
How to DIY It (The Gist)
You can install a simple closet rod, a curtain rod, or get a little more creative.
- Closet Rod Method: The easiest way is to buy a closet rod and a pair of mounting sockets. Screw the sockets into the walls (or the sides of cabinets) and pop the rod in.
- Industrial Pipe Method: For a more stylish, industrial look, use black iron pipes and fittings from the hardware store. You can create a custom-sized rod that attaches to the wall with floor flanges. It’s incredibly sturdy and looks amazing.
- Under-Cabinet Rod: If you have upper cabinets, you can install a small tension rod or a dedicated under-cabinet rod between them. It’s a great way to use the space below your cabinets.
My Two Cents
I have a rod installed between two upper cabinets, right over my machines. It’s the perfect spot. My advice is to install it high enough that long shirts or pants won’t drag on the countertop or your machines below. And use some pretty hangers! It’s a small detail that makes the whole setup feel more intentional.
12. Mason Jar Storage for Small Items
What do you do with all the little bits and bobs that accumulate in the laundry room? Clothespins, loose buttons that fell off in the wash, pocket change, dryer balls—they all need a home. Mason jars are the perfect, charming solution.
Why It Works So Well
Mason jars are cheap, they’re see-through, and they have a classic, timeless appeal. Using them for storage allows you to see exactly what’s inside at a glance, so you’re not hunting for a clothespin in a random junk drawer.
Lining up a series of matching jars on a shelf creates a sense of order and uniformity. It’s a simple trick that instantly makes your space feel more organized and curated, all for the cost of a few jars.
How to DIY It (The Gist)
There’s barely any “DIY” here, but you can get creative with the execution.
- On a Shelf: The simplest method is to just line them up on one of your open shelves. Easy peasy.
- The Floating Jar Hack: For a cool “floating” look, you can attach the lids of the jars to the underside of a shelf or cabinet. Screw the metal lid directly into the wood. Then, you can just fill the jar and screw it into the lid.
- Label Them: Use a paint pen, a label maker, or a simple twine tag to label each jar. It’s functional and adds another layer of charm.
My Two Cents
This is where you can create a “laundry room emergency kit.” Have one jar for a small sewing kit for quick button repairs, one for a stain-remover pen, and one for safety pins. Having these things visible and ready to go is surprisingly handy.
13. Laundry Room Makeover with Peel-and-Stick Tiles

Is your laundry room floor a sad sheet of linoleum from 1985? Does your wall behind the washer have a weird water stain? A huge-impact, low-effort solution is peel-and-stick tile. This stuff has come a long way and can completely transform the look of your room in an afternoon.
Why It Works So Well
This is the ultimate DIY for instant gratification. Peel-and-stick tiles—for both floors and walls (as a backsplash)—require no grout, no thin-set mortar, and no specialized tools. You literally peel off the backing and stick it on. The visual transformation is dramatic and immediate.
Today’s options are amazing. You can get tiles that convincingly mimic high-end cement tile, subway tile, hardwood, and intricate mosaics. It’s a budget-friendly way to get a high-end look without the cost or commitment of real tile.
How to DIY It (The Gist)
Patience and a sharp utility knife are your best friends here.
- Prep Your Surface: The surface needs to be perfectly clean, dry, and flat. Any dirt or bumps will prevent the tiles from adhering properly.
- Plan Your Layout: Find the center of your floor or wall and snap a chalk line. Start tiling from the center and work your way out. This ensures your pattern is centered and you don’t end up with weirdly thin slivers of tile on a prominent edge.
- Cut and Stick: For tiles that need to be cut around corners or pipes, make a paper template first. Trace it onto the tile and cut it carefully with a sharp utility knife and a straight edge. Then, peel and stick!
My Two Cents
Buy at least 10% more tile than you think you need. You will make mistakes, I guarantee it. Having extra on hand for those “oops” cuts will save you a frantic trip back to the store. Also, for floors, a small hand roller can help you press the tiles down firmly to ensure a strong bond.
14. DIY Over-the-Door Storage Racks
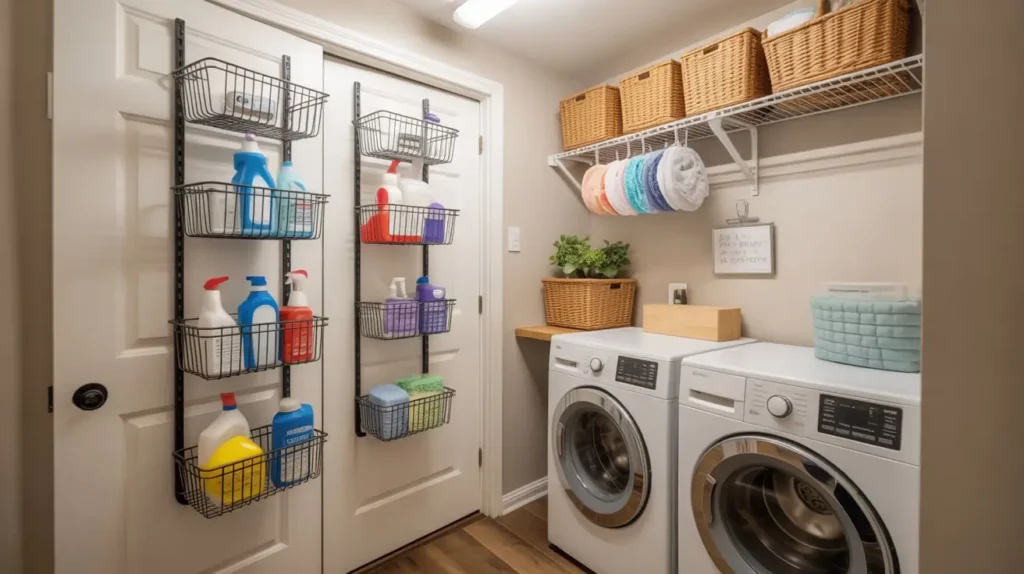
If you have a door in your laundry room, you have untapped storage potential. The back of that door is prime real estate that often goes completely unused. An over-the-door rack is the perfect way to capitalize on it.
Why It Works So Well
This is the definition of a space-saving hack. It adds a significant amount of storage without taking up any floor or wall space. It’s perfect for small laundry closets or rooms where every inch counts.
These racks are ideal for storing items you use frequently but don’t necessarily want on display. Think cleaning supplies, extra paper towels, bottles of starch, and your iron. Everything is hidden when the door is closed but easily accessible when you need it.
How to DIY It (The Gist)
You can buy a pre-made over-the-door rack, but building a custom one can give you exactly the storage you need.
- Shallow Shelves: You can build a series of very shallow shelves or ledges using thin pieces of wood. Mount them directly onto the door. Add a small lip to the front of each shelf to prevent items from vibrating off when the door is opened and closed.
- Pegboard Panel: Cut a small piece of pegboard to fit the back of your door. Mount it with a small gap (using the frame method from idea #4), and you’ve got a versatile, vertical storage panel.
- Use Wire Baskets: A super simple method is to just screw a few wire baskets directly onto the back of the door. This is great for holding rags, dryer sheets, and other small items.
My Two Cents
Make sure your door and its hinges can handle the extra weight. A solid-core door is much better for this than a flimsy, hollow-core door. And whatever you build, use short screws! You don’t want your screws poking through the other side of the door. That’s a bad look.
15. Minimalist Modern Laundry Countertop
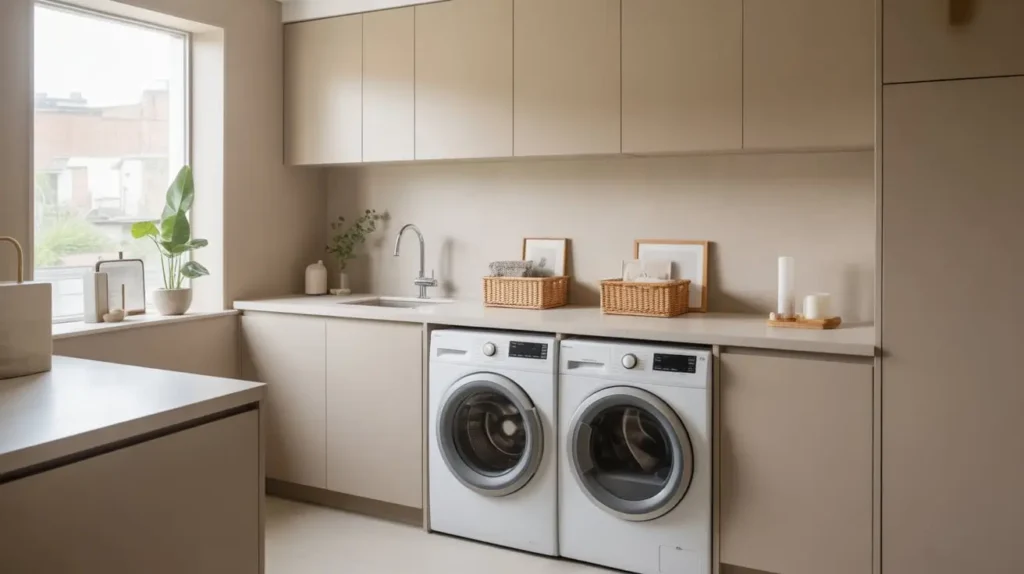
My final and perhaps most transformative idea is to build a countertop that spans over your front-loading washer and dryer. This single project can completely redefine your laundry room, turning two clunky appliances into one seamless, functional workspace.
Why It Works So Well
A countertop instantly creates a massive, usable surface. It’s a place for folding laundry, treating stains, or placing your laundry baskets. It stops you from using the tops of your machines as a dumping ground and prevents socks from falling into the dreaded gap between or behind them.
Aesthetically, it’s a huge win. A beautiful wood or laminate countertop makes the appliances look like they’re built-in, giving the entire room a polished, custom, and high-end feel. It elevates the space from a utility room to a designed room.
How to DIY It (The Gist)
This project requires careful measurement but is surprisingly straightforward.
- Build the Support: You can’t just lay a countertop on your machines; they vibrate too much. You need to build a support frame. The easiest way is to screw 1×2 cleats into the studs on the back and side walls at the desired height (just above your machines).
- Add a Front Support: For the front edge, you can either add support legs or, for a “floating” look, use a piece of 1×4 or 1×6 wood to create a front apron that connects the two side supports.
- Choose and Cut Your Top: A butcher block countertop is a beautiful and popular choice. You can also use a more affordable laminate countertop and cut it to size. Place the countertop on your support frame and secure it from below.
My Two Cents
For an extra-luxe look, consider a “waterfall” edge, where the countertop material continues down the side of the end machine to the floor. It’s a modern design touch that looks incredibly sharp. Also, before you build, pull your machines out and make sure you have easy access to your water hookups and dryer vent for future cleaning and maintenance.
You’ve Got This!
Whew, that was a lot, but are you feeling inspired yet? Your laundry room doesn’t have to be the room you avoid at all costs. With a little bit of planning and a can-do attitude, you can absolutely transform it into a space that is not only hyper-functional but also genuinely beautiful.
You don’t have to tackle all 15 of these ideas at once (unless you’re feeling particularly ambitious!). Just pick one or two that resonate with you and would solve your biggest laundry room headaches. Whether it’s finally getting a real folding surface or just organizing your detergent in pretty jars, every small change adds up.
Now, go forth and conquer that mountain of laundry. You have the ideas, you have the know-how, and you can create a laundry room that you might actually enjoy spending time in. Or at the very least, one that doesn’t make you want to run away screaming. 🙂