

Look, let’s be real for a second. Have you seen the price of outdoor Christmas decorations lately? I walked into a big-box store last week, looked at a plastic reindeer that looked like it would blow away in a stiff breeze, and almost dropped my coffee when I saw the price tag. It’s absolute highway robbery.
Why pay a fortune for something generic when you can make something way cooler, sturdier, and frankly, more charming yourself? There is a massive satisfaction in driving up to your house and seeing decorations that you built with your own two hands. Plus, your neighbors don’t need to know that your stunning porch display cost you twelve bucks and a Saturday afternoon.
We are going to walk through 15 Stunning DIY Outdoor Christmas Decorations Ideas for Charm. These aren’t just random crafts; these are the heavy hitters that actually boost your curb appeal. I’ve tried most of these, failed at a few initially, and figured out the secrets so you don’t have to mess up.
Grab your glue gun, find your work gloves, and let’s get to work.
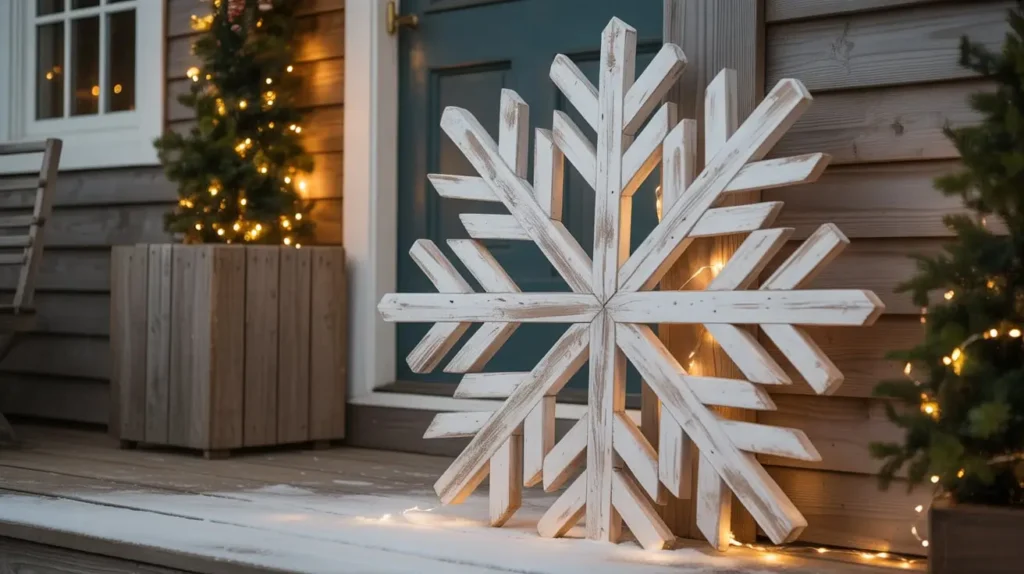
1. Rustic Wooden Snowflake Stand

I absolutely adore this project because it screams “winter wonderland” without looking tacky. If you have scrap wood lying around (and let’s be honest, who doesn’t?), you already have half the supplies.
Why This Works
This decoration works because it adds height to your porch display. Most people just put a doormat down and call it a day. Vertical interest is the secret to professional-looking decor. This snowflake stand sits beautifully next to your front door or right by the mailbox.
What You Need
- Reclaimed wood, pallet slats, or simple 1×4 boards.
- Wood glue and nails (a brad nailer makes this a breeze).
- White paint or white stain.
- Sandpaper.
Let’s Build It
Start by cutting your wood into a simple “X” shape. Then, add a vertical board right down the center. You now have a six-point star base.
Now comes the fun part. Cut smaller pieces of wood to create the “V” shapes at the end of each arm. Don’t stress about perfection here. If the cuts are slightly uneven, it just adds to the rustic charm. Once you nail everything together, give it a messy coat of white paint. You want the wood grain to show through, so don’t go crazy with coverage.
Sand down the edges to distress it further. Prop it up against the wall or build a simple kickstand for the back. It looks like something you bought at a high-end boutique, but it cost you practically nothing.
2. DIY Tomato Cage Christmas Tree
Okay, seriously, what do you do with tomato cages in the winter? They usually just sit in the shed tangling up with everything else. This idea gives them a second life and looks surprisingly elegant at night.
The Genius Behind It
You get the perfect conical tree shape without constructing a frame from scratch. The metal cage provides a sturdy base that anchors well into the ground or a pot.
Materials List
- Wire tomato cage (any size).
- Artificial garland (the non-lit kind works, but pre-lit is a game changer).
- Zip ties (buy the green ones so they hide well).
- A funky tree topper (star, bow, or finial).
The Process
Flip the tomato cage upside down so the wide rings are at the bottom and the stakes are pointing up. Gather the stakes at the top and zip tie them together to form a point. This creates that classic evergreen shape.
Take your garland and start wrapping from the top down. Secure it with zip ties every few inches. Pull the garland tight. You do not want sagging branches when the snow hits. If your garland looks a bit thin (we’ve all bought the cheap stuff, no judgment), just double wrap it.
Once you cover the cage completely, add your lights if the garland isn’t pre-lit. Stick this “tree” into a soil-filled urn on your porch, or use landscape staples to pin it directly to your lawn. It looks fantastic in groups of three at varying heights.
3. Oversized Porch Ornament Ball

You have definitely seen these huge, glossy ornaments in expensive catalogs. They look like giant glass baubles, but they cost an arm and a leg. We are going to make unbreakable ones using kids’ toys.
Why I Love It
It brings a pop of color that is visible from the street. Plus, since they are made of rubber, they won’t shatter when the delivery driver accidentally kicks one.
What You’ll Need
- Large rubber playground balls (the bouncy kind from the dollar store).
- Spray paint (red, silver, gold, or glitter).
- Plastic deli containers or tuna cans (clean them out, obviously).
- Wire coat hanger or thick wire.
- Super glue or heavy-duty epoxy.
Making the Magic
Spray paint the rubber ball in your chosen color. Do short bursts to avoid drips. You might need two or three coats to cover the original neon pattern on the ball.
While that dries, paint your tuna can or deli cup silver or gold. This acts as the ornament “cap.” Poke a hole in the center of the can and loop a piece of wire through it to look like the hook.
Glue the cap onto the ball. Once it dries, you have a massive, stunning ornament. Scatter these on your lawn, hang them from a sturdy tree limb, or pile them in a corner of your porch. They look incredibly high-end for being made of literal trash and toys.
4. Pallet Wood “JOY” Yard Sign
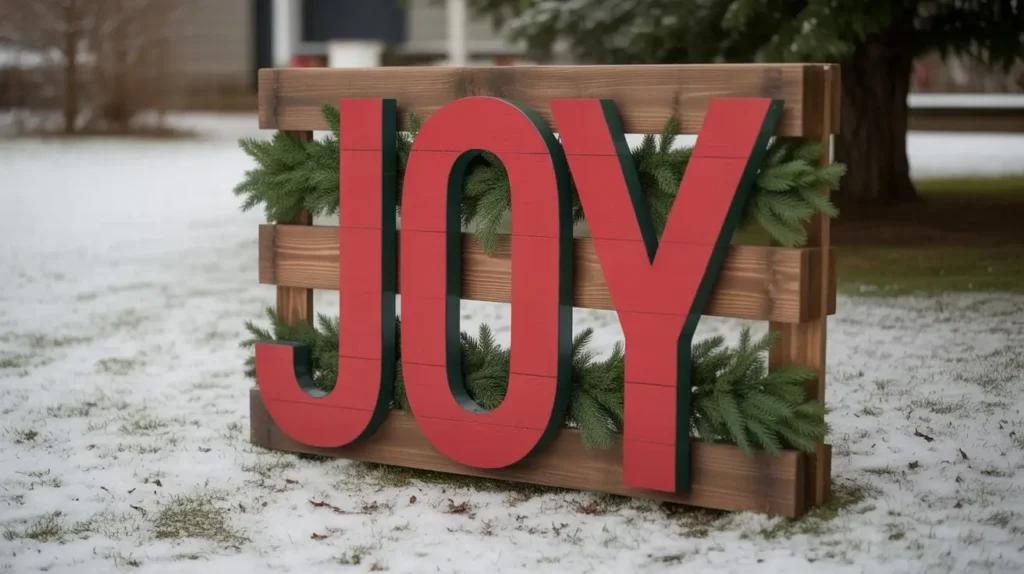
If you have a pallet, you have a project. Pallet wood is the holy grail of DIY outdoor Christmas decorations ideas. It weathers well and takes paint beautifully.
The Concept
We aren’t rewriting history here; we are just making a bold statement. A large “JOY” or “NOEL” sign leaning against the house creates a focal point.
Supplies
- One wooden pallet (or 3-4 wide planks connected on the back).
- Red and white exterior paint.
- Stencils (or a steady hand).
- Polyurethane sealer.
Instructions
Disassemble the pallet or keep it whole if you want a massive background. I prefer painting the wood boards white or staining them dark walnut first to make the letters pop.
Paint your letters in a bright, festive red. Use painter’s tape to keep your lines crisp. If you aren’t confident in your freehand skills, print out large letters on paper, cut them out, and trace them onto the wood.
Want to take it up a notch? Replace the “O” in JOY with a wreath. Screw a hook into the wood and hang a small evergreen wreath right in the middle. It adds texture and creates a 3D effect that flat paint just can’t match. IMO, this is the easiest way to look like a pro carpenter.
ALSO READ: 15 Stunning Modern Christmas Decor Ideas for Chic Homes
5. Lighted Snowman Made From Buckets
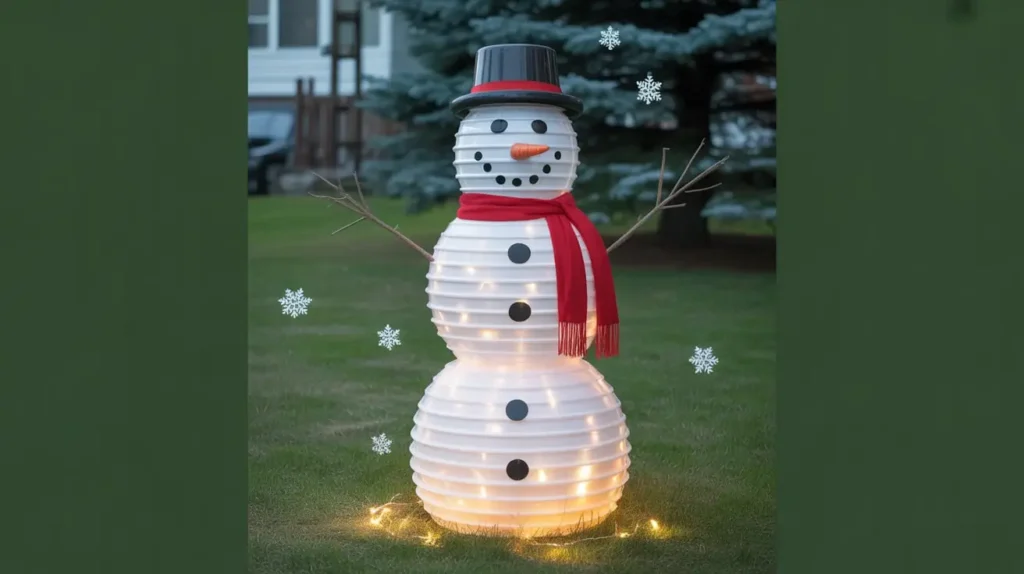
Do you live somewhere where it doesn’t snow? Or maybe you just hate the feeling of freezing wet gloves? This snowman never melts, and he lights up the night.
Why Build This?
It is adorable, durable, and stores easily because the parts nest inside each other.
The Build List
- 3 white plastic buckets (different sizes ideally, but three 5-gallon buckets work if you stack them creatively).
- Drill with a large bit.
- Christmas lights (multicolored or white).
- Black and orange paint (or felt).
- A scarf and a hat.
Assembly
Flip the buckets upside down. Drill holes all over the sides of the buckets—this allows the light to shine through. Don’t drill the bottoms, which are now the tops, because you need to stack them.
Place the lights inside the bottom bucket, run the cord through to the middle, and then to the top. Stack the buckets and glue them together with heavy-duty construction adhesive.
Paint a face on the top bucket. Add buttons down the middle bucket. Tie a scarf around the “neck” and slap a hat on top. When you plug it in, the whole snowman glows. It creates such a happy vibe on a dark winter evening.
6. Evergreen Garland Fence Wrap

Sometimes the best ideas are the simplest. If you have a fence, you have a blank canvas. Wrapping it in garland connects your entire yard to the holiday theme.
The Strategy
Don’t just drape it lazily. You need intention here.
What You Need
- Lots of garland (measure your fence first!).
- Red velvet bows (weatherproof ribbon is a must).
- Solar string lights.
- Zip ties or floral wire.
How to Execute
Start at one end of the fence. Loop the garland so it swoops down between each fence post. Consistency is key. Make sure the “swoop” is at the same depth for every section.
Secure the garland at each post with zip ties. At every connection point, attach a large red bow to hide the zip tie. Weaving solar lights into the garland ensures that your fence sparkles at night without you running extension cords across the driveway (trip hazard alert!).
It frames your property beautifully and makes the whole house feel wrapped in a hug.
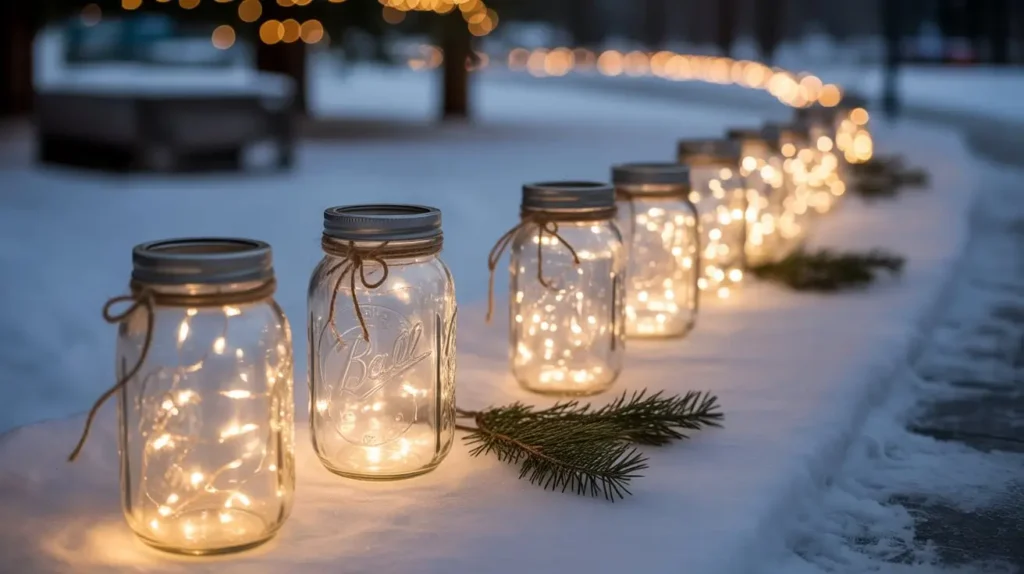
7. Mason Jar Lantern Pathway

Lighting your walkway is essential for guests, but those plastic stakes from the store break if you look at them wrong. Mason jars offer that rustic charm we are aiming for.
Why This Wins
Glass reflects light beautifully. By frosting the glass, you get a soft, diffused glow that looks magical in the snow.
Supplies
- 10-12 Mason jars (pint or quart size).
- Epsom salts.
- Mod Podge or white glue.
- Battery-operated tea lights or fairy lights.
- Shepherd’s hooks or wire.
Creating the Lanterns
Coat the outside of your jars with a layer of Mod Podge. Roll the sticky jar in a tray of Epsom salts. This creates a crystallized, icy look that glitters even when the lights are off.
Tie a piece of twine or wire around the neck of the jar to create a handle. Drop a battery-operated light inside. Do not use real candles. Real fire inside a glue-covered jar on a windy walkway is a recipe for disaster :/ .
Hang these from shepherd’s hooks lining your path, or simply set them on the stairs leading to your porch. They look like captured snowballs glowing in the dark.
8. Giant Gift Box Porch Display
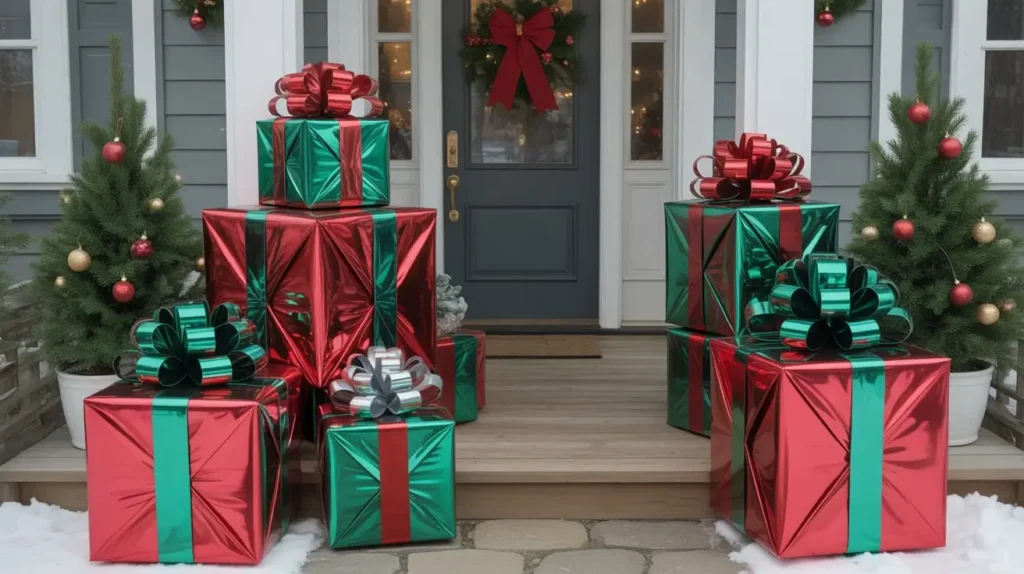
Turn your porch into Santa’s delivery zone. This is a great way to use up leftover shipping boxes from all your online shopping.
The Idea
Create a stack of “presents” that stays outside. It adds color, shape, and excitement.
Materials
- Large cardboard boxes.
- Bricks or rocks (essential!).
- Weather-resistant wrapping paper or foil paper.
- Wide ribbon and giant bows.
- Clear packing tape.
The Process
Before you wrap anything, put a brick or a heavy rock inside the box. If you skip this step, your decorations will end up in your neighbor’s yard.
Wrap the boxes completely in foil paper or plastic tablecloths (paper wrapping paper dissolves in rain). Use clear packing tape to seal every seam so water can’t get in.
Tie massive bows around them. Stack them in the corner of your porch or arrange them around your front door. Mix up the sizes and shapes. A tall skinny box next to a wide flat box looks visually interesting.
Funny side note: watch the delivery drivers get confused for a split second when they see packages already on the porch.
ALSO READ: 15 Stunning Rustic Christmas Decor Ideas for Cozy Homes
9. Candy Cane PVC Pipe Stakes
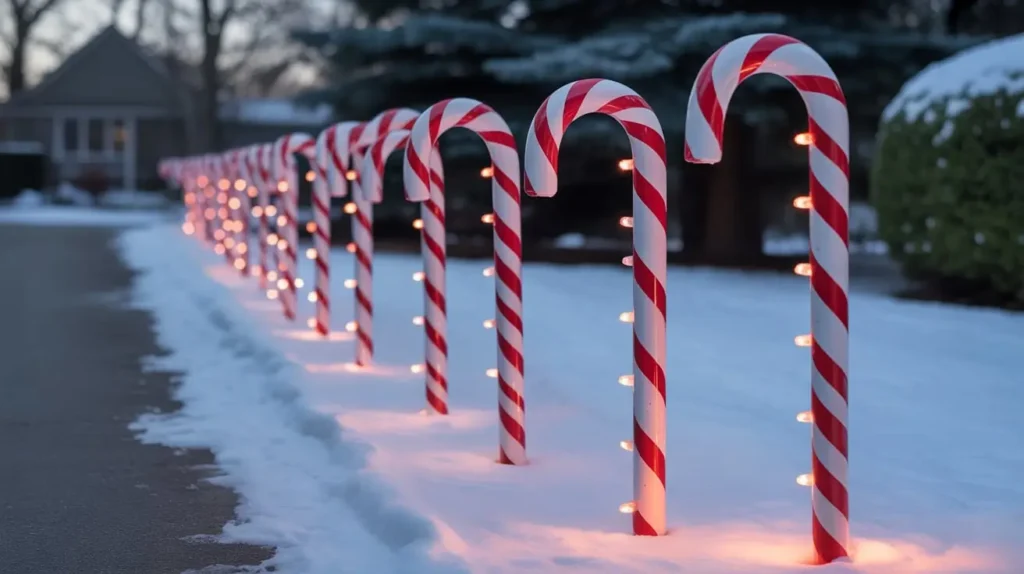
If you want that “North Pole” look, giant candy canes are the way to go. But the plastic ones you buy are hollow and flimsy. PVC pipe is tough as nails.
The Concept
We are bending plumbing supplies into festive shapes. It sounds industrial, but it looks whimsical.
Supplies
- 1-inch PVC pipe.
- PVC elbows (curved pieces).
- Red painter’s tape or red spray paint.
- White spray paint.
- Sand or rebar (for anchoring).
Fabrication
Cut your PVC pipe to your desired height (usually waist-high). Attach a curved elbow joint to the top to create the cane hook. Spray the entire thing glossy white.
Once the white paint dries, you have two options. You can wrap red painter’s tape around the pipe in a spiral to create the stripe (easiest method), or use masking tape to block off stripes and spray paint the exposed areas red (messier but more permanent).
Hammer a piece of rebar into the ground first, then slide your candy cane over it. This keeps them standing straight even in a blizzard. Line your driveway with these for a grand entrance.
10. Wooden Reindeer Porch Duo
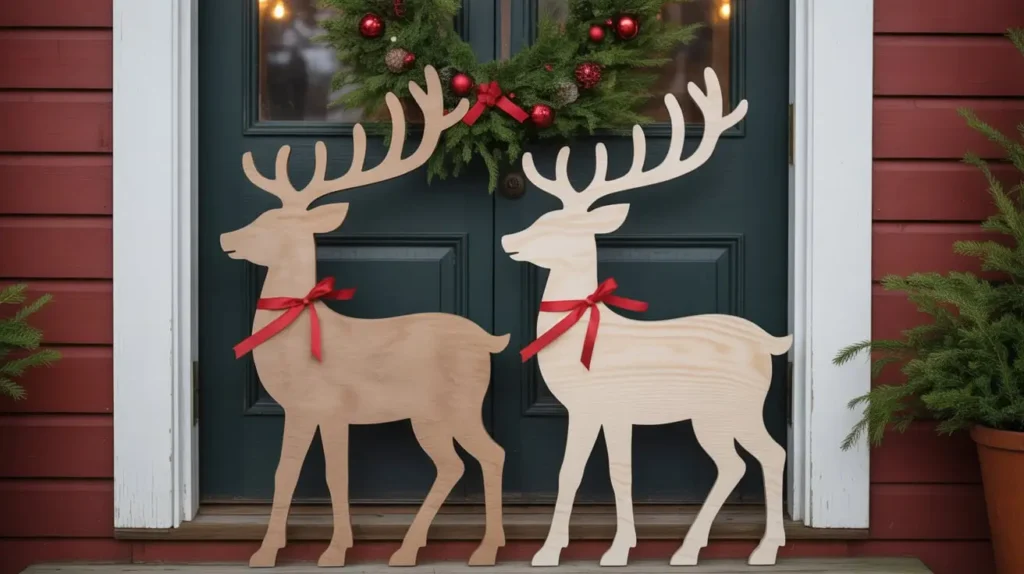
Nothing says Christmas like reindeer. Making them out of logs gives them a primitive, charming personality that plastic just can’t replicate.
Why It’s Awesome
It uses natural materials. If a branch falls off, you just go find another one. It’s eco-friendly decor at its finest.
What You Need
- Logs of varying thickness (Body: thick; Head: medium; Legs/Neck: thin).
- Drill and spade bits.
- Wood glue.
- Twigs for antlers.
- Red pom-pom for a nose (optional).
Assembly
Cut a thick log for the body. Drill four holes in the bottom for the legs and one hole in the top for the neck. Angle the leg holes slightly outward so the reindeer stands stable and doesn’t tip over.
Cut four sturdy branches for legs and jam them into the holes with some glue. Add the neck stick and attach the smaller log for the head.
Drill small holes in the head to insert twig antlers. You can leave them natural or paint a red nose on one of them. Place a pair of these—one tall, one short—by your front door. They look like they just wandered out of the forest to say hello.
11. Upcycled Tire Christmas Wreath
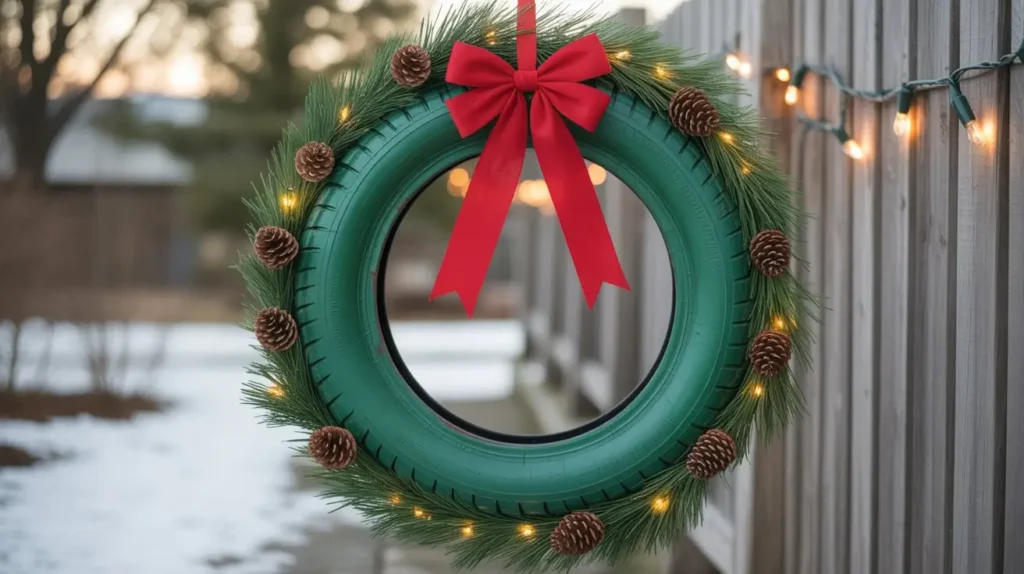
Got an old tire in the garage? Don’t pay the disposal fee. Turn it into a massive, industrial-chic wreath that makes a huge statement.
The Appeal
Standard wreaths are small. On a large garage door or a barn wall, a 12-inch wreath disappears. A tire is big, bold, and visible from down the street.
Materials
- Old car tire.
- Degreaser and scrub brush.
- Green spray paint (matte works best).
- Wide red ribbon.
- Battery-operated lights.
The Transformation
Clean the tire thoroughly. You have to get the road grease off, or the paint won’t stick (and it will stain your house). Once it’s dry and clean, coat it in green spray paint. I personally like leaving a little black showing in the treads for depth.
Wrap a massive red ribbon around the bottom or top and tie a bow. String battery-operated lights around the tire. Hang this on your garage door or lean it against a tree. It’s rugged, durable, and totally unexpected.
12. Santa Mailbox Drop-Off Station
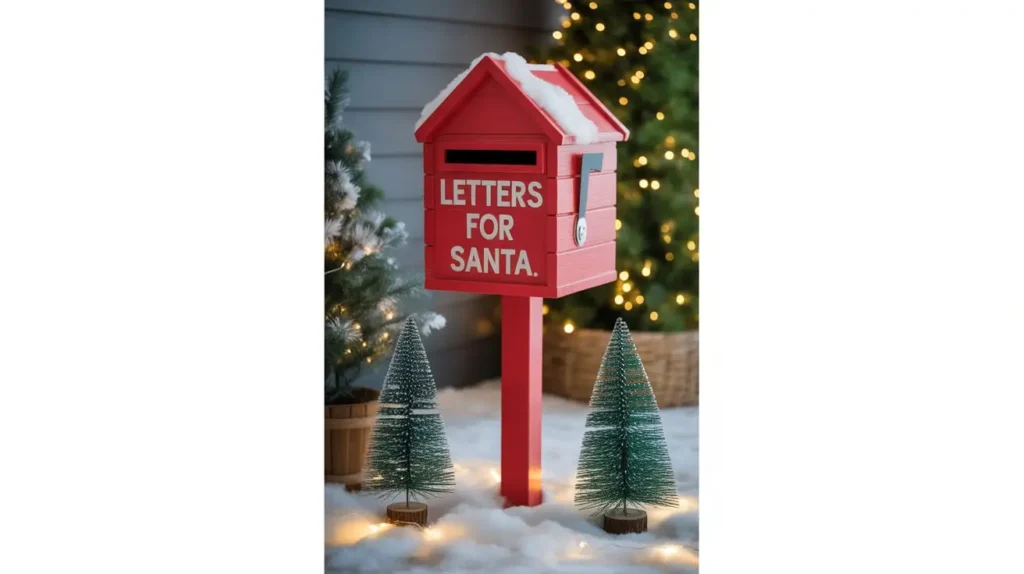
This is a massive hit if you have kids or grandkids. It transforms a boring part of your yard into an interactive experience.
The Idea
Take an old mailbox (or buy a cheap plastic one) and turn it into the direct line to the North Pole.
Supplies
- A mailbox.
- A post (4×4 wood).
- Red paint.
- Vinyl letters or stickers saying “Santa’s Mail.”
- Some fake snow or cotton batting.
How to Do It
Paint the post white (like a candy cane stripe if you’re ambitious) and the mailbox bright red. Apply your “North Pole Post” or “Santa’s Mail” lettering to the side.
Fill the base with rocks or concrete if it’s free-standing so kids don’t knock it over in their excitement. I like to add a little flag that stays up.
Encourage the neighborhood kids to drop their letters in. You (aka the elf) can retrieve them later. It adds a layer of community magic that static decorations just don’t have.
13. Illuminated Pallet Nativity Scene
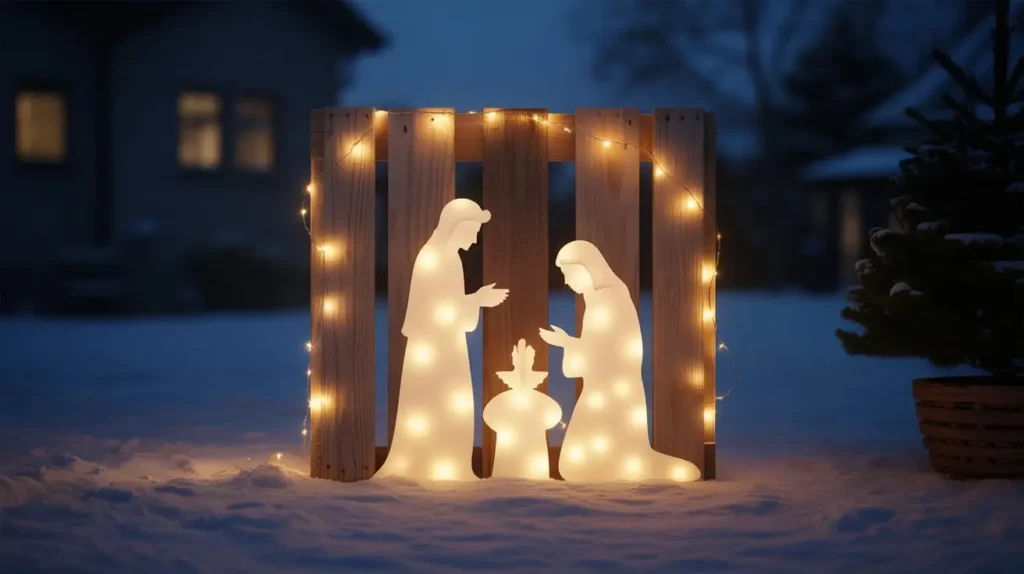
This is a more solemn and beautiful decoration that focuses on the reason for the season. Using a pallet keeps it rustic and grounded.
Why This Works
It relies on silhouettes and backlighting, which is much easier to pull off than painting detailed faces on plywood.
What You Need
- A wooden pallet.
- Jigsaw.
- Plywood or dark cardstock (if keeping it under a porch).
- A bright spotlight or string lights.
- Wood stain.
The Build
Stand the pallet on its side. You are going to attach a silhouette of the nativity scene (Joseph, Mary, Manger) to the front of the pallet. You can cut these shapes out of thin plywood painted black.
Mount the silhouette to the front slats of the pallet. Place a strong light behind the pallet. When it’s dark, the light shines through the slats, silhouetting the black figures against the glowing wood.
Top it with a wooden star. It is simple, respectful, and breathtakingly beautiful at night.
14. Snowflake Window Frame Decor
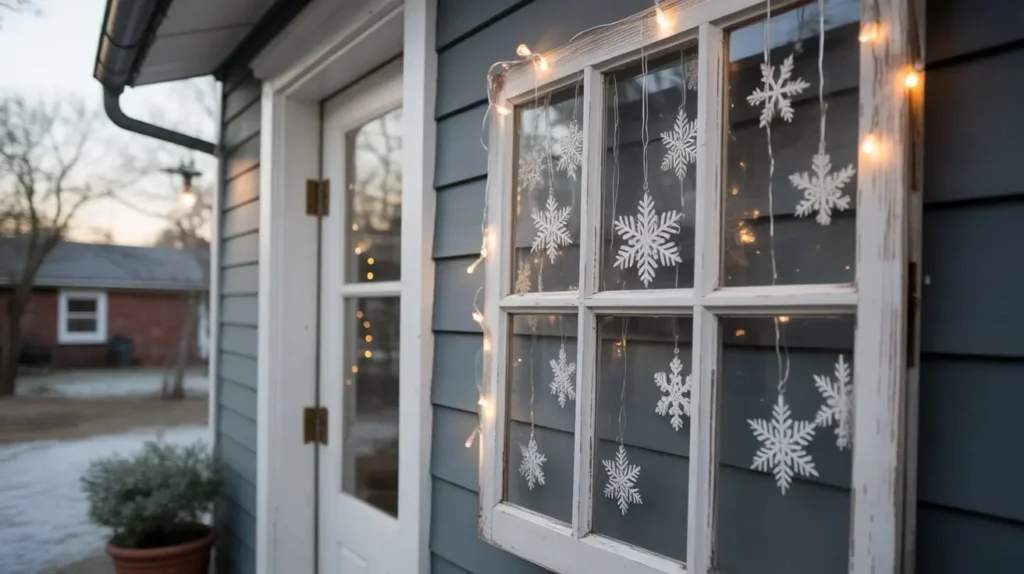
Old windows are treasure. If you see one at a flea market or on the side of the road, grab it. They make incredible frames for holiday decor.
The Concept
The window pane acts as a stage for hanging ornaments or snowflakes. It looks like you are looking into a cozy winter scene.
Supplies
- Old window sash (glass removed or intact, either works).
- Screw hooks.
- Plastic snowflake ornaments or pinecones.
- Fishing line.
- Evergreen spray for the top.
Putting It Together
Clean up the window frame. If the paint is chipping, seal it with clear coat so you don’t have lead paint flakes on your porch.
Screw small hooks into the top inside of the frame. Tie fishing line to your snowflakes and hang them at varying lengths inside the frame. The invisible line makes them look like they are floating.
Attach a swag of greenery and a bow to the top of the frame. Lean this against the wall on a bench or hang it on your siding. It adds a “homey” architectural element to the outdoors.
15. Twinkle Light Branch Bundle
Ever wondered why fancy hotels always have those tall pots with sticks in them? Because it looks elegant and costs pennies.
Why Do It?
It adds height, light, and texture. Plus, you get to go for a walk in the woods to find supplies.
Materials
- Tall, straight branches (birch is gold standard, but any stick works).
- Spray paint (white, silver, or gold).
- A tall planter or urn.
- Floral foam or dirt.
- LED string lights.
The Method
Gather your branches. Give them a quick coat of spray paint. You don’t need full coverage; just enough to catch the light.
Stick the branches firmly into the dirt or foam in your planter. Pack them tight. A sparse arrangement looks sad. You want a bundle.
Wrap the lights up and down the branches. Don’t just circle the outside; weave the lights into the center of the bundle too. When you plug this in, it looks like a pillar of fireflies. Place two of these flanking your garage or front door for an instant upgrade.
Making It All Come Together
Okay, you have the ideas. Now, a quick word of advice: don’t try to do all 15 of these at once.
If you put a tire wreath next to a pallet nativity scene next to giant rubber balls, your yard might start looking like a garage sale exploded. Pick a theme.
- Going Rustic? Choose the Reindeer (#10), the Pallet Signs (#4), and the Snowflake Stand (#1).
- Going colorful and fun? Go for the Giant Ornaments (#3), the Bucket Snowman (#5), and the Candy Canes (#9).
- Going classic elegant? The Tomato Cage Trees (#2), the Window Frame (#14), and the Branch Bundle (#15) are your best friends.
DIY outdoor Christmas decorations ideas aren’t just about saving money (though my wallet is definitely happier). It’s about putting a piece of your personality out on the lawn. It’s about standing back with a cup of hot cocoa, looking at that crooked snowman or that slightly imperfect sign, and thinking, “Yeah, I did that.”
So, what are you waiting for? The neighbors are already putting up their inflatables. Go show them how it’s done. FYI, make sure you check your extension cords for frays before you plug everything in—nobody wants a visit from the fire department on Christmas Eve!