
Let’s be real for a second. The entryway is the most abused and neglected space in our homes. It’s the official dumping ground for keys, mail, muddy shoes, and that weird tote bag you keep meaning to return to your friend. It’s less of a grand entrance and more of a chaotic pit stop. First impressions are everything, right? So what does your entryway say about you? “This person is barely holding it together”? Yikes.
I’ve been there. My own foyer used to be a sad, beige tunnel of despair. It was the first thing I saw when I got home and the last thing I saw when I left, and it did absolutely nothing for my mood. One day, I just snapped. I decided that this high-traffic, high-visibility wall deserved some actual love. It needed a personality transplant, STAT.
So, if you’re staring at your own bland entryway wall and feeling a similar sense of existential dread, you’re in the right place. We’re going to transform that forgotten space into a stunning first impression. Forget boring. Forget generic. I’m here to walk you through 15 unique entryway wall decor designs that are guaranteed to level up your home makeover game. Let’s make your entrance unforgettable for all the right reasons.
1. Oversized Round Mirror Wall
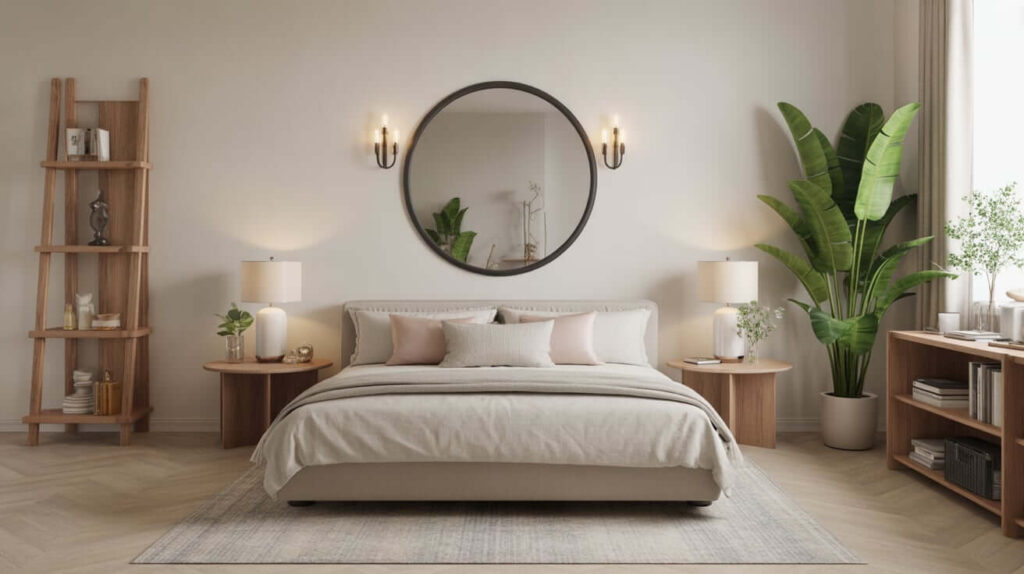
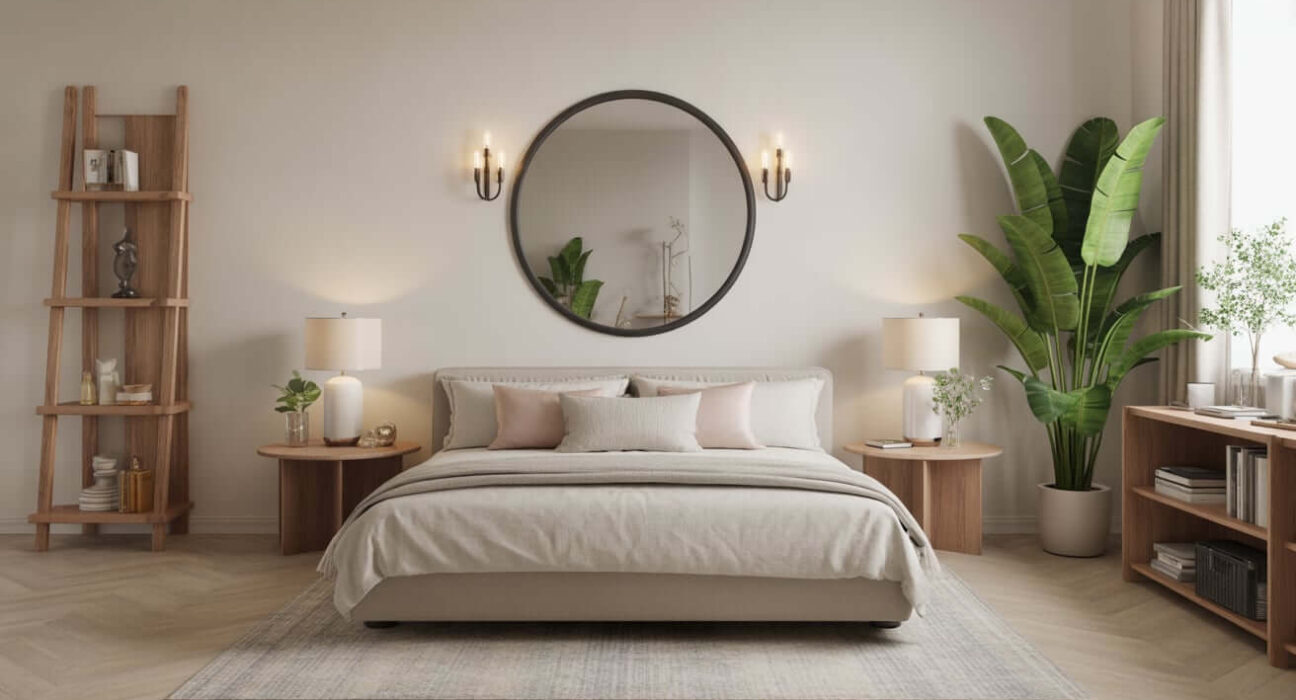
You’ve probably seen this one on Pinterest, and for good reason. An oversized round mirror isn’t just a decor trend; it’s a design miracle worker. A big mirror is the oldest trick in the book for making a small space feel larger and brighter, and I am here for it. It bounces light around like a disco ball in a sunbeam, instantly opening up even the pokiest of entryways.
Why a round mirror, specifically? Rectangles and squares can feel a bit rigid and formal. A round mirror softens the hard lines of doorways and walls, adding a touch of organic, fluid grace. It feels less like a functional object and more like a piece of art. Plus, it gives you one last chance to check if you have spinach in your teeth before you bolt out the door. We all need that.
How to Nail the Look
The key here is “oversized.” Don’t be shy. Go for a mirror that’s at least 30 inches in diameter, and if you have the wall space, push it to 40 or even 50 inches. You want it to be a true statement piece, not an afterthought.
- Framing Matters: A thin, black metal frame offers a modern, industrial vibe. A chunky, rustic wood frame leans into farmhouse chic. A brass or gold frame adds a touch of glam. Choose a frame that complements your home’s overall aesthetic.
- Placement is Everything: Hang it directly over a slim console table or a simple entryway bench. The ideal height is to have the center of the mirror at about eye level (around 60 inches from the floor). This ensures it’s both functional and visually balanced.
I once tried to hang a 45-inch round mirror by myself. Let’s just say it involved a lot of sweat, a few choice words, and a near-death experience for my favorite lamp. My advice? Always use a buddy and a stud finder. Seriously. Don’t be a hero.
2. Floating Ledge Gallery Display
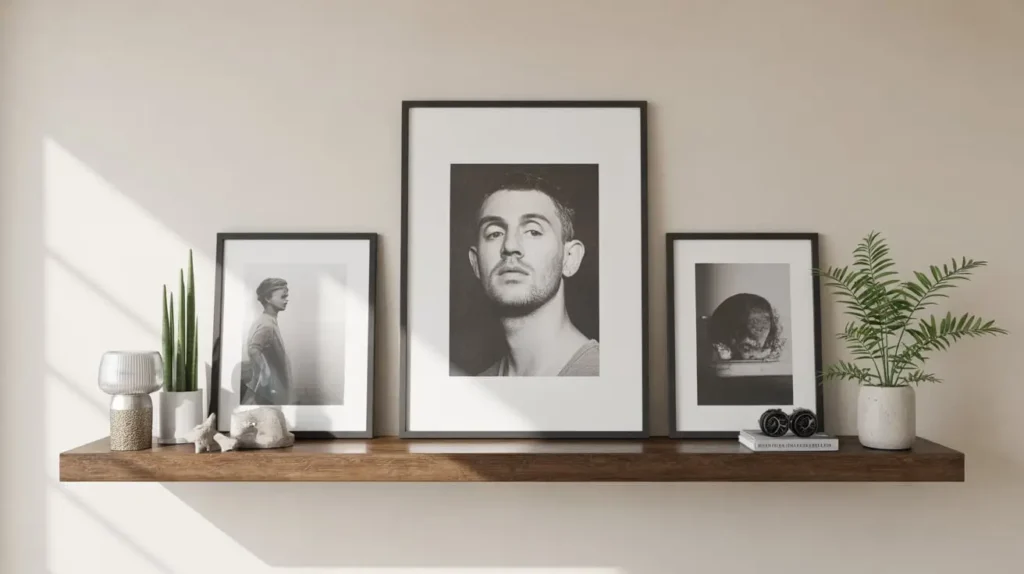
Tired of the traditional, perfectly aligned gallery wall? Me too. It can feel a bit… sterile. Enter the floating ledge gallery display. This approach is more relaxed, versatile, and frankly, a lot more fun. It allows you to create a curated collection of art, photos, and objects without committing to a hundred nail holes.
Floating ledges are super slim shelves that have a small lip on the front to keep your frames from sliding off. You can layer frames, overlap them, and mix in other little treasures. The best part? You can change your display whenever the mood strikes without any tools. Feeling festive for the holidays? Swap in some seasonal art. Got a new family photo? Just pop it in front of the old one.
Creating a Dynamic Display
The secret to a great ledge display is variety. Don’t just line up a row of identical 8×10 frames. Where’s the personality in that?
- Mix Frame Sizes and Orientations: Combine large statement pieces with smaller frames. Mix vertical and horizontal orientations. This creates visual rhythm and keeps the eye moving.
- Layer, Layer, Layer: This is what makes it look professionally styled. Place larger frames in the back and lean smaller ones in front. It adds depth and a casual, collected-over-time vibe.
- It’s Not Just for Photos: Add a small succulent, a tiny vase with a single stem, a cool rock you found on a hike, or a favorite postcard. These little objects break up the flatness of the frames and inject your personality.
I love using two or three ledges, staggered on the wall. One long ledge can look a bit static, but staggering them at different heights adds a dynamic, modern feel.
3. Minimalist Wood Slat Accent Wall
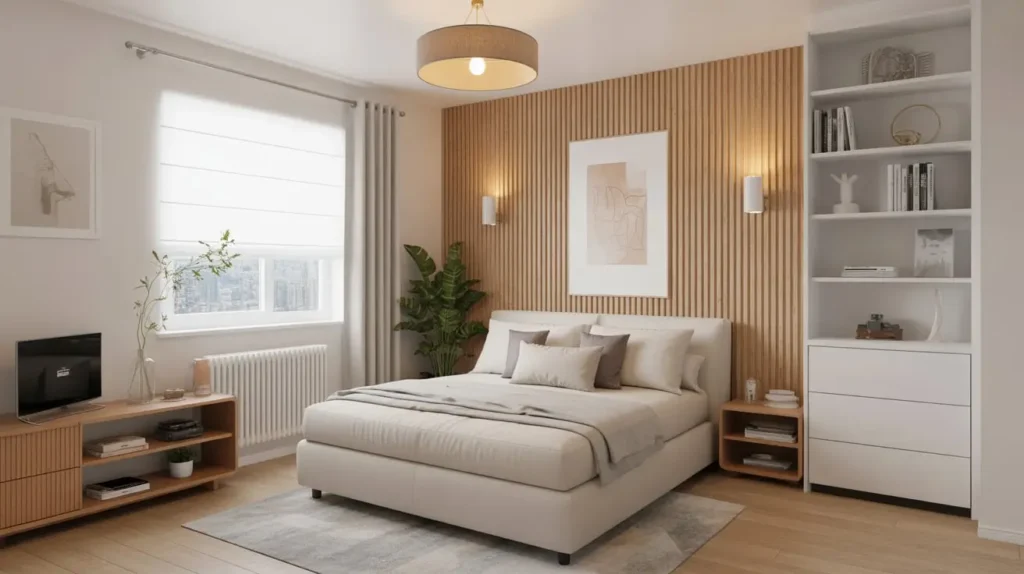
Okay, if you really want to make a high-impact architectural statement, the wood slat wall is your answer. This design brings incredible texture, warmth, and a sophisticated, spa-like quality to your entryway. It’s a bit more of a project than just hanging a picture, but the payoff is huge. You’re essentially creating a permanent piece of art.
A wood slat wall consists of narrow vertical strips of wood installed with small gaps in between. This creates a beautiful linear pattern that adds depth and a sense of height to the room. It’s a hallmark of Japandi and modern Scandinavian design, known for its clean lines and natural materials.
Getting the Slat Look
You can go the full DIY route or buy pre-made panels. IMO, the pre-made panels are a lifesaver if you’re not super confident with a saw.
- Choose Your Wood: Oak and walnut are popular choices for their rich tones and beautiful grain. For a lighter, more airy feel, consider maple or birch. You can leave the wood natural, stain it, or even paint it a bold color (though natural wood is where the magic is, if you ask me).
- Spacing is Key: The gap between the slats is just as important as the slats themselves. A gap that’s about the same width as the slat itself is a good rule of thumb for a balanced look.
- Installation: The slats are typically mounted on a backer board (often painted black to make the gaps pop) or installed directly onto the wall. Use a level for every single slat. An uneven slat will throw off the entire look and haunt your dreams.
This is a fantastic solution for a long, narrow hallway. The vertical lines draw the eye upward, making the ceiling feel higher and the space less confined.
4. Rustic Coat Hook Feature Wall
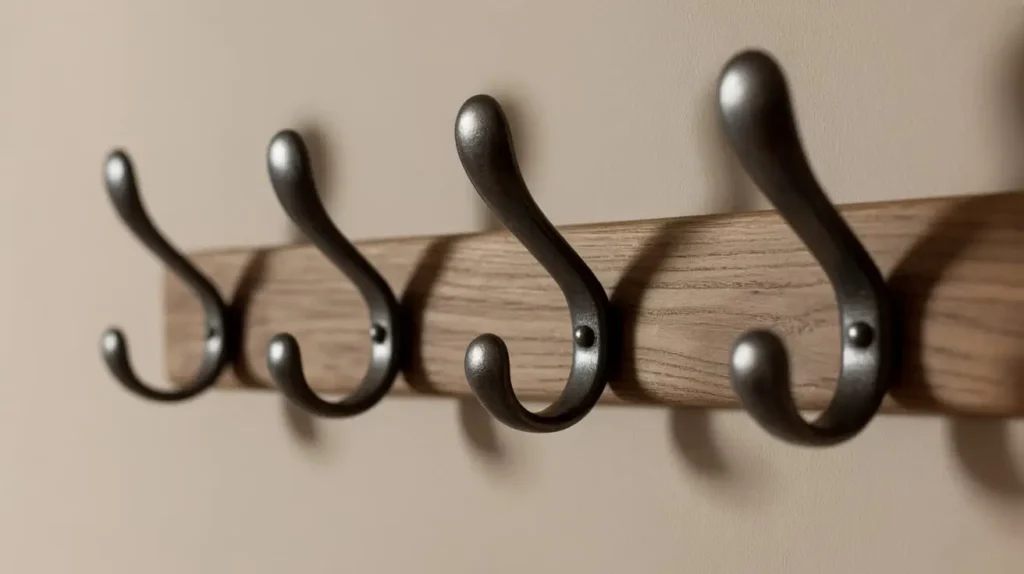
Let’s talk function. An entryway needs a place to hang coats. But who says it has to be a boring, clunky coat rack shoved in a corner? Turn that necessity into a design feature with a rustic coat hook wall. This is a practical, charming, and endlessly customizable idea.
Instead of a few hooks screwed randomly into the wall, you create a dedicated panel or zone for them. This looks intentional and stylish. Think a beautiful piece of reclaimed barn wood mounted horizontally on the wall, with a series of sturdy, cast-iron hooks. It’s functional art.
Beyond the Basic Hook
The beauty of this idea is in the details. You can tailor it perfectly to your style.
- The Backboard: This is your canvas.
- For a farmhouse vibe, use a distressed piece of wood or shiplap.
- For a modern rustic look, a smooth, sleek piece of live-edge walnut is stunning.
- For an industrial feel, you could even use a piece of metal or a dark-stained plank.
- The Hooks: Don’t skimp here. The hooks are the jewelry of the piece. Look for unique designs—vintage-inspired iron, sleek and modern brass, or even quirky animal shapes for a touch of whimsy.
A word of warning: a coat hook wall can quickly become a “coat monster” if you let it. My rule is one hook per family member, plus one for a guest. This forces you to actually put your coats away in the closet and keeps the feature wall from being completely buried. See? Design can enforce good habits!
Read Also 15 Refreshing Entryway Bench Decor Looks for Updated Homes
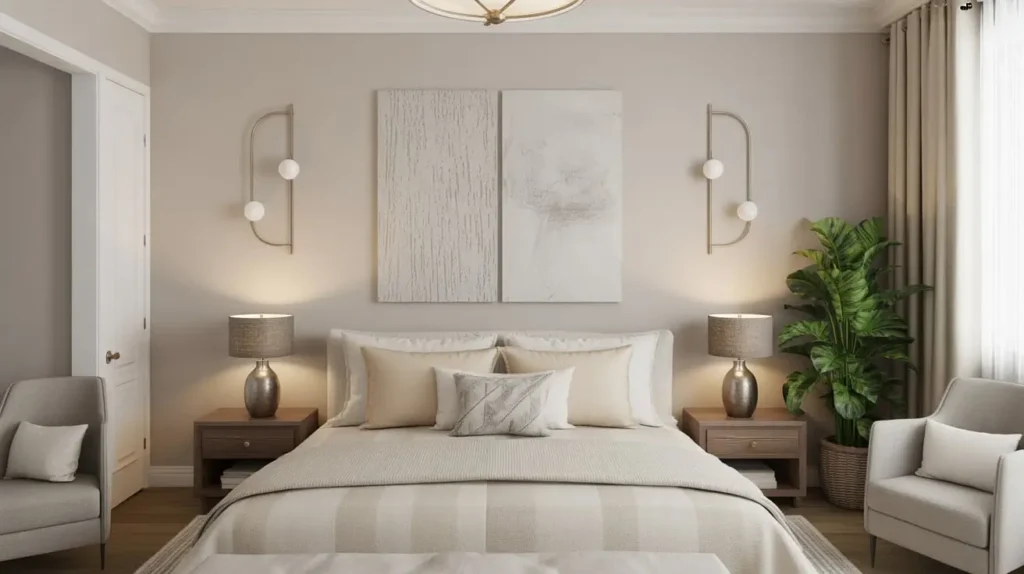
5. Statement Wall Sconce Pairing
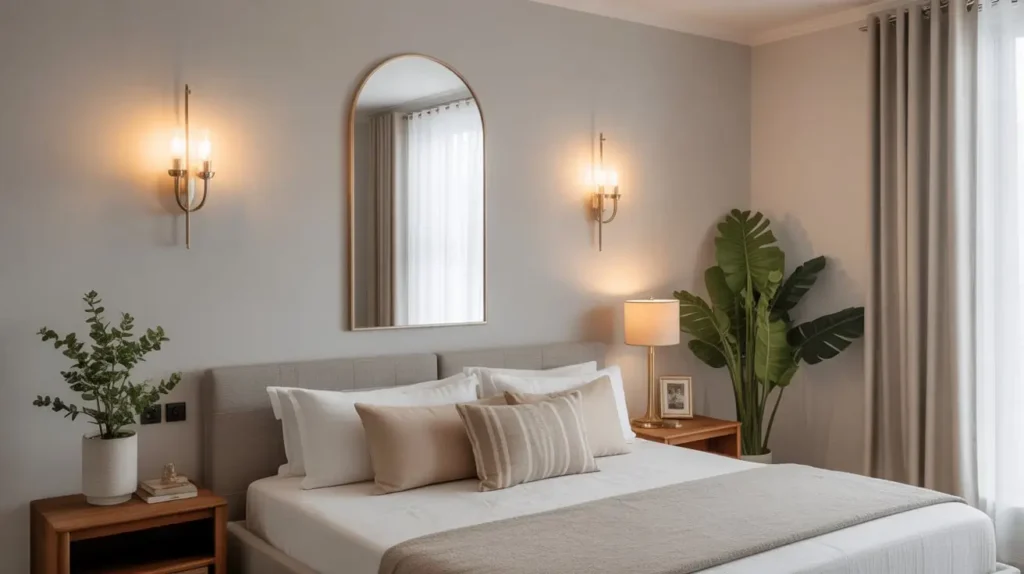
Lighting can make or break a space, and the entryway is no exception. Ditching that sad, flush-mount “boob light” on the ceiling for a pair of dramatic wall sconces is a major upgrade. Sconces add layers of light, creating ambiance and highlighting your wall decor.
Think of sconces as wall jewelry. They can flank a mirror, a piece of art, or even a doorway. A symmetrical pair creates a sense of balance and formality, which is perfect for an entryway. You’re telling your guests, “Yes, I have my life together. Welcome.”
Choosing the Right Sconces
The style of your sconces should echo the overall feeling of your home.
- Modern and Minimalist: Look for sleek, sculptural designs with clean lines and metallic finishes like black or brass.
- Traditional and Elegant: Classic lantern-style or candelabra-inspired sconces are timeless.
- Industrial Chic: Think exposed bulbs, dark metal, and utilitarian shapes.
Pro-Tip: Pay attention to the direction of the light. Uplighting sconces cast a soft, ambient glow, making the space feel taller. Downlighting sconces are more task-oriented, perfect for illuminating a console table where you drop your keys. I personally love sconces that cast light both up and down for the best of both worlds.
Hiring an electrician is the safest bet for installation, but if you’re feeling brave, you can find plug-in versions that don’t require any hardwiring. No excuses!
6. Slim Floating Shelf Styling

What if you don’t have room for a full console table but desperately need a spot to drop your keys and mail? The slim floating shelf is your best friend. This minimalist solution provides just enough surface area without eating up precious floor space, making it ideal for narrow hallways and small foyers.
A single, chunky floating shelf made of reclaimed wood or a sleek, painted one can look incredibly chic. It’s less about storage and more about creating a styled “moment.” You’re not loading this thing up; you’re curating it.
The Art of the Shelfie
Styling a single shelf is a fun design challenge. The goal is to make it look effortless and beautiful, not cluttered.
- The Trio Rule: A great starting point is to style in threes. For example: a small piece of leaning art, a beautiful catch-all bowl for keys, and a tiny plant. This creates a balanced, visually pleasing vignette.
- Vary Heights: Use objects of different heights to create interest. A tall, skinny vase next to a low, wide bowl and a medium-sized framed photo works beautifully.
- Add Life: A small plant or a few stems of eucalyptus in a vase is a must. It brings life, color, and texture to the arrangement. Even a high-quality faux plant works wonders if you, like me, have a history of botanical homicide.
I love to hang a round mirror just above the shelf to complete the look. It creates a perfect little station for that final once-over before you leave the house.
7. Woven Basket Wall Arrangement
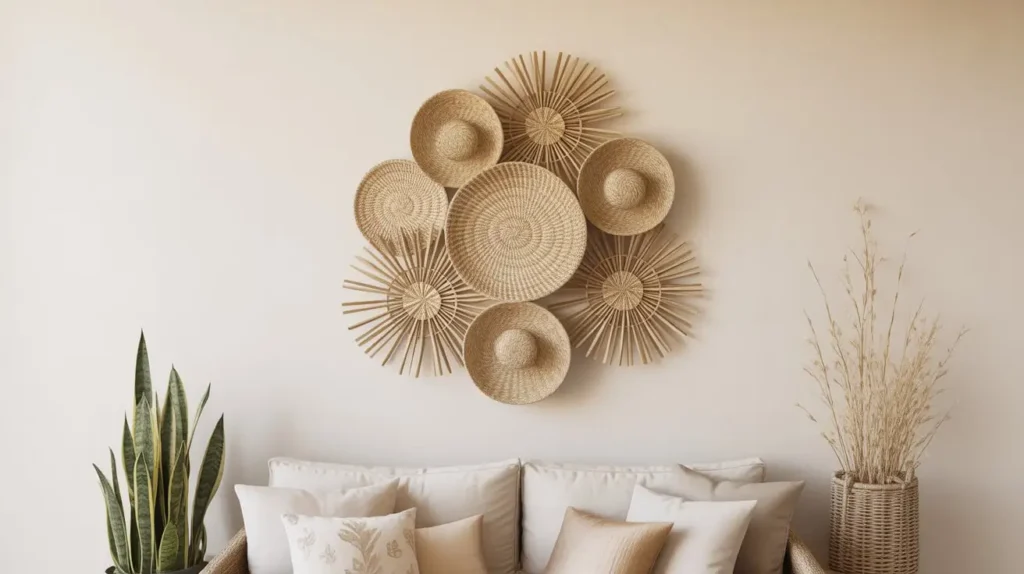
For a dose of texture, warmth, and bohemian flair, nothing beats a woven basket wall. This is such a creative and budget-friendly way to fill a large, empty wall. You can find beautiful, shallow decorative baskets at thrift stores, flea markets, and home decor shops.
The idea is to group a collection of different-sized, -patterned, and -textured baskets into a gallery-style arrangement. The natural fibers add an organic, earthy element that feels incredibly welcoming and cozy—exactly the vibe you want for an entryway.
How to Create Your Basket Gallery
It might look random, but a good basket wall is thoughtfully planned.
- Gather Your Collection: Start collecting baskets. Look for a variety of sizes, from small 6-inch ones to large 20-inch ones. Mix in different weaves, patterns, and even some with color. A common color palette (like black, tan, and cream) helps tie them all together.
- Plan Your Layout: Before you put a single nail in the wall, lay your baskets out on the floor. Arrange and rearrange them until you find a composition you love. Start with the largest basket as your anchor point and build out from there.
- Hang Them Up: Use small nails to hang the baskets. Most are light enough that you won’t need heavy-duty anchors. Just slip the nail head through the weave in the back of the basket. Easy peasy.
This look is perfect for filling that awkward, tall wall space above a staircase in a split-level entryway.
8. Modern Metal Grid Organizer

If your style leans more urban, industrial, or just plain practical, a metal grid organizer is a fantastic and functional choice. These simple wire grids are incredibly versatile and can be customized to fit your exact needs. They offer a cool, graphic element to the wall while also serving as a command center for your life.
You can use clips to hang photos, reminders, and important mail. Add-on accessories like small shelves and hanging cups are perfect for holding keys, pens, sunglasses, and even a small plant. It’s like a mood board you can actually interact with.
Making the Grid Work for You
This isn’t just for dorm rooms anymore. A well-styled grid can look incredibly sophisticated.
- Go Big: A single small grid can look a bit lost. Opt for a large one or use two or three side-by-side to fill the wall and make a real statement.
- Choose a Finish: Black is classic and graphic. Gold or brass adds a touch of glam. White blends in for a more subtle look.
- Curate, Don’t Clutter: The danger here is the same as the coat hook wall—it can get messy. Be intentional about what you display. Mix functional items (like your keys) with decorative ones (like a cool postcard or a sprig of dried greenery). A little bit of negative space is your friend.
This is the perfect solution for anyone who needs visual reminders but wants to do it in style. It keeps your important stuff off the kitchen counter and gives it a designated, stylish home.
9. Framed Botanical Art Trio
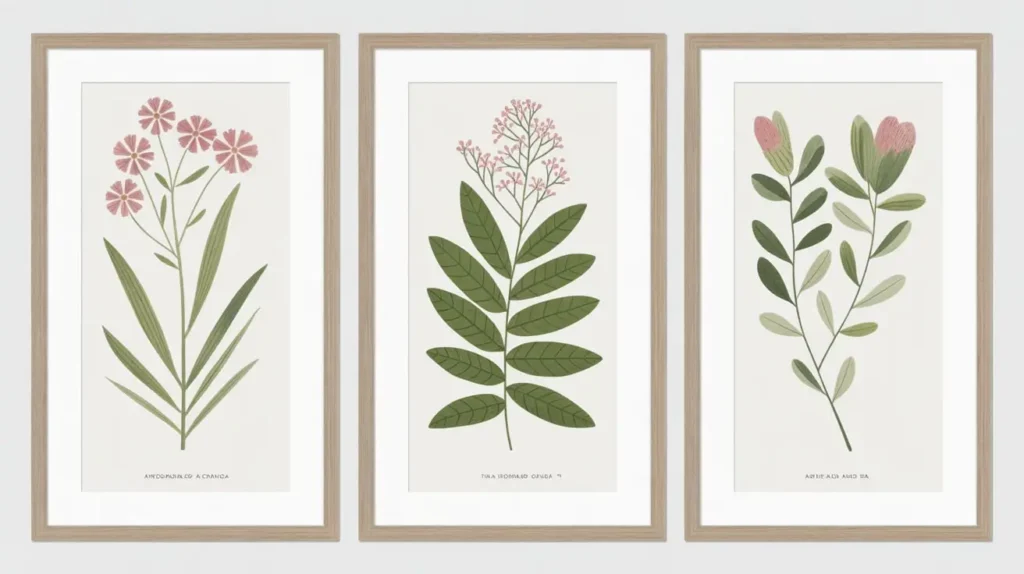
Bringing the outdoors in is always a good idea. The biophilic design trend is all about connecting with nature, and what better place to do that than in your entryway? A set of three framed botanical prints is a classic, elegant, and serene way to decorate your wall.
This look is incredibly versatile. It can feel traditional with vintage-style scientific illustrations of ferns or modern with minimalist, graphic leaf prints. It adds a touch of life and color without the responsibility of keeping an actual plant alive.
Creating a Cohesive Trio
The key to making a trio of prints work is consistency.
- Matching Frames: Use identical frames for all three prints. This is non-negotiable. It’s what makes them look like a cohesive set rather than a random collection. Simple black, white, or natural wood frames work best.
- Consistent Style: The prints themselves should share a similar style and color palette. Whether they are detailed sketches, simple silhouettes, or vibrant watercolors, they should look like they belong together.
- Perfect Spacing: Hang them in a neat row, either horizontally or vertically. Use a level and a tape measure to ensure the spacing between each frame is exactly the same. A 2-3 inch gap is usually perfect.
This is a foolproof way to add a touch of sophistication. It’s calm, it’s beautiful, and it will never go out of style.
Read Also 15 Stunning Narrow Entryway Decor Ideas for Small Spaces
10. Textured Wall Panel Design

Want to add some “wow” factor with pure texture? 3D wall panels are the answer. These panels come in a huge variety of materials and patterns—from wavy and geometric designs to patterns that mimic rough stone or intricate woodwork. They turn a flat, boring wall into a sculptural feature.
When the light hits these panels, it creates beautiful shadows and highlights that change throughout the day. It’s a dynamic and incredibly modern way to add depth and interest without adding a lot of color or clutter. It’s all about that tactile, sensory experience.
Things to Consider
This is a more permanent installation, so it’s worth thinking through.
- Material: Panels come in MDF, PVC, plant fiber, and more. Plant fiber panels are lightweight and paintable, giving you endless color options. PVC is durable and water-resistant, great for high-traffic areas.
- Pattern: Choose a pattern that fits your home’s scale and style. A large-scale, bold pattern works well on a big wall, while a more subtle, smaller pattern is better for a compact space.
- Installation: Most panels are installed with construction adhesive. It’s a doable DIY project, but it requires precision. You have to make sure the seams line up perfectly. Again, a level is your best friend.
I’d recommend using these panels on a single accent wall. Covering the entire entryway might feel a bit overwhelming, but one feature wall covered in a stunning textured design is pure architectural drama.
11. Vintage Entryway Wall Collage

For those of us with an old soul, a vintage collage is a beautiful way to tell a story. This is the opposite of the minimalist approach. It’s about creating a rich, layered, and deeply personal display that feels like it has been collected over a lifetime.
Think a mix of antique mirrors with foxed glass, old oil paintings in ornate gold frames, vintage family photos in sepia tones, and maybe even a few quirky objects like antique keys or a small set of antlers.
The Art of the Curated “Clutter”
This look is often called “cluttercore,” but a successful vintage collage is anything but random. It’s a carefully curated chaos. 🙂
- Find a Common Thread: To keep it from looking like a garage sale exploded on your wall, find a unifying element. This could be a color palette (e.g., moody tones and metallics), a theme (e.g., botanical or nautical), or a specific era.
- Mix Shapes and Sizes: The variety is what makes it interesting. Combine oval frames, small square ones, large rectangular pieces, and even frameless mirrors.
- Lay It Out First: Just like with the basket wall, plan your arrangement on the floor. This is crucial for a collage. Start with your largest piece in the center or slightly off-center and build around it. Aim for consistent spacing between the items.
This style is not for everyone, but if you love history, storytelling, and one-of-a-kind finds, it’s a truly magical way to greet your guests.
12. Hanging Macrame Accent Wall
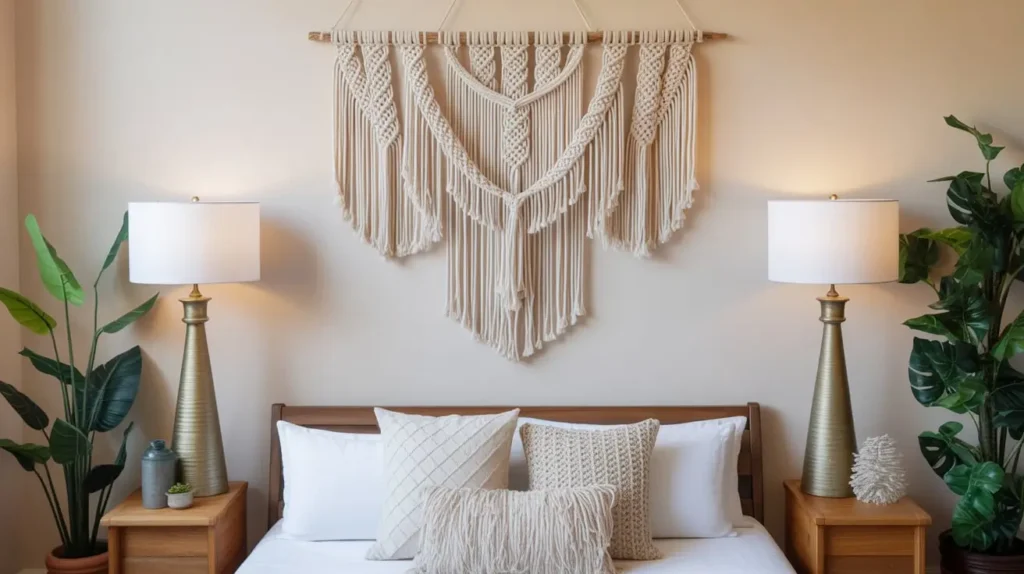
Channel your inner 70s free spirit with a beautiful macrame wall hanging. This isn’t the dusty, drab macrame from your grandma’s attic. Modern macrame is chic, textural, and a stunning way to add a soft, handmade touch to your entryway.
A large, intricate macrame piece can serve as the single focal point on a wall. It adds incredible texture and a sense of calm, bohemian artistry. It’s a softer alternative to a painting or a print and works wonders to warm up a modern, minimalist space.
Choosing Your Woven Wonder
- Size Matters: Just like with the round mirror, go for a piece that makes a statement. A small macrame hanging can get lost in an entryway. Look for something wide and long that can anchor the wall.
- Consider Color: While most macrame is a natural cream or white color, you can find pieces with dip-dyed ends or woven with colored rope. A touch of black, terracotta, or dusty blue can tie the piece into your home’s color scheme.
- DIY or Buy?: Macrame is a very popular DIY craft right now. If you’re feeling crafty, you can find tons of tutorials online to make your own custom piece. If not, Etsy is a treasure trove of incredible handmade macrame art.
I love hanging a macrame piece on a beautiful piece of driftwood for an extra dose of natural, coastal charm.
13. Sculptural Wall Art Statement

Sometimes, one single, incredible piece is all you need. A large-scale sculptural wall art piece can be a showstopper. This is less about decor and more about installing a piece of fine art. It shows confidence and a sophisticated eye.
What do I mean by sculptural art? Think 3D pieces that have form and depth. This could be a series of metal discs, a flowing wooden carving, or an abstract ceramic installation. It’s something that pops off the wall and commands attention.
Finding “The One”
This is a very personal choice, like picking a tattoo.
- Material is Message: The material says a lot. Polished metal is sleek and modern. Carved wood is warm and organic. Ceramic is earthy and artistic.
- Scale and Proportion: The piece should be proportionate to your wall. Too small, and it will look insignificant. Too large, and it will overwhelm the space. Measure your wall before you start shopping.
- Lighting is Crucial: Good lighting is essential to show off a 3D piece. A spotlight from the ceiling or a picture light mounted above the art will create shadows that accentuate its form.
This is an investment piece, but it’s one that will define your entryway and set the tone for your entire home.
14. Farmhouse Chalkboard Wall Setup

Practical, playful, and endlessly changeable—the chalkboard wall is a modern farmhouse staple for a reason. It’s a fantastic way to create an interactive and personal entryway. You can write welcome messages for guests, leave reminders for your family, or let your kids (or you!) doodle a masterpiece.
You don’t have to paint an entire wall. You can buy a large, framed chalkboard or create your own with a piece of plywood and some chalkboard paint. Mounting it in the entryway creates an instant, charming command center.
Making it Farmhouse Chic, Not Classroom Drab
- The Frame is Everything: A chunky, rustic wood frame is what gives it that signature farmhouse look. A distressed white or warm-stained wood frame works perfectly.
- Add a Ledge: Install a small ledge at the bottom of the chalkboard to hold the chalk and an eraser. This is both practical and adds to the look.
- Practice Your Penmanship: Okay, maybe not practice, but using a mix of fonts and simple drawings can elevate the look. Look up “chalkboard art” for inspiration. My handwriting is a disaster, so I often use stencils or just stick to simple, all-caps block letters. No shame in that game.
Pair it with a few galvanized metal buckets for mail and a simple bench, and you’ve got a picture-perfect modern farmhouse entryway.
15. Mixed Material Wall Decor Combo
Can’t decide on just one idea? Why not combine a few? A mixed-material combo is for the bold designer who isn’t afraid to play. This is about layering different textures and materials to create a look that is uniquely you.
For example, you could pair the sleekness of a metal-framed mirror with the warmth of a wood slat accent. Or hang a soft macrame piece next to a rustic coat hook board. The key is to create balance and harmony, even with contrasting elements.
The Formula for a Perfect Mix
- Anchor Piece: Start with one large anchor piece. This could be your oversized mirror, a wood slat panel, or a piece of sculptural art.
- Functional Element: Add a functional piece, like a slim floating shelf or a set of stylish hooks.
- Textural Touch: Bring in a soft, textural element. This could be a woven basket, a macrame hanging, or even a small, lush plant.
- Unifying Color: Tie everything together with a consistent color palette. Maybe your hooks, mirror frame, and the pot for your plant are all matte black. This repetition creates a cohesive, intentional look.
My favorite combo? A large round mirror hanging slightly off-center on a partial wood slat wall, with a small floating shelf underneath. It hits all the notes: modern, warm, functional, and full of texture.
Your Entryway Awaits
So there you have it—15 ideas to rescue your entryway from the brink of boredom. Your home’s first impression doesn’t have to be an afterthought or a chaotic mess. It can be a beautiful, intentional space that makes you smile every time you walk through the door.
Whether you’re a minimalist, a maximalist, or somewhere in between, there’s an idea here for you. Pick the one that speaks to your soul, roll up your sleeves, and make it happen. You’ll be amazed at what a difference a well-decorated entryway wall can make.
So, what are you waiting for? Go give that sad little hallway the glow-up it deserves. You’ve got this. 🙂