

Let’s be honest for a second. You’re staring at your bathroom floor, and you feel… nothing. Or worse, you feel a deep, soul-crushing sense of “ugh.” Maybe it’s that cracked 1980s linoleum, the beige tile that was boring even when it was new, or a pattern that makes you question the life choices of the home’s previous owner. You dream of a gut renovation, but your bank account (and your sanity) just screamed in protest.
What if I told you that you could completely transform that floor in a single weekend, with no demo, no grout, and no hiring an expensive contractor? Seriously. I was a skeptic too, convinced that “peel and stick” was a flimsy, cheap-looking solution destined to peel up the second a drop of water hit it. Then, I tried it in my own sad little powder room, and folks, I am a full-blown convert.
Peel and stick floor tile is the DIY hero we didn’t know we needed. It’s durable, water-resistant, and the design options these days are genuinely stunning. Forget what you think you know. We’re talking about chic, modern, and high-end looks that will have your friends asking for your contractor’s number. So, grab a coffee, and let’s talk about how to give your bathroom the glow-up it deserves.
1. Modern Marble Peel-and-Stick Bathroom Floor
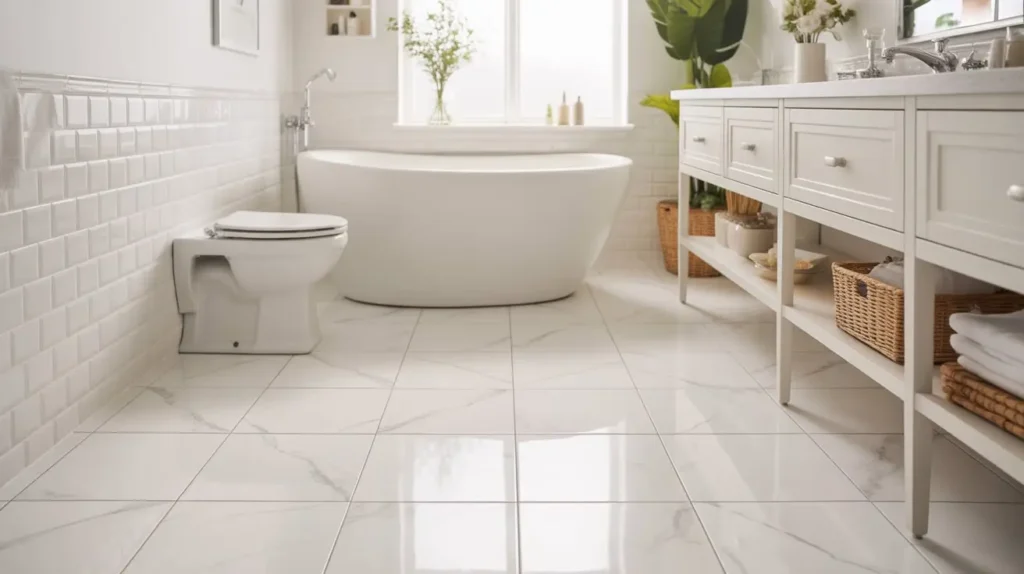
There’s something about a marble floor that just screams luxury. It’s the design equivalent of putting on a silk robe and pretending you have your life together. The problem? Real marble costs a fortune, is a pain to maintain, and is ridiculously slippery when wet. No, thank you.
Modern marble peel-and-stick tiles give you all of the opulence with none of the drama. They instantly brighten a dark bathroom, making it feel bigger, cleaner, and way more expensive than it is. The high-gloss finish on many of these tiles reflects light beautifully, adding a touch of glamour to your morning routine.
Why I Absolutely Love This Look
I find this look to be the perfect blend of classic and contemporary. It’s a timeless choice that won’t feel dated in five years. You can pair a white marble-look floor with literally any color scheme, from moody blacks and greens to soft pastels. It’s the ultimate design chameleon, providing a sophisticated canvas for the rest of your bathroom.
Pro Tips for Nailing the Installation
- Mind the Veins: For the most realistic look, pay attention to the direction of the marble veins. Before you start peeling and sticking, lay out a few tiles to see how the patterns connect. I like to rotate the tiles to avoid obvious repeats and create a more natural, “slab-like” flow.
- Start with a Clean Slate: This goes for any peel-and-stick job, but it’s especially important for light-colored tiles. Scrub your existing floor until it’s spotless. Any speck of dust or grime can prevent the adhesive from sticking properly.
- Get a J-Roller: Seriously, this little tool is a game-changer. After you lay each tile, use a J-roller to press it down firmly, ensuring a super strong bond and pushing out any air bubbles.
Perfect Pairings
This floor is a dream to style. I personally love it with brushed gold or champagne bronze fixtures for a warm, luxurious vibe. Pair it with a simple white or dark navy vanity, and you’ve got a bathroom that looks like it belongs in a high-end hotel.
2. Black Hexagon Peel-and-Stick Tile Upgrade

If marble is the elegant protagonist, black hexagon tile is the cool, mysterious anti-hero. It’s bold, it’s dramatic, and it makes an immediate statement. This is not a floor for the faint of heart, but if you’re willing to go there, the payoff is huge.
Black hex tiles are perfect for creating contrast, especially in bathrooms with a lot of white elements, like a classic subway tile wall or a simple white vanity. They hide dirt and scuffs like a ninja, making them a surprisingly practical choice for a high-traffic bathroom.
Why I Absolutely Love This Look
I adore the graphic punch that black hexagon tiles provide. They feel incredibly modern and architectural. There’s a reason you see them all over Pinterest and in trendy cafes—they just work. They add visual interest and texture without relying on a busy pattern, striking a perfect balance between bold and sophisticated.
Pro Tips for Nailing the Installation
- The First Row is Everything: With a geometric pattern like hexagons, your first row dictates the success of the entire project. Use a level and a chalk line to ensure it’s perfectly straight. If that first line is even a little bit crooked, you’ll be fighting a losing battle the rest of the way.
- Consider a “Grout” Pen: Most peel-and-stick hex tiles fit together tightly, leaving no real grout line. For an even more authentic look, you can use a light grey or white paint pen to carefully draw in the “grout” lines after the tiles are laid. It’s a bit tedious, but the result is chef’s kiss.
- Order Extra: Hexagon tiles mean more cuts, especially around edges and corners. You’ll inevitably have more waste than with square tiles. Always order at least 15% more than your square footage calculation suggests.
Perfect Pairings
To keep the look from feeling too heavy, I recommend pairing this floor with light, bright walls. Black fixtures can create a sleek, monochromatic look, while brass or chrome will pop beautifully against the dark floor. A floating wood vanity can also add warmth to balance the coolness of the black tile.
3. Light Oak Wood-Look Peel-and-Stick Floor

The idea of a wood floor in a bathroom used to be a cardinal sin of design. Water, humidity, and wood are not friends. But what if you could get that warm, organic, spa-like feel of wood without the risk of warping and water damage? Enter light oak wood-look peel-and-stick planks.
This is one of my favorite options for creating a serene, calming bathroom retreat. The light, natural tone of the “wood” adds warmth and texture, making the space feel instantly more inviting. It’s a perfect foundation for a Scandinavian, modern farmhouse, or Japandi-style bathroom.
Why I Absolutely Love This Look
Have you ever walked into a spa and just felt your shoulders relax? That’s the power of natural materials. This flooring mimics that effect beautifully. It connects the space to nature and provides a soft, organic counterpoint to the hard, cold surfaces of porcelain and tile. It just feels… peaceful.
Pro Tips for Nailing the Installation
- Stagger, Stagger, Stagger: The key to a convincing wood-look floor is to stagger the seams randomly, just like you would with real hardwood. Avoid creating “H” patterns where the seams of adjacent rows line up. A good rule of thumb is to start each new row with the leftover piece you cut from the end of the previous row.
- Find Your Center: To ensure your layout looks balanced, I suggest finding the center of the room and snapping a chalk line. You can either start your first plank right on the line or have the line run down the center of your first plank.
- Acclimate the Planks: This might sound silly for vinyl, but I swear it helps. Let the planks sit in the bathroom for at least 48 hours before you install them. This allows them to adjust to the room’s temperature and humidity, which can help ensure a better, more stable fit.
Perfect Pairings
This floor is begging for lush green plants, natural textures like linen and jute, and matte black fixtures. A crisp white vanity keeps things feeling fresh, while minimalist decor allows the texture of the floor to shine.
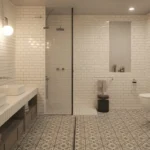
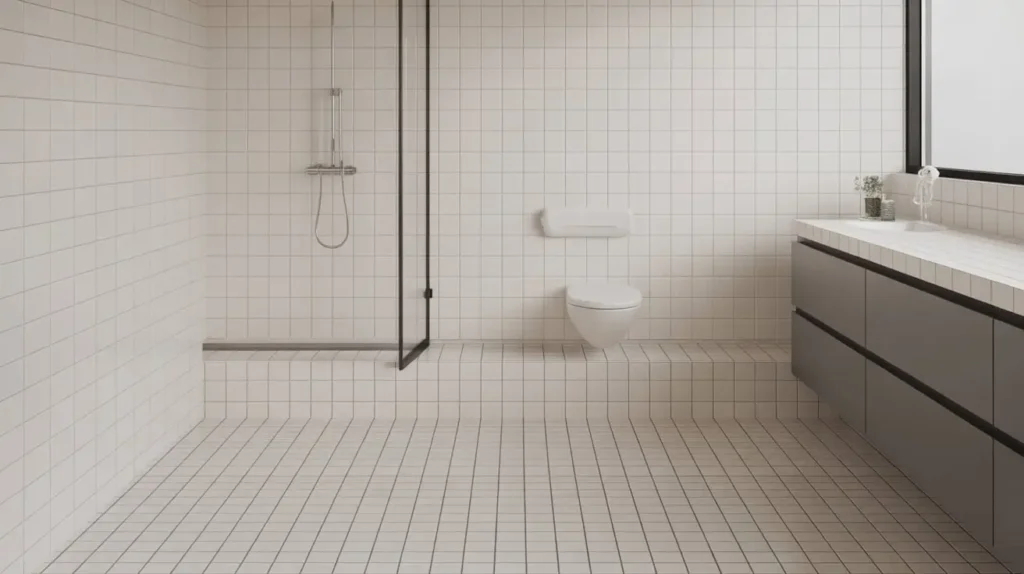
4. White Grid Minimalist Peel-and-Stick Tile
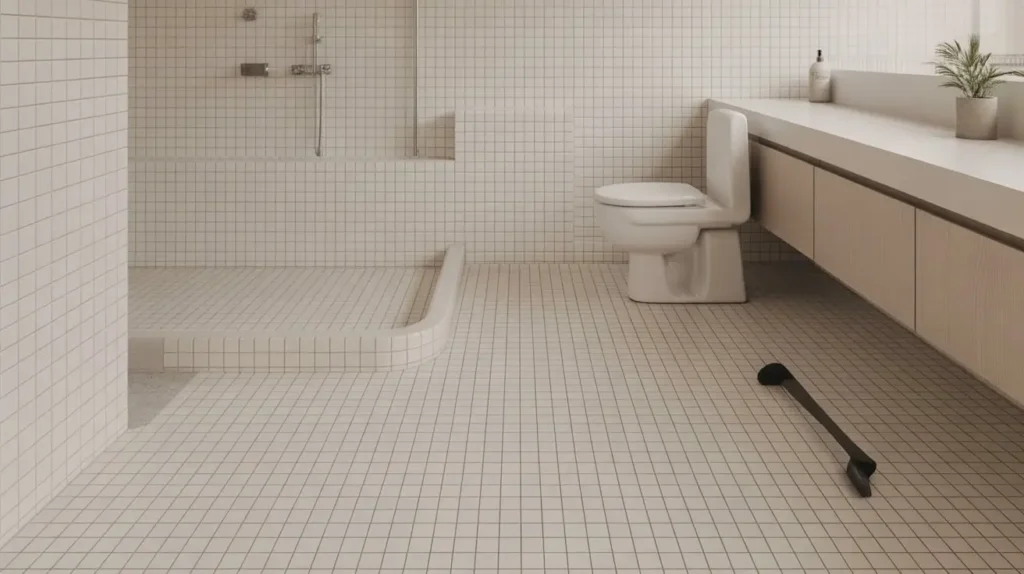
For the true minimalist, this is the holy grail. A simple, clean, white tile with a thin black or grey grid line. It’s the epitome of less is more. This design is incredibly effective at making a small bathroom feel larger and more open.
The beauty of this style lies in its simplicity. The grid provides a subtle structure and a touch of graphic interest without overwhelming the space. It’s clean, it’s airy, and it’s a perfect backdrop for a carefully curated, uncluttered bathroom.
Why I Absolutely Love This Look
I appreciate this design for its quiet confidence. It doesn’t need to shout to be noticed. It creates a sense of order and calm, which is exactly what I want in a bathroom. It’s the perfect neutral foundation that allows other elements, like a unique vanity or colorful towels, to take center stage. Plus, it has a slightly retro, utilitarian chic that I find very appealing.
Pro Tips for Nailing the Installation
- Line ‘Em Up: With a grid pattern, perfect alignment is non-negotiable. Even a tiny mistake will be glaringly obvious. Take your time, use tile spacers if you need to, and double-check every single tile before you press it down for good.
- A Pristine Subfloor is a Must: White floors are notoriously unforgiving. Any bump, divot, or piece of debris on the subfloor can create a shadow or bump that will be visible through the tile. Make sure your starting surface is as smooth and clean as a freshly Zamboni’d ice rink.
- Magic Eraser is Your Best Friend: White floors, especially in a bathroom, will show every stray hair and speck of dust. Keep a magic eraser on hand for quick scuff removal to keep your grid looking sharp.
Perfect Pairings
This floor screams for a floating vanity to enhance the sense of space. Keep fixtures simple and streamlined—matte black or chrome work equally well. You can add a pop of color with towels or a piece of art, or keep it strictly monochromatic for a powerful minimalist statement.
Read Also 15 Gorgeous Beige Tile Bathroom Styles for Small Spaces
5. Checkerboard Peel-and-Stick Bathroom Makeover
The checkerboard floor is back, baby! This classic black-and-white pattern has been around for centuries, but it’s having a major modern resurgence. It’s playful, it’s bold, and it injects a ton of personality and retro charm into a bathroom.
Whether you’re going for a vintage-inspired look or a more eclectic, modern vibe, the checkerboard pattern delivers. It’s a powerful design statement that feels both nostalgic and totally fresh at the same time. FYI, this look is taking over social media for a reason. 🙂
Why I Absolutely Love This Look
What’s not to love? It’s pure, unadulterated fun. A checkerboard floor instantly tells you that the person who lives here doesn’t take themselves too seriously. It’s a high-impact, low-effort way to create a memorable space. I used this in a tiny powder room, and it completely transformed the boring little box into my favorite room in the house.
Pro Tips for Nailing the Installation
- The Diagonal vs. The Grid: You have two main options: lay the tiles parallel to the walls (a classic grid) or on a diagonal (a diamond pattern). The diagonal layout can often make a small room feel larger, but it does require more complex cuts at the edges.
- Find the True Center: This is critical for a symmetrical checkerboard. Measure to find the exact center of your room and draw two perpendicular lines with chalk. Start your first four tiles right at that intersection and work your way outwards.
- Dry Fit First: Before you peel off a single backing, lay out a large section of the tiles dry. This allows you to see how the pattern will interact with your vanity, toilet, and doorway, and make adjustments before you commit.
Perfect Pairings
You can go full retro with a vintage-style pedestal sink and chrome fixtures. Or, for a more modern take, pair the floor with a sleek, colorful vanity—I’m thinking emerald green or a deep burgundy. The black and white pattern is surprisingly neutral, so don’t be afraid to play with bold colors.
6. Concrete-Look Peel-and-Stick Flooring
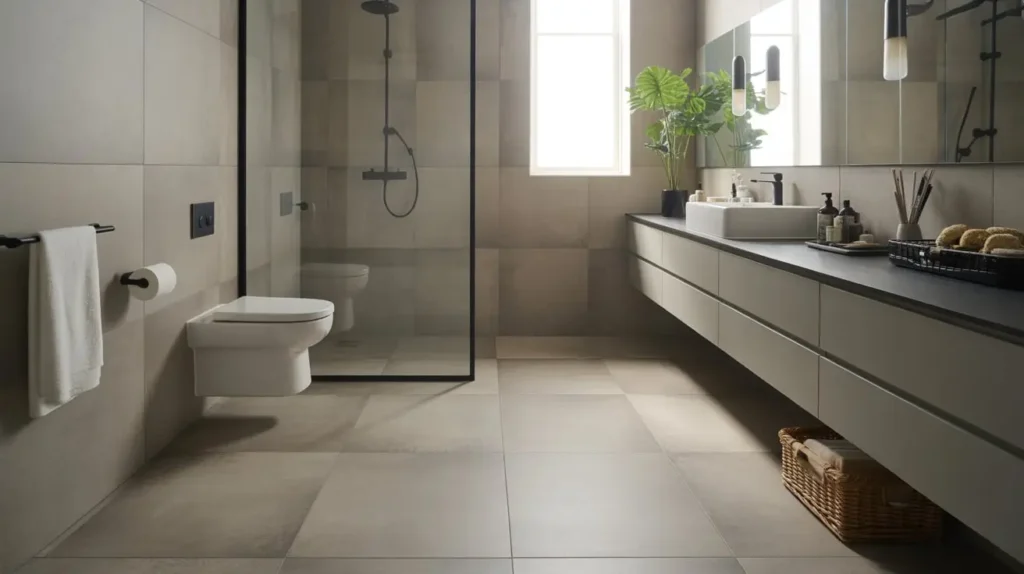
Love the raw, edgy vibe of an industrial loft? A concrete-look peel-and-stick floor can bring that aesthetic right into your bathroom. It’s minimalist, modern, and has an understated coolness that is hard to beat.
Unlike real concrete, which is cold, hard, and porous, these vinyl tiles are comfortable underfoot, water-resistant, and a breeze to install. They offer the perfect balance of rugged style and practical comfort. The subtle variations in color and texture in high-quality concrete-look tiles make them look remarkably authentic.
Why I Absolutely Love This Look
I’m a huge fan of the industrial chic aesthetic, and this floor is the perfect starting point. It provides a neutral, textured backdrop that is both sophisticated and unpretentious. It doesn’t compete for attention, allowing you to highlight other features like a statement shower curtain or sleek, modern hardware. It feels very clean and architectural.
Pro Tips for Nailing the Installation
- Look for Large Format Tiles: To best mimic the look of a poured concrete slab, opt for the largest tiles you can find (e.g., 18×18 or 12×24 inches). Fewer seam lines will make the final result look more seamless and authentic.
- Embrace Imperfection: Real concrete isn’t perfectly uniform, so your tiles shouldn’t be either. Mix tiles from different boxes to ensure a good distribution of the different patterns and color variations. Don’t stress about making every tile’s pattern flow perfectly.
- A Dark “Grout” Line?: While many people lay these tiles without a gap, I’ve seen some amazing results where people use very thin black tile spacers and then fill the gap with a dark grey or black flexible grout caulk. It’s an extra step but can really elevate the look.
Perfect Pairings
This floor is a natural match for matte black fixtures, raw wood accents, and metal shelving. A simple, clean-lined white or black vanity works perfectly. Add some texture with waffle-knit towels and a linen shower curtain to soften the industrial edge.
7. Blue Moroccan Peel-and-Stick Tile Design
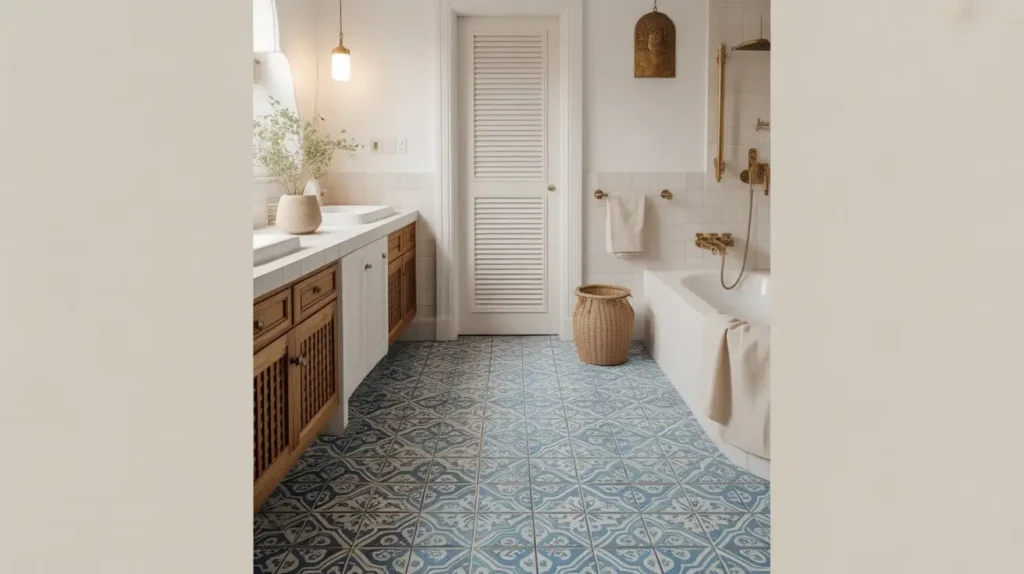
Ready to escape to a Mediterranean riad every time you brush your teeth? Blue Moroccan-inspired peel-and-stick tiles can transport you there. These intricate, vibrant patterns are perfect for adding a dose of color and worldly charm to your bathroom.
This is the perfect choice for anyone who finds minimalist design a bit… bland. A patterned floor can serve as the primary design feature in the room, acting as a piece of art under your feet. It’s a fantastic option for a guest bathroom or powder room where you can afford to be a little more daring.
Why I Absolutely Love This Look
I’m a sucker for a good pattern, and Moroccan tile designs are some of the most beautiful in the world. They bring so much energy and personality into a space. Using the blue-and-white version keeps it feeling fresh and clean, evoking a breezy, coastal Mediterranean vibe. It’s a guaranteed conversation starter.
Pro Tips for Nailing the Installation
- Pattern Matching is Key: These patterns are designed to connect and create a larger, seamless design. Pay close attention to how the tiles should be oriented. It’s a good idea to lay them all out first to ensure you have the flow right. One misplaced tile can throw off the whole look.
- Start in the Most Visible Spot: Begin your installation along the wall you see first when you walk into the room. This ensures you have full, perfect tiles in the most prominent area, leaving any partial cut tiles for the less visible spots (like behind the toilet or under the vanity).
- Keep it Simple Elsewhere: When you have a floor this bold, let it be the star of the show. If you pair it with busy wallpaper and a patterned shower curtain, the room will feel chaotic. Stick to simple, solid colors for your walls and accessories.
Perfect Pairings
A simple white vanity and white walls are the perfect companions for this floor. Chrome or brushed nickel fixtures will complement the cool blue tones beautifully. Add some natural elements like a woven basket for laundry or a small wooden stool to complete the relaxed, bohemian vibe.
8. Herringbone Peel-and-Stick Vinyl Pattern
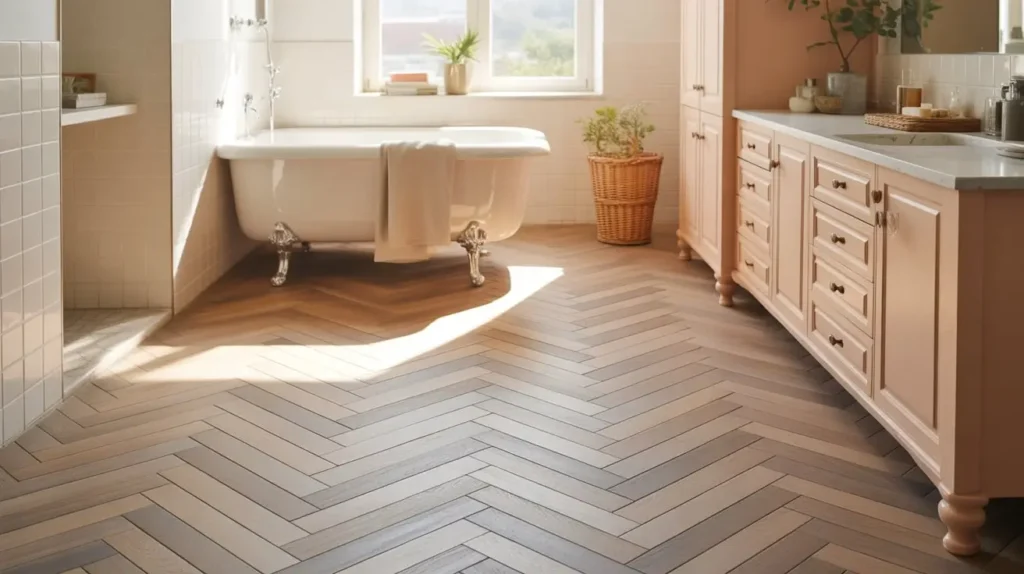
Is there any pattern more effortlessly chic than herringbone? I don’t think so. It’s a classic pattern that has graced European estates for centuries, and now you can get the look with easy-to-install vinyl planks.
Typically seen in wood or subway tile, the herringbone pattern adds a sense of movement and sophisticated detail to a floor. It makes any room feel custom-designed and high-end. Using peel-and-stick vinyl planks in a light wood or even a solid color creates a stunning visual effect.
Why I Absolutely Love This Look
IMO, herringbone is the pinnacle of quiet luxury. It’s a pattern that you notice and appreciate, but it doesn’t scream for attention. It adds a layer of architectural detail and sophistication that elevates the entire room. It looks complicated and expensive, which makes the fact that it’s a simple DIY project all the more satisfying.
Pro Tips for Nailing the Installation
- This One Requires Math. Sorry.: Don’t just wing it. A successful herringbone layout requires careful planning. You need to find the exact center line of your room and start your first “V” shape there. There are tons of great video tutorials online—watch a few before you start.
- Create a Jig: To ensure your 45-degree angle is consistent, you can create a simple jig using a speed square or a piece of scrap wood. This will help you place your first few tiles perfectly, which sets the stage for the rest of the floor.
- Lots of Cuts: Be prepared for a lot of angled cuts, especially along the walls. A good utility knife with plenty of fresh blades and a straight edge are your best friends here. Measure carefully!
Perfect Pairings
This elegant floor pairs beautifully with classic elements. Think a vintage-style vanity, marble countertops, and polished brass fixtures. For wall color, you could go with a crisp white, a soft grey, or even a deep, moody color like navy or forest green to create a dramatic, library-like feel.
9. Terrazzo Peel-and-Stick Bathroom Floor
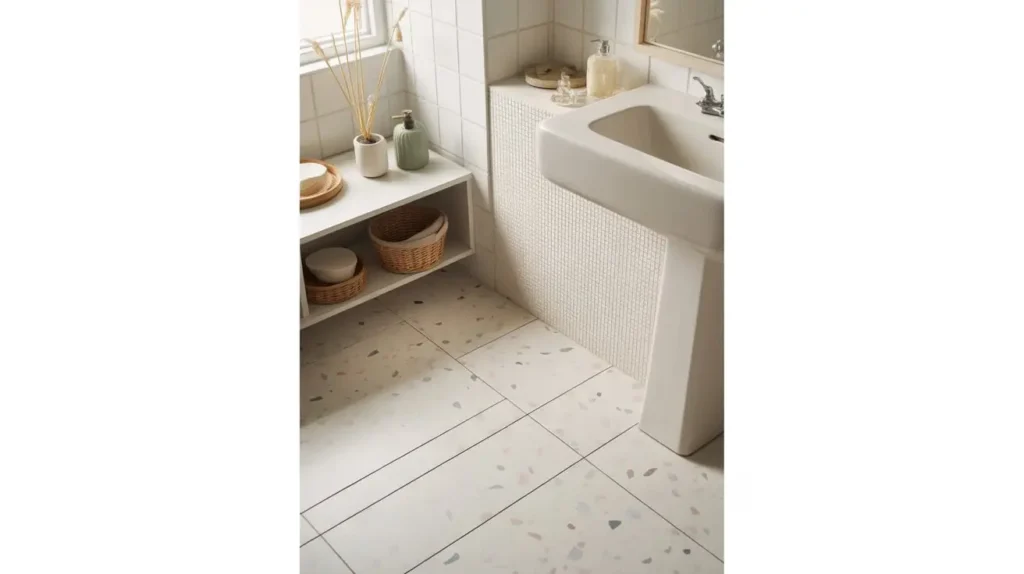
Terrazzo is back from its 1970s vacation and is more popular than ever. This composite material, traditionally made with chips of marble, quartz, granite, and glass, is known for its playful, speckled appearance. Modern peel-and-stick versions capture that fun, quirky vibe perfectly.
This is a fantastic option if you want something with color and pattern but find traditional floral or geometric patterns too formal. Terrazzo is inherently playful and a bit random, which makes it a very forgiving pattern. Plus, the speckled design is amazing at hiding dust and lint. A win-win!
Why I Absolutely Love This Look
Terrazzo just makes me happy. It’s got a retro, mid-century modern feel that is full of personality. The little flecks of color give you a built-in color palette for the rest of the room. It’s a “fun neutral”—it has a lot going on, but because the pattern is random and the base is often white or grey, it doesn’t feel overly busy.
Pro Tips for Nailing the Installation
- Mix Your Boxes: Just like with the concrete look, make sure you mix tiles from different packages. This will ensure a random distribution of the chip patterns and colors, preventing any weird “clumping” of a certain color in one area.
- Pay Attention to Scale: Terrazzo peel-and-stick comes in various scales, from small, fine specks to large, chunky chips. Consider the size of your bathroom. A larger-scale pattern can sometimes overwhelm a very small space, while a smaller-scale pattern works just about anywhere.
- Seamless is Best: For this look, I recommend butting the tiles up against each other as tightly as possible. The goal is to mimic a poured terrazzo floor, so visible seam lines would detract from the effect. Use your J-roller to press the seams together firmly.
Perfect Pairings
Pull one of the colors from the terrazzo chips to use for your towels, shower curtain, or even the vanity. For example, if your terrazzo has flecks of pink and green, a dusty rose or sage green vanity would look amazing. Simple, modern fixtures in chrome or black will keep the focus on the fun floor.
Read Also 15 Stunning Black Hexagon Tile Bathroom Ideas for Modern Homes
10. Slate-Black Peel-and-Stick Stone Look

If the glossy black hexagon is too graphic for you, consider the more organic, moody look of slate-black stone tile. These tiles often have a subtle texture and slight color variations—from deep charcoal to lighter greys—that mimic the look of natural quarried slate.
This flooring choice creates a dark, dramatic, and incredibly chic foundation for a bathroom. It can make the space feel like a luxurious, cave-like sanctuary or a sophisticated, modern spa. It’s a bold choice that exudes confidence and style.
Why I Absolutely Love This Look
I love a moody, dramatic bathroom. It feels so cozy and enveloping. A slate-look floor is the perfect way to achieve this. It has a rich, earthy texture that feels more organic and grounded than a simple black tile. It’s sophisticated without being flashy and has a timeless quality that will never go out of style.
Pro Tips for Nailing the Installation
- Look for a Matte, Textured Finish: The key to a believable slate look is the finish. Avoid high-gloss options. Look for tiles with a matte or low-lustre finish and a slightly uneven or riven texture. This is what will sell the “natural stone” illusion.
- Offset Brick Pattern: The most common way to lay rectangular tiles like these is in an offset or “subway tile” pattern. Each row is offset from the one below it by half a tile’s length. This creates a classic, stable look that is easy to achieve.
- Balance the Darkness: A black floor will absorb a lot of light. Make sure you have adequate lighting in your bathroom—good overhead light and sconces by the mirror are a must. Otherwise, your chic sanctuary might just feel like a gloomy dungeon.
Perfect Pairings
To keep a dark floor from feeling too cold or oppressive, you need to introduce warmth. Warm wood tones, like a teak vanity or wooden shelves, are a perfect complement. Brushed brass or gold fixtures will glow against the dark background. Add plenty of white elements—towels, a white countertop—to provide contrast.
11. Beige Neutral Peel-and-Stick Tile Aesthetic
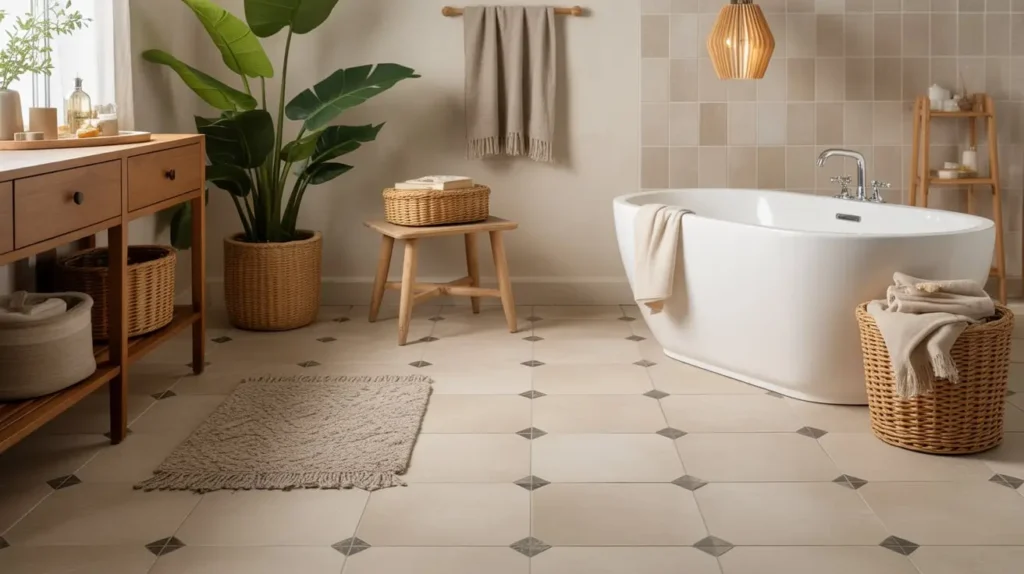
Okay, let’s talk about beige. It gets a bad rap for being boring, but I’m here to defend it. The right beige isn’t boring; it’s serene, warm, and incredibly versatile. We’re not talking about the sad, flat beige of yesteryear. Modern beige is more of a “greige,” a sandy tone, or a warm cream.
A neutral beige peel-and-stick floor creates a soft, warm, and inviting foundation. It’s the perfect choice for creating a calm, spa-like atmosphere that feels bright without being stark white. It’s a safe choice, but safe doesn’t have to mean style-less.
Why I Absolutely Love This Look
Sometimes, you don’t want your floor to be the star. Sometimes, you want it to be the perfect, supportive best friend to your statement vanity or gorgeous wallpaper. That’s what a good neutral floor does. It creates a sense of calm and cohesion, allowing other design elements to shine. It’s a quiet, confident choice for a peaceful retreat.
Pro Tips for Nailing the Installation
- Focus on Texture and Variation: To keep a beige floor from looking flat, choose a tile with subtle texture or color variation. Look for options that mimic travertine or limestone, with gentle movement and slight shifts in tone.
- Consider a Contrasting “Grout”: If you’re using light beige tiles, using a slightly darker grout caulk or even a paint pen in a taupe color can add definition and interest, preventing the floor from looking like one monolithic sheet.
- Lay it Out: Even with a neutral color, it’s worth laying out the tiles to check for any weird color variations between boxes. You want a subtle, natural flow, not a weird checkerboard of slightly different beige tones.
Perfect Pairings
This is your chance to play with texture. Pair this floor with waffle-knit towels, a rattan light fixture, and a linen shower curtain. Almost any fixture finish will work here, but I’m partial to matte black for a modern contrast or brushed nickel for a soft, cohesive look.
12. Retro Pattern Peel-and-Stick Flooring
Are you a maximalist at heart? Do you believe that beige is a crime? Then a bold, retro-patterned peel-and-stick floor might be calling your name. Think 1960s floral bursts, 1970s geometric waves in avocado and orange, or Art Deco-inspired sunbursts.
This is a fearless design choice that turns your bathroom floor into a massive piece of pop art. It’s fun, it’s vibrant, and it’s guaranteed to make an impression. This look is perfect for a person who wants their home to be a true reflection of their unique, eclectic personality.
Why I Absolutely Love This Look
Because it’s pure joy! Who could be in a bad mood in a bathroom with a funky, colorful floor? It’s a total rejection of boring, cookie-cutter design. It’s a celebration of color, pattern, and personality. It might not be for everyone, and that’s exactly what makes it so great.
Pro Tips for Nailing the Installation
- Commit to the Bit: If you’re going retro, go retro. This isn’t the time for half-measures. Embrace the era you’re channeling.
- Pattern Matching is Crucial: Just like with the Moroccan tiles, you must pay excruciating attention to lining up the pattern. One slip-up and the whole illusion is shattered. Dry fit a large section first to get the hang of how the repeat works.
- Start in the Middle: For a large, repeating pattern, starting in the center of the room is often the best strategy. This ensures the pattern is centered in the space, which will look more intentional and balanced.
Perfect Pairings
This is tricky. You need to balance the wild floor. I suggest keeping the walls and vanity very simple—probably white. Pull one of the less-dominant colors from the pattern for your towels or accessories. Let the floor have its moment and make everything else a quiet, supporting character.
13. Grey Marble Peel-and-Stick Bathroom Floor

If white marble feels a bit too traditional or flashy for your taste, its cooler, more contemporary cousin, grey marble, might be the perfect fit. It offers the same sense of luxury and movement but with a more subdued, modern, and slightly masculine edge.
Grey marble-look tiles can range from a soft, cloudy grey with delicate white veining to a dramatic, dark charcoal with bold white streaks. It’s a sophisticated choice that pairs beautifully with a wide range of fixtures and color palettes.
Why I Absolutely Love This Look
Grey marble feels very current and chic. It has all the elegance of marble but feels more grounded and less ostentatious than its white counterpart. It’s a fantastic neutral that still has a lot of visual interest and depth. It can make a bathroom feel like a sleek, downtown hotel suite.
Pro Tips for Nailing the Installation
- Match the Veining, Part II: Just like with white marble, taking the time to arrange the tiles so the veining flows naturally will make a world of difference. Try to create long, sweeping lines for a more dramatic and realistic effect.
- Choose Your Temperature: Grey can be warm or cool. Pay attention to the undertones of the tile you choose. A cool grey with blue undertones will feel very modern and crisp, while a warmer grey with brown undertones will feel more inviting.
- Consider a Glossy Finish: While matte is great for slate or concrete looks, I find that a high-gloss finish really brings out the depth and veining in a marble-look tile, making it look more like polished stone.
Perfect Pairings
This floor is a knockout with sleek chrome or matte black fixtures. It looks fantastic with a crisp white vanity for a high-contrast look, or you can pair it with a dark wood or grey vanity for a more tonal, sophisticated palette.
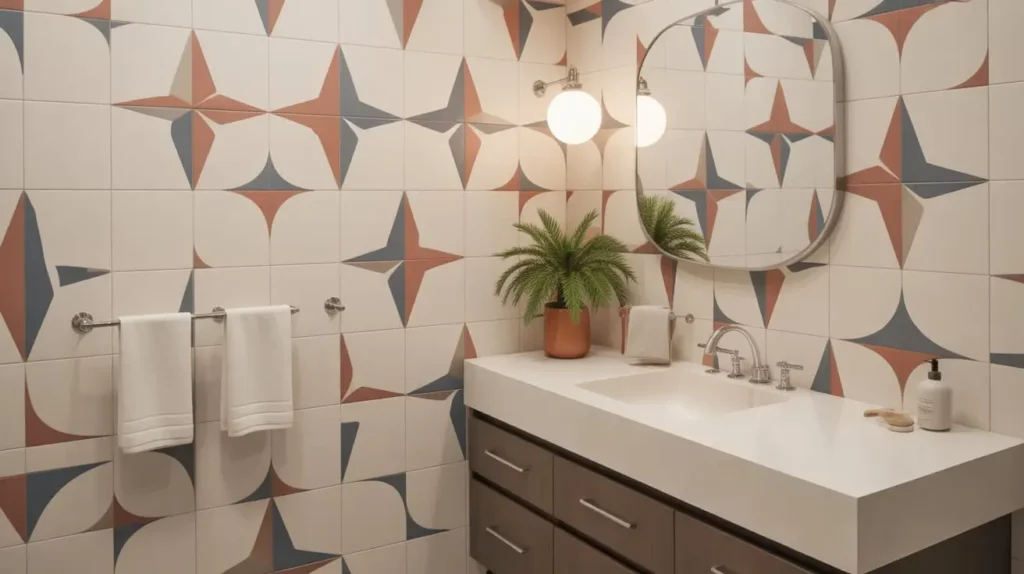
14. Bold Geometric Peel-and-Stick Tile Style

Beyond hexagons and checkerboards lies a whole world of bold, graphic geometric patterns. Think interlocking triangles, 3D cube effects, or dynamic, high-contrast line work. This is a thoroughly modern look that adds energy and a strong graphic element to a bathroom.
This style is perfect for making a statement in a contemporary home. It’s a way to introduce pattern that feels structured, intentional, and architectural rather than decorative or floral. It’s a thinking person’s pattern.
Why I Absolutely Love This Look
I love the visual energy that these patterns create. They can play with perspective and add a sense of dimension to a flat surface. It’s a smart, sophisticated way to add personality that feels both artistic and calculated. A good geometric floor is like a piece of abstract art for your bathroom.
Pro Tips for Nailing the Installation
- Precision is Everything: Is this sounding familiar? With any strong pattern, your alignment has to be flawless. A single tile that is off by even a millimeter can create a domino effect of crookedness. Use a level, a chalk line, and your most patient self.
- Small Bathroom, Big Impact: These bold patterns can actually work wonders in a small powder room. The strong lines can trick the eye and create a sense of movement and space.
- Let the Floor Be the Loudest Thing in the Room: You know the drill. When the floor is this bold, everything else needs to be quiet. Simple vanity, solid color walls, and minimalist fixtures.
Perfect Pairings
This floor demands minimalist, modern fixtures and a simple vanity. Let the lines of the floor be the main event. Matte black fixtures often work best, as they echo the graphic quality of the pattern without competing with it.
15. Coastal Light Blue Peel-and-Stick Floor Design

Want your bathroom to feel like a breezy, seaside escape? A soft, light blue peel-and-stick floor can instantly set a coastal, serene tone. This could be a solid, powder blue tile, or something with a subtle pattern, like a blue and white encaustic-style design.
Blue is a naturally calming color, associated with water and sky, making it a perfect choice for a bathroom. It creates a tranquil, spa-like atmosphere that feels clean, fresh, and relaxing. It’s a way to add color that still feels soft and neutral.
Why I Absolutely Love This Look
I find a light blue floor to be so incredibly soothing. It’s a gentle pop of color that doesn’t feel overwhelming. It makes the bathroom feel clean, airy, and a little bit special, like a guest suite at a charming beach cottage. It’s a happy, calming color that starts your day off on the right foot.
Pro Tips for Nailing the Installation
- Choose the Right Blue: There are a million shades of blue. For a calming coastal vibe, stick to softer, dustier blues—think sea glass or a hazy sky. A super-saturated royal blue will create a much different, more energetic feel.
- White is Your Friend: A light blue floor looks its best when paired with plenty of crisp white. White walls, a white vanity, and white towels will make the blue pop and keep the space feeling bright and airy.
- Solid vs. Pattern: A solid light blue tile is a great, subtle choice. If you opt for a blue-and-white pattern, make sure it’s one you can live with for a while. As always, lay it out and make sure the pattern lines up correctly.
Perfect Pairings
This is the quintessential coastal palette. Pair your blue floor with a white shiplap wall, a simple white vanity, and brushed nickel or chrome fixtures. Add natural textures like a jute rug, a woven laundry basket, and some beachy art to complete the look.
So, Are You Ready for a New Floor?
See? Transforming your bathroom doesn’t require a second mortgage or a week of dust and chaos. Peel-and-stick tile has completely changed the game, offering stylish, durable, and budget-friendly solutions for almost any aesthetic you can dream of. From luxurious marble to playful terrazzo, there’s a design out there just waiting to rescue your sad bathroom floor.
The best part is that this is a project you can genuinely tackle yourself in a weekend. The satisfaction of standing back and looking at your brand-new, gorgeous floor—a floor you laid yourself—is unbeatable. So, what are you waiting for? Your dream bathroom is just a few peel-and-stick tiles away. Go on, give it a try. You might just become a convert, too.