
Let’s be honest. You’ve just signed the lease on your new place. It’s got “character,” which is landlord-speak for “impossibly small.” You’re standing in the middle of what feels like a glorified shoebox, trying to mentally Tetris your entire life into one room. The excitement of a new apartment quickly gives way to a creeping sense of dread. How are you supposed to make this tiny space feel like a home and not a storage unit?
I’ve been there. My first apartment was so small, I’m pretty sure my couch paid its own share of the rent. I made every mistake in the book—bulky furniture, dark colors, and a level of clutter that would make a hoarder nervous. But through trial, error, and a whole lot of Pinterest-fueled frustration, I figured out a few things.
Forget those generic, soul-crushing tips you’ve seen a thousand times. We’re going to talk about real, actionable ideas that actually work. These are the tricks that take a cramped room and make it feel intentional, stylish, and, most importantly, yours. Ready to turn that tiny room into your personal sanctuary? Let’s get to it.
1. The Floating Shelf Accent Wall
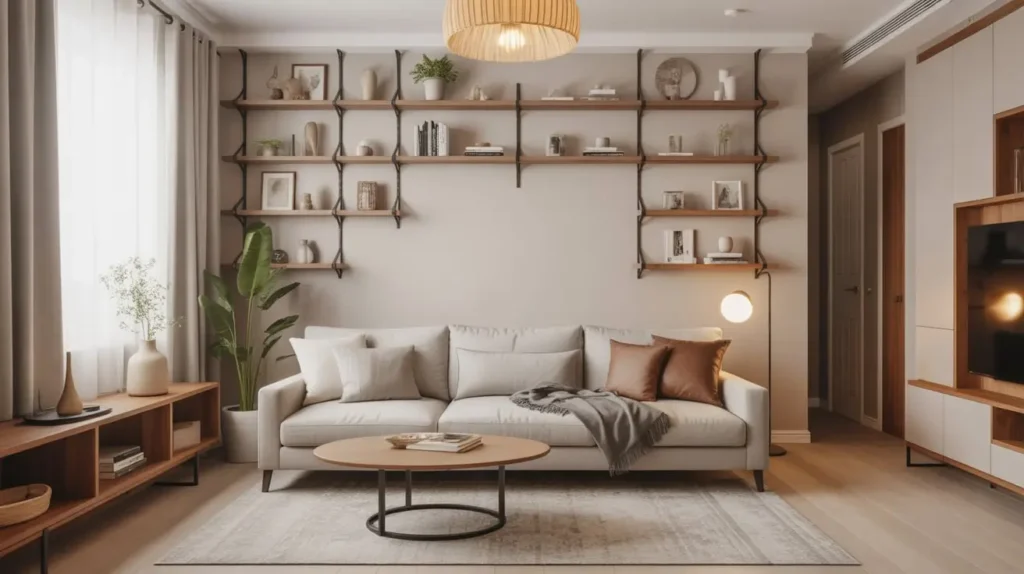
Your floor space is precious, probably more precious than gold right now. So why are we still letting bulky, floor-hogging bookcases dominate our tiny rooms? It’s time to look up. Using your vertical space is the number one rule of small-space living, and a floating shelf accent wall is the perfect way to do it.
Instead of one massive piece of furniture, a series of floating shelves creates storage and display space while keeping the floor clear. This gives you a feeling of openness that a traditional bookcase just can’t match. It’s functional art, and who doesn’t love that?
Why It Works So Well
The magic here is all about drawing the eye upward. When you mount shelves on a wall, you encourage people to look up, which creates an illusion of height and space. Because the shelves have no visible brackets and don’t touch the floor, they feel light and airy, reducing the visual weight in the room.
How to Nail the Look
- Plan Your Layout: Don’t just start drilling! Use painter’s tape to map out where you want your shelves. Stagger them for a dynamic, modern look, or align them for a clean, symmetrical feel.
- Choose the Right Shelves: Slim, simple shelves work best. Think light wood tones, white, or even clear acrylic to really maximize the airy vibe. I once found some great reclaimed wood shelves that added a rustic touch without feeling heavy.
- Style with Intention: This isn’t just storage; it’s a display. Mix books (stack some horizontally, some vertically), small plants, and a few personal objects. The key is to leave some negative space on each shelf so it doesn’t look cluttered.
2. The Compact Cozy Reading Nook
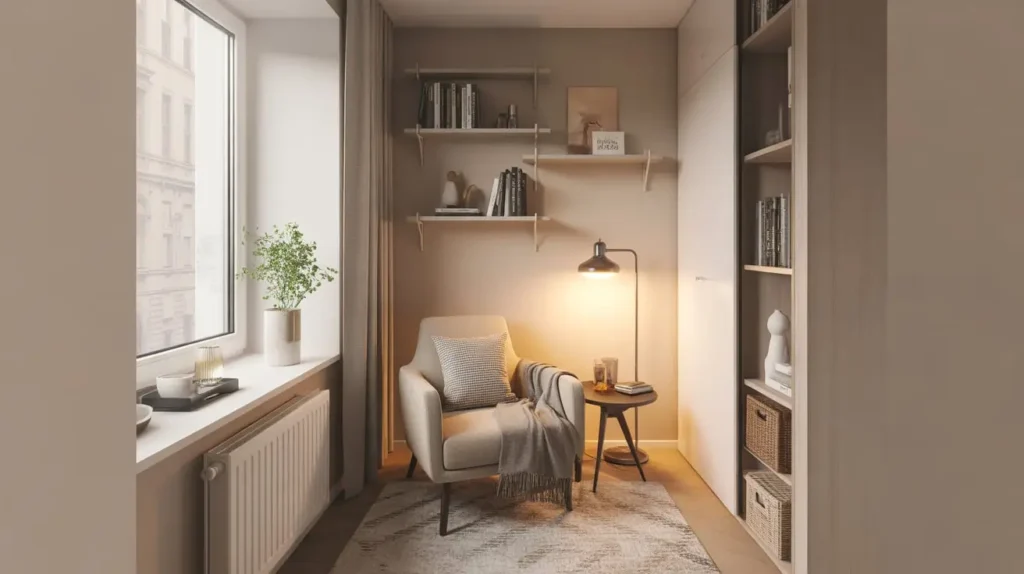
Every home needs a cozy corner, a little spot dedicated to relaxation. You might think you don’t have room for a reading nook, but I’m here to tell you that you absolutely do. You don’t need a sprawling chaise lounge and a dedicated library. All you need is one neglected corner and a little bit of creativity.
A reading nook defines a purpose for that awkward, empty space you’re not sure what to do with. It carves out a “zone” in a multi-purpose room, making your apartment feel more organized and intentional.
Why It Works So Well
Creating designated zones is a psychological trick that makes small spaces feel larger and more functional. By dedicating a corner to a single activity, like reading, you’re telling your brain that this small apartment has multiple distinct areas. It stops feeling like one box and starts feeling like a home with different rooms.
How to Nail the Look
- Find the Right Chair: Look for an armchair with a small footprint. Something with clean lines and exposed legs will feel less bulky. A nice accent chair can become the focal point of the whole room.
- Lighting is Everything: A slim, arched floor lamp is your best friend here. It can hang over the chair, providing direct light without taking up any floor space next to it.
- Add a Tiny Table: You need a place to put your tea (or wine, no judgment). A super-small C-table that can slide over the arm of the chair is perfect. It gives you a surface when you need it and tucks away when you don’t.
3. Minimalist Multi-Purpose Furniture

Welcome to the holy grail of small apartment decorating. If a piece of furniture only does one thing, it’s not earning its keep in a tiny room. Every major piece should serve at least two purposes. It’s the golden rule that will save you from a world of clutter and frustration.
Think about it: a bed that’s just a bed? A coffee table that’s just a table? What a waste of potential! We’re looking for the Swiss Army knives of furniture.
Why It Works So Well
This one is pretty self-explanatory. By combining functions, you reduce the number of individual pieces you need, which directly translates to more open floor space. Fewer items mean less visual clutter, which in turn makes your room feel bigger and calmer. IMO, this is the single most impactful change you can make.
How to Nail the Look
- The Ottoman with a Secret: Get a storage ottoman. It’s a footrest, it’s extra seating when guests come over, and it’s a secret hiding place for blankets, board games, or your ever-growing collection of throw pillows.
- The Transformer Coffee Table: Look for a coffee table with a top that lifts up to become a dining table or a desk. I had one of these in my last apartment, and it was a game-changer for my work-from-home setup.
- The Sleeper Agent: A stylish daybed or a sleeper sofa is a must if you ever plan on having guests. Modern designs are a far cry from those lumpy, back-breaking monstrosities from the 90s.
A word of caution: some multi-purpose furniture can be a bit flimsy. Read reviews and invest in quality pieces. There’s nothing worse than a lift-top coffee table that gets stuck halfway up.
4. The Vertical Plant Ladder Display

You want to be a plant parent, but your windowsills are already full and every flat surface is accounted for. Don’t give up on your green dreams! A plant ladder is the perfect solution. It uses vertical space to let you create a lush, living wall without sacrificing a single inch of precious floor real estate.
This is more than just a plant stand; it’s a statement piece. It brings life, color, and a touch of the outdoors into your tiny apartment, making it feel fresh and vibrant.
Why It Works So Well
Like floating shelves, a plant ladder draws the eye upward, creating that all-important illusion of height. The open structure of a ladder feels much lighter than a solid shelving unit. Plus, the organic shapes of the plants break up the hard lines and boring white walls of a typical apartment, adding softness and character.
How to Nail the Look
- Choose Your Ladder: You can find beautiful bamboo or wooden decorative ladders, or even repurpose a simple stepladder with a coat of paint. Lean it against an empty wall for an effortlessly chic look.
- Get the Right Pots: Use hanging planters that can hook onto the rungs of the ladder. Mix and match different sizes, colors, and textures for visual interest.
- Pick Your Plants Wisely: Consider the amount of light the wall gets. For lower-light areas, go for snake plants, pothos, or ZZ plants. If you have a sunny spot, succulents and trailing ivy will thrive. A mix of trailing and upright plants will create a beautiful, layered effect.
Read Also 15 Modern Studio Apartment Ideas for Men and Space-Saving Tricks
5. Mirror-Enhanced Bright Corners
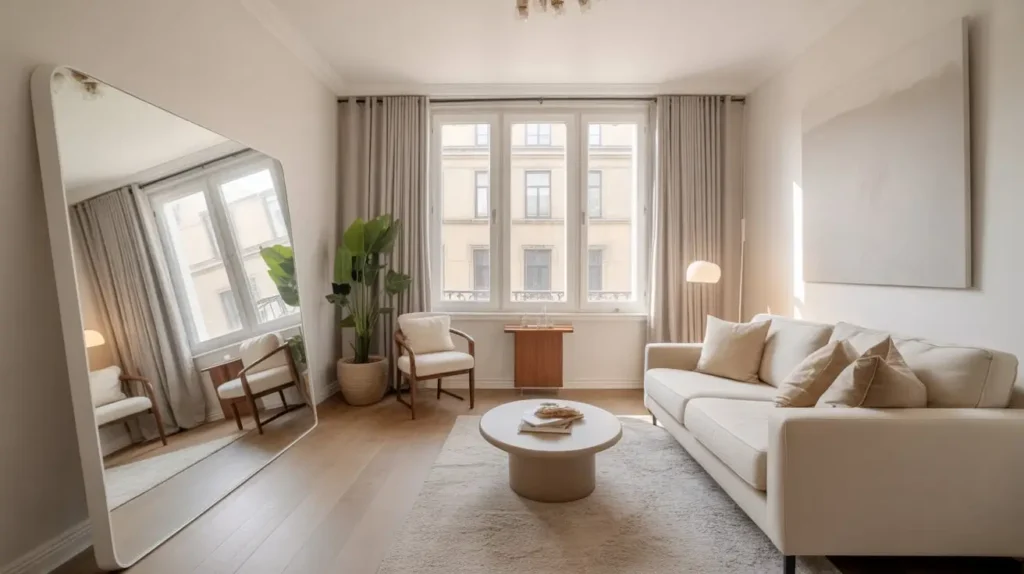
Okay, this might be the oldest trick in the small-space decorating book, but there’s a reason it has stuck around: it works. Seriously. Putting a large mirror in a small room is like adding a window. It reflects light, creates a sense of depth, and can make even the tiniest corner feel more open and bright.
But just throwing a mirror on any old wall won’t do the trick. Placement is absolutely key. You have to be strategic to unlock the mirror’s full space-expanding potential.
Why It Works So Well
A mirror tricks the eye in two ways. First, it reflects light, both natural and artificial, bouncing it around the room and making the entire space feel brighter. A bright room inherently feels larger than a dark one. Second, it reflects the view, creating an illusion of depth. It makes the wall seem to recede, fooling your brain into thinking the room continues on.
How to Nail the Look
- Opposite a Window is Best: The number one spot for a mirror is on the wall opposite your largest window. This will capture the maximum amount of natural light and reflect the view of the outdoors, essentially creating a second window.
- Go Big or Go Home: Don’t be timid. A tiny mirror won’t have much of an impact. Opt for a large, floor-length mirror leaned against a wall. This is a great renter-friendly option that adds a dramatic, stylish touch.
- Mirrored Furniture: For a more subtle approach, consider a small piece of mirrored furniture, like a nightstand or a small cabinet. It will have the same light-reflecting effect without being as obvious as a giant wall mirror. (Just be prepared to wipe off fingerprints. Constantly.)
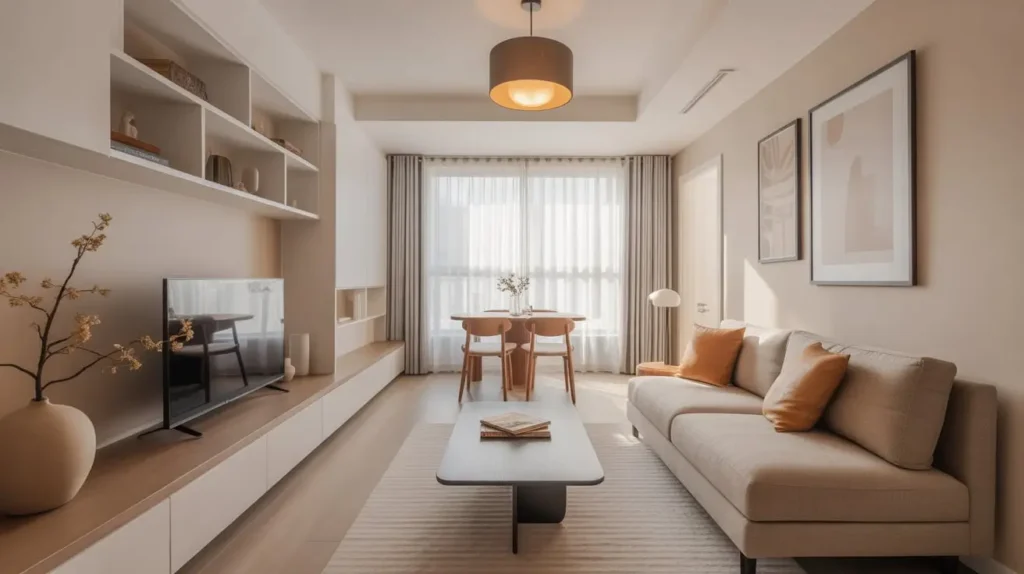
6. The Foldable Dining Space Setup
“Dining room? I don’t even have a dining wall.” I hear you. But that doesn’t mean you’re doomed to eat every meal on your couch for the rest of your life. With the right furniture, you can create a dining space that appears when you need it and vanishes when you don’t.
This is for anyone who loves to host the occasional dinner party but doesn’t have the square footage for a permanent dining table. It’s about having the option for civilized dining without sacrificing your living space 24/7.
Why It Works So Well
It’s the ultimate space-on-demand solution. A foldable dining setup gives you the functionality of a dining room without the permanent commitment of a large piece of furniture. It’s about making your space work for your lifestyle, not the other way around.
How to Nail the Look
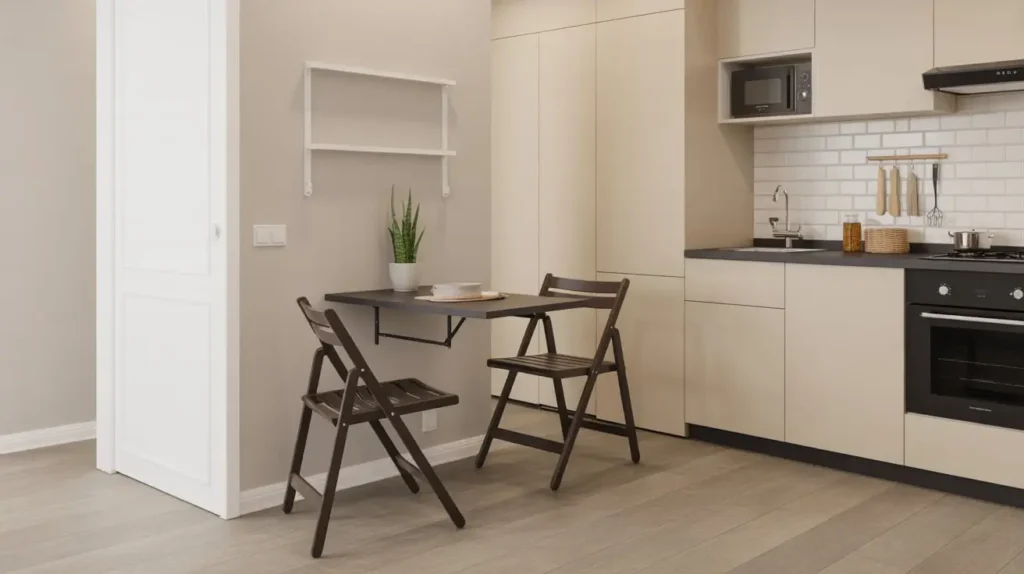
- The Wall-Mounted Drop-Leaf: This is pure genius. It’s a shelf on the wall that folds down to become a table for two (or even four). When you’re done, you just fold it back up against the wall. It takes up literally zero floor space when not in use.
- The Classic Gateleg Table: This is an old design that’s perfect for modern small spaces. It’s a very narrow console table that has one or two “leaves” that fold up to create a larger dining surface. You can use it as a slim entryway table day-to-day.
- Stylish Folding Chairs: Banish the thought of ugly metal folding chairs. There are so many stylish and comfortable folding chairs available now, from sleek acrylic designs to upholstered options. Find a few you love and hang them on a wall hook for a cool, functional art display.
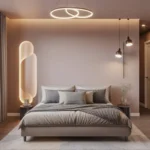
7. Under-Bed Storage Styling
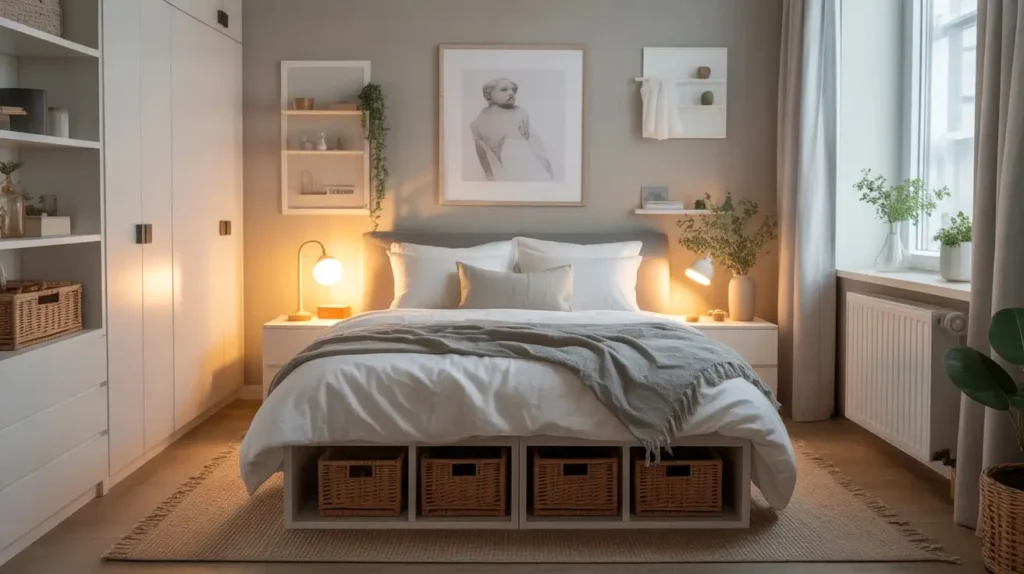
Let’s talk about the space under your bed. For many, it’s a black hole of dust bunnies and long-forgotten items. But that space is prime real estate! Using it for storage is a no-brainer, but the key is to do it with style. Don’t just shove, style.
You want your under-bed storage to look intentional, not like you’re hiding a mess. When it’s done right, it can actually add to the room’s aesthetic instead of detracting from it.
Why It Works So Well
This is about reclaiming unused space. The area under a standard bed frame is a significant amount of square footage that often goes to waste. By using it effectively, you can free up valuable closet or dresser space for other things.
How to Nail the Look
- Choose Cohesive Containers: The secret to making under-bed storage look good is consistency. Instead of a random assortment of plastic bins, invest in a set of matching containers. Woven baskets, fabric bins with leather handles, or sleek wooden boxes on wheels look fantastic.
- Go for Drawers or Wheels: Containers on wheels are a lifesaver. They make it so much easier to access your stuff without scratching your floors or throwing out your back. Some bed frames even come with built-in drawers, which is the ultimate streamlined solution.
- Use Bed Risers (If Needed): If your bed frame is too low to the ground, a set of simple bed risers can give you a few extra inches of crucial storage height. Just make sure you get a bed skirt that’s long enough to conceal the risers and the containers.
8. The Neutral Tone Open-Space Palette

Color can make or break a small space. While I love a bold, dramatic color, it can be a risky move in a tiny room. Dark or overly saturated colors can absorb light and make the walls feel like they’re closing in on you. The safest—and often most effective—strategy is a light, neutral color palette.
We’re not talking about boring, sterile white. Think of a sophisticated range of soft grays, warm beiges, creamy off-whites, and muted taupes. These colors are the perfect backdrop for a small space.
Why It Works So Well
Light, neutral colors are highly reflective. They bounce light around the room, making it feel brighter, airier, and more open. Using a single, cohesive color (or very similar shades) throughout the space also helps to blur the lines where walls begin and end, which tricks the eye into perceiving the room as larger than it actually is.
How to Nail the Look
- Pick the Right Undertone: Not all whites are created equal. Pay attention to undertones. A cool white with blue or gray undertones will feel crisp and modern, while a warm white with yellow or pink undertones will feel cozier and more inviting. Get samples and test them on your wall!
- Paint the Ceiling: For the ultimate space-expanding trick, paint your ceiling the same color as your walls. This erases the boundary between the wall and ceiling, drawing the eye up and making the room feel incredibly tall and open.
- Avoid It Being Boring: The key to a beautiful neutral room is texture. We’ll get more into this later, but think about adding different materials—a chunky knit blanket, a jute rug, linen curtains—to keep the space from feeling flat.
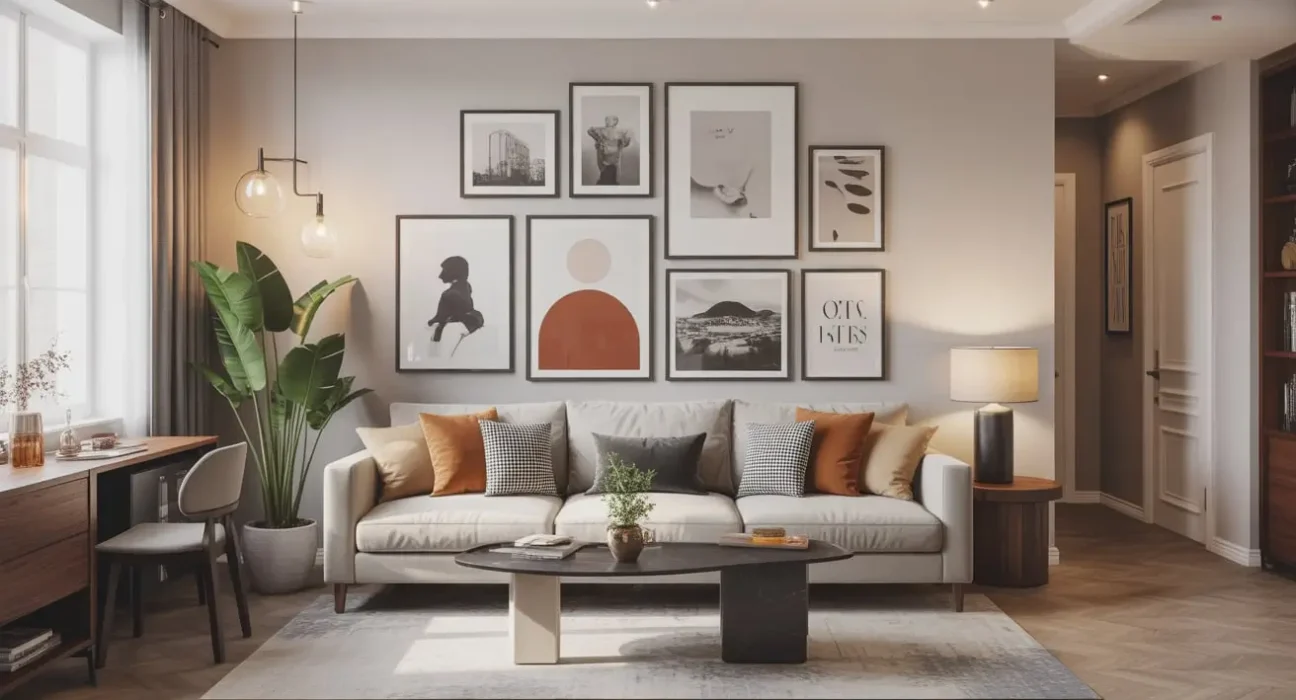
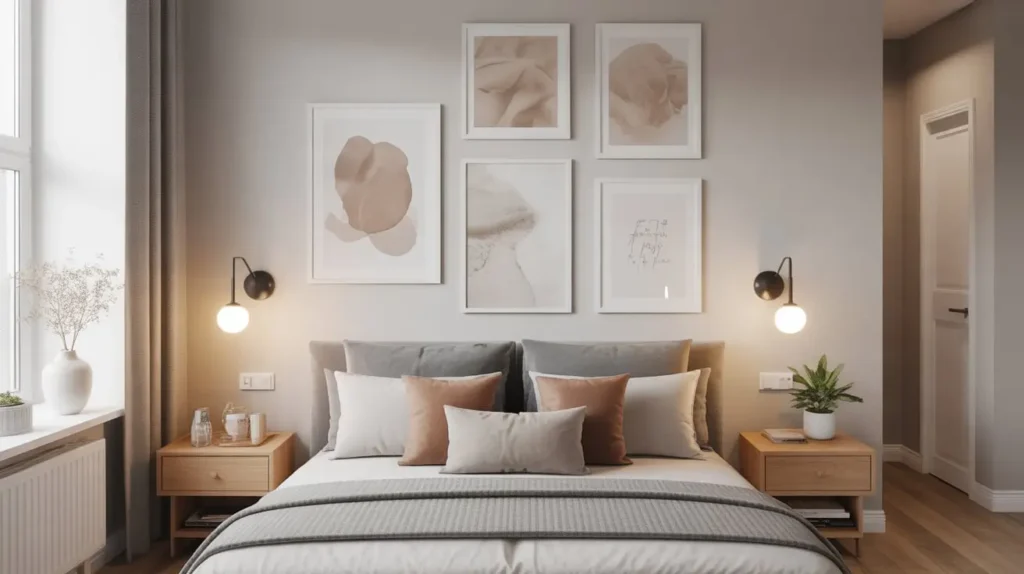
9. The Small Space Gallery Wall

This one might sound counterintuitive. Won’t a bunch of pictures on a wall make a small room feel cluttered? Not if you do it right. In fact, a well-curated gallery wall can actually make a space feel larger and more polished. It creates a single, powerful focal point, which is far more effective than scattering a bunch of small items around the room.
A gallery wall is also a fantastic way to inject your personality into a generic rental apartment. It tells a story and makes the space uniquely yours.
Why It Works So Well
Instead of having your eye jump around to different small art pieces scattered on various walls, a gallery wall consolidates all that visual interest into one spot. This creates a strong focal point and allows the other walls to remain clear, which gives the room a sense of calm and order. It’s controlled, intentional maximalism.
How to Nail the Look
- Plan Your Layout on the Floor: This is my non-negotiable step. Arrange all your frames on the floor first. Play with the layout until you find one you love. Then, take a picture of it with your phone so you can reference it as you hang.
- Create a Theme: Your gallery wall will look most cohesive if it has a common thread. This could be a color palette (like all black and white photos), a subject matter (like all travel photography), or a frame style (like all thin, gold frames).
- Use a Center Line: A great trick is to hang the frames so that their center point aligns along a single horizontal line, usually at eye level (about 57 inches from the floor). You can have frames of all different shapes and sizes, but this invisible line will make the whole arrangement feel balanced and intentional.
Read Also 15 Brilliant Small Studio Apartment Decorating Ideas to Try Today
10. The Slim Console Entryway Design
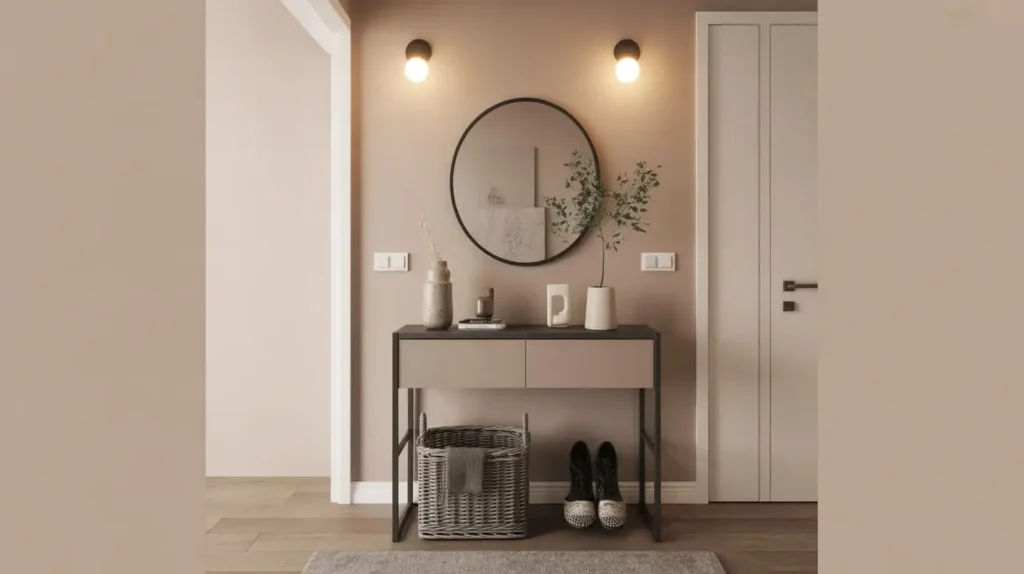
Most small apartments don’t have a formal entryway or foyer. You basically open the front door and fall directly into the living room. This can lead to a dreaded “drop zone” of keys, mail, shoes, and bags right by the door. A slim console table is the elegant solution.
It gives you that much-needed drop zone without eating into your living space. It carves out the feeling of an entryway, making your apartment feel more organized and welcoming from the moment you step inside.
Why It Works So Well
This is another example of creating zones. A console setup signals, “This is the entryway.” It contains the clutter to one specific, organized area. Using a slim or “floating” design keeps the floor clear, which is essential for maintaining a sense of openness in a high-traffic area.
How to Nail the Look
- Go Super Slim: Look for console tables that are specifically designed for small spaces—some are as narrow as 8-10 inches deep. That’s all you need for a small lamp, a bowl for your keys, and a spot to drop the mail.
- Or Float It: A simple floating shelf can also serve as an entryway console. Mount one at table height, hang a mirror above it, and you’ve got a chic, minimalist entryway that takes up zero floor space.
- Complete the Zone: Add a few key elements to make it fully functional. Hang a stylish mirror above the table (great for a last-minute check before you leave) and a few sleek wall hooks for coats or bags. A small, durable rug can also help define the space.
11. The Corner Desk Micro Office
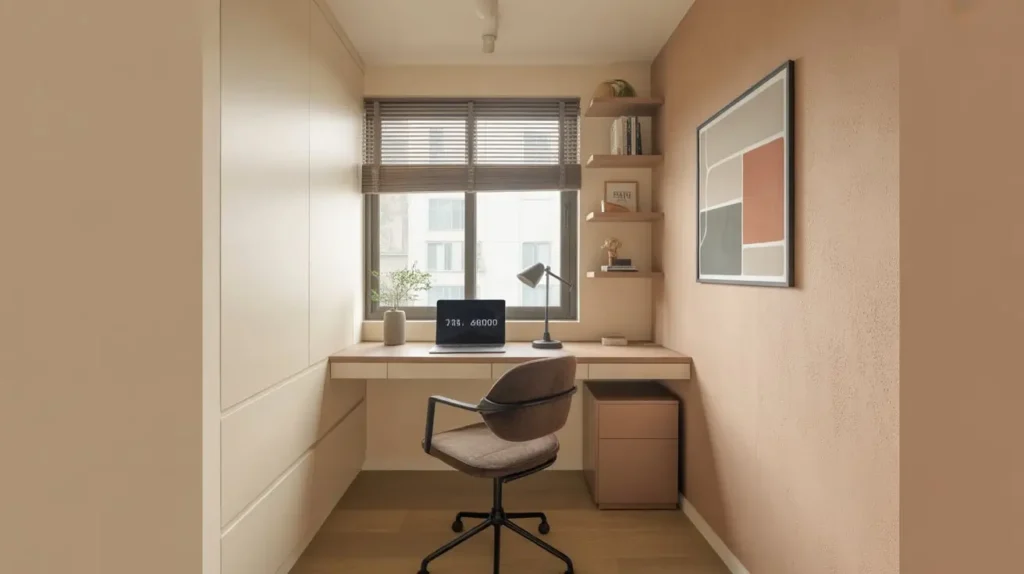
In the age of working from home, carving out a dedicated workspace is more important than ever. But where do you put a desk when you barely have room for a couch? The answer is in the corner. An unused corner is a black hole of wasted potential, and it’s the perfect spot for a compact, efficient micro office.
A corner desk setup uses an awkward space efficiently, keeping your work life contained to one area so it doesn’t take over your entire apartment. And let’s be real, working from the couch is terrible for your back. 🙂
Why It Works So Well
A corner desk is the ultimate space-saver. It fits snugly into a space that is often difficult to furnish otherwise. By facing into the corner, you also create a sense of psychological separation from the rest of the room, which can help you focus when you need to work and disconnect when you’re done.
How to Nail the Look
- Find the Right Desk: There are tons of desks designed specifically for corners. Look for one with a minimalist design and maybe a built-in shelf or two for vertical storage. A floating corner desk that mounts directly to the wall is an even sleeker option.
- Think Vertically for Storage: Use the wall space above your desk. Install a couple of floating shelves for books and supplies, or a pegboard for a customizable and flexible storage solution.
- Get a Good Chair (That Tucks Away): You need a comfortable, ergonomic chair, but you don’t want it dominating the room. Find one that can slide completely under the desk when you’re not using it. An armless design is often a good choice for this.
12. The Space-Saving Sofa Layout
The sofa is usually the largest piece of furniture in the living room, so choosing the right one is critical. A huge, overstuffed sectional might be your dream, but in a small apartment, it can swallow the entire room and make it impossible to move. Choosing a sofa with the right scale and placing it correctly is everything.
The goal is to have comfortable seating without creating a furniture fortress that blocks all walkways and visual flow. FYI, measure your space twice (or three times!) before you buy a single thing.
Why It Works So Well
A properly scaled sofa leaves room for air and light to circulate around it. Pushing a sofa up against a wall is a common instinct, but sometimes pulling it a few inches away from the wall can actually make the room feel bigger. A smart layout creates clear pathways and a sense of order.
How to Nail the Look
- Choose an “Apartment Size” Sofa: Many brands now offer apartment-sized versions of their popular sofas. These have a smaller footprint, shallower depth, and are generally more streamlined.
- Look for Legs: A sofa with visible legs feels much lighter than one with a heavy skirt that goes all the way to the floor. The space underneath allows you to see more of the floor, which creates an illusion of more space.
- Consider a Loveseat and a Chair: Instead of one massive sofa, a loveseat paired with one or two accent chairs can offer the same amount of seating but with much more flexibility in arrangement. You can move the chairs around as needed.
- The Chaise Sectional: If you really want a sectional, opt for one with a reversible chaise instead of a full corner piece. The chaise gives you that “lounge” feel without the bulk of a traditional L-shape.
13. Renter-Friendly Wall Art
You’re renting. You want to make the place feel like yours, but you live in constant fear of the landlord and your security deposit. The thought of putting a nail in the wall gives you a cold sweat. Don’t resign yourself to boring, blank walls! There are so many amazing, damage-free ways to add art and personality.
These solutions let you go bold with your decor without leaving a single trace behind when you move out. Your walls get a makeover, and your security deposit stays safe. It’s a win-win.
Why It Works So Well
Blank walls in a small space can feel sterile and prison-like. Adding large-scale art or a pattern creates a powerful focal point and injects much-needed personality. These renter-friendly options provide a high-impact look with a low-commitment application.
How to Nail the Look
- Peel-and-Stick Wallpaper: This stuff is a revelation. You can create a stunning accent wall with a bold pattern or texture, and when you’re ready to leave, it just peels right off. I used a subtle grasscloth version behind my bed, and it instantly made the whole room look more expensive.
- Command Strips Are Your Best Friend: You can hang a surprising amount of weight with modern adhesive strips. They are perfect for creating that gallery wall we talked about earlier. Just be sure to follow the weight limits on the package. (I learned this the hard way after a 3 AM crash from an overloaded frame :/ ).
- Large-Scale Tapestries: A large, lightweight fabric tapestry can cover a huge amount of wall space and add amazing color and texture. It’s easy to hang with a few small tacks or even adhesive strips.
- The Leaning Art Technique: Who says art has to be hung? A large, framed piece of art or a big mirror can look incredibly chic just leaned against a wall, either on the floor or on top of a console table or dresser.
14. The Light-Boosting Curtain Setup
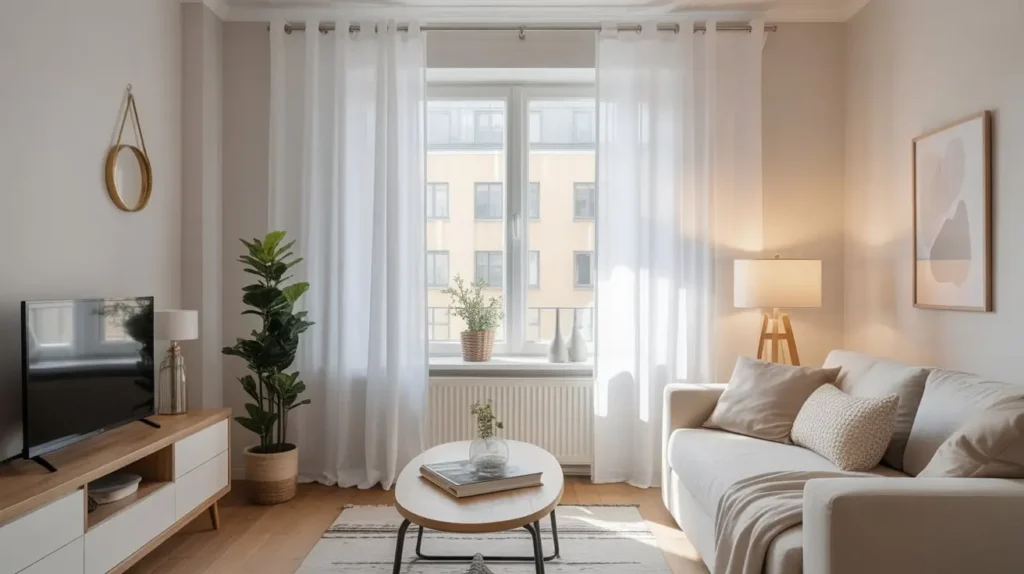
The way you hang your curtains can dramatically change the perception of a room’s size. Most people make the mistake of hanging a short rod right over the window frame and using heavy, dark curtains. This is a cardinal sin of small-space decorating. It blocks light and makes your window (and your room) feel small and cramped.
The right curtain setup can make your windows look bigger and your ceilings look higher, all while maximizing the amount of precious natural light that floods into your space.
Why It Works So Well
Hanging the curtain rod high and wide tricks your brain. A high rod draws the eye upward, creating an illusion of height. A wide rod allows you to pull the curtains completely clear of the window pane when they’re open, exposing the entire window and letting in maximum light. It makes the window itself appear larger and more grand than it actually is.
How to Nail the Look
- Hang the Rod High and Wide: This is the golden rule. Mount your curtain rod 4-6 inches above the window frame and 3-6 inches wider than the frame on each side. This simple change will have a massive impact.
- Choose a Long Curtain: Your curtains should skim the floor. Curtains that are too short (the dreaded “high-water” look) will visually chop up the wall and make the ceiling feel lower.
- Go for Sheer or Light-Colored Fabrics: Unless you need blackout curtains for sleeping, opt for light and airy fabrics like linen, cotton, or sheer voile. These will allow light to filter through even when they’re closed, keeping the room bright. Stick to light colors like white, cream, or light gray.
15. The Cozy Layered Textures Look

So you’ve painted your walls a lovely neutral color, you’ve got your minimalist furniture… but now the room feels a little… boring. A little sterile. How do you add personality and warmth without adding clutter? The answer is texture.
Layering different textures is the secret weapon of interior designers. It adds visual interest, depth, and a sense of coziness to a room without needing a lot of color or “stuff.” It’s what makes a space feel inviting and lived-in.
Why It Works So Well
Texture adds what designers call visual weight. A smooth, flat surface feels light, while a nubby, rough surface feels heavier and more substantial. By mixing different textures, you create a rich, layered look that is interesting to the eye and pleasing to the touch. It’s a sensory experience that makes a room feel complete.
How to Nail the Look
- On the Floor: Start with a good rug. A high-pile shag rug, a natural fiber jute rug, or a soft wool rug can define a space and add a huge dose of texture.
- On the Sofa and Bed: This is where you can have fun. Layer it up! Add a chunky knit throw blanket, some velvet pillows, maybe a faux fur cushion, and some simple linen pillows. Mix and match to create a cozy, touchable pile.
- On the Walls and Windows: Texture isn’t just for textiles. Think about a woven wall hanging, linen curtains, or a reclaimed wood shelf. Even plants add a natural, organic texture. The goal is to have a variety of materials throughout the room.
So, What’s Next?
There you have it. 15 ideas to take your tiny room from a source of stress to a space you genuinely love to be in. Decorating a small apartment isn’t about waving a magic wand and doubling your square footage. It’s about being smart, being intentional, and making every single choice count.
It’s about turning limitations into creative opportunities. Your small space doesn’t have to be a compromise; it can be a cozy, stylish, and perfectly functional home that reflects who you are.
Now the fun part begins. Pick one idea—just one!—and try it this weekend. Maybe it’s finally hanging those curtains high and wide, or maybe it’s mapping out that gallery wall on your living room floor. Just start. You’ll be amazed at how one smart change can transform the entire feel of your space. Go make that tiny room your own.